Welcome to the Brother P-Touch Label Maker Manual․ This guide provides essential information to help you get started, understand features, troubleshoot, and optimize your label maker’s performance․
Overview of the P-Touch Label Maker Series
The Brother P-Touch Label Maker Series offers versatile and practical solutions for labeling needs across various environments, including offices, factories, labs, and homes․ Known for their ease of use and high-quality output, these label makers support Brother TZ tapes in multiple widths (6mm, 9mm, 12mm) and colors, ensuring flexibility for different tasks․ Whether for professional or personal use, the series provides reliable performance, making it a popular choice for efficient and customizable labeling․
Importance of Reading the Manual
Reading the Brother P-Touch Label Maker Manual is crucial for understanding its features, troubleshooting common issues, and optimizing performance․ It provides step-by-step guidance for initial setup, loading tapes, and basic operations, ensuring you make the most of your label maker․ The manual also highlights safety precautions, maintenance tips, and advanced functions, helping you avoid errors and extend the device’s lifespan․ Keep it handy for quick reference to maximize efficiency and creativity in your labeling tasks․
Key Features of the Brother P-Touch Label Maker
The Brother P-Touch Label Maker offers compatibility with Brother TZ tapes, multiple tape widths and colors, and versatility for use in various environments, ensuring professional and efficient labeling solutions․
Compatibility with Brother TZ Tapes
The Brother P-Touch Label Maker is designed exclusively for use with Brother TZ tapes, ensuring consistent quality and durability․ These tapes are available in various widths (6mm, 9mm, 12mm) and vibrant colors, offering flexibility for different labeling needs․ The machine’s compatibility with TZ tapes guarantees reliable performance and prevents misuse of non-optimized cartridges․ This exclusive design ensures optimal printing results, making it easy to create professional labels for home, office, or industrial use․ Always use genuine Brother TZ tapes for best performance and longevity․
Multiple Tape Widths and Colors
The Brother P-Touch Label Maker supports multiple tape widths and colors, offering flexibility for various labeling needs․ Available in 6mm, 9mm, and 12mm widths, Brother TZ tapes come in a range of vibrant colors to suit different applications․ This variety allows users to create labels that stand out, whether for organizational purposes, decorative projects, or professional use․ The ability to choose from different widths and colors enhances customization options, making the label maker versatile for home, office, or industrial environments․
Versatility in Different Environments
The Brother P-Touch Label Maker excels in various settings, from offices to factories, labs, and homes․ Its portability and durability make it suitable for both professional and personal use․ Whether labeling files, organizing cables, or marking equipment, it adapts seamlessly to different environments․ The machine’s robust design ensures consistent performance, while its compact size allows easy transportation․ This versatility makes it an ideal tool for diverse labeling needs, delivering high-quality results in any setting․
Getting Started with Your P-Touch Label Maker
Begin by unboxing and setting up your P-Touch label maker․ Follow the manual for loading batteries and tape, then explore basic operations and intuitive controls to start creating labels effortlessly․
Unboxing and Initial Setup
Start by carefully unboxing your P-Touch label maker and inspecting its contents․ Ensure all accessories, such as the power adapter and starter tape cassette, are included․ Gently remove any protective packaging materials and place the device on a stable surface․ Before powering on, familiarize yourself with the control panel and port locations․ Refer to the manual for guidance on installing batteries or connecting the power cord․ This initial setup ensures your label maker is ready for operation and helps prevent any potential issues down the line․
Loading Batteries and Tape
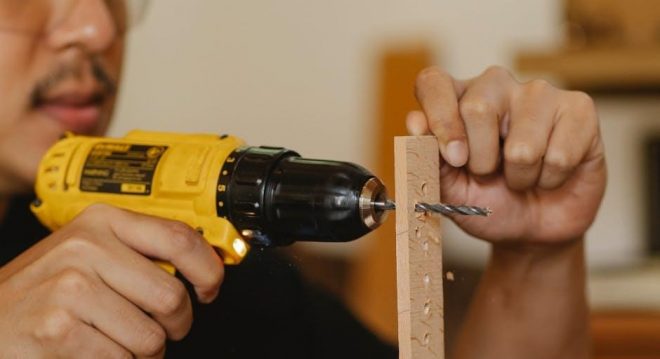
To power your P-Touch label maker, insert the recommended batteries or connect the power adapter․ For tape installation, open the tape compartment by pressing the release latch․ Insert a Brother TZ tape cassette, ensuring the tape protrudes slightly and aligns with the guide․ Close the compartment firmly․ Always use genuine Brother TZ tapes for optimal performance․ Check that the tape width matches your model’s specifications․ Properly loaded tape ensures smooth operation and prevents jams․ Refer to your manual for specific model instructions․
Basic Operations and Controls
Mastering the basic functions of your P-Touch label maker ensures efficient use․ Turn on the device using the power button․ Use the keyboard to type text, and navigate with arrow keys․ Preview your label on the LCD display before printing․ Format text using buttons like bold, italic, or underline․ Use the ‘C’ button to delete characters or clear the screen․ Press ‘Shift’ for symbols and special characters․ The ‘Cut’ button trims the label to size․ Familiarize yourself with these controls for quick, precise label creation․ Regular use will make operations second nature․
Creating and Editing Labels
Effortlessly create and edit labels by entering text, formatting it, and enhancing with frames or underlining․ Save and reprint labels for convenience, ensuring efficient customization every time․
Entering and Formatting Text
Enter text using the keypad or connect to a computer for advanced editing․ Format text by adjusting font size, bold, italic, or underline․ Use frames to enhance label designs and ensure clarity․ Preview text on the LCD screen before printing․ The P-Touch label maker supports uppercase letters and special characters, offering flexibility for various labeling needs․ Utilize the Brother TZ tapes in different widths and colors for vibrant, professional-looking labels․ This feature ensures your labels stand out in any environment, from office to industrial settings․
Using Special Features Like Frames and Underlining
Enhance your labels with frames, underlining, and other formatting options․ The P-Touch label maker offers multiple frame styles to add visual appeal․ Underlining text ensures important information stands out․ Combine these features with bold or italic text for a professional look․ Use symbols or emojis to add personality to your labels․ Preview your design on the LCD screen before printing to ensure accuracy․ These features make your labels more readable and visually appealing, suitable for both personal and professional use․ Brother TZ tapes in various colors further enhance the visual impact of your designs․
Saving and Reprinting Labels
The P-Touch label maker allows you to save frequently used labels for quick reprinting․ Use the “Save” or “Memory” function in the menu to store your designs․ Labels are saved in the device’s memory, eliminating the need to re-enter text․ To reprint, select the saved label from the memory menu and print․ This feature saves time and ensures consistency․ You can store up to 15 labels, depending on complexity․ Reprinting is efficient and ideal for labels used regularly, such as address tags or inventory markers․ Use this feature to streamline your labeling process and enhance productivity․
Maintenance and Troubleshooting
Regular maintenance ensures optimal performance․ Clean the tape cutter and check alignment․ Replace batteries as needed․ Troubleshoot common issues like jammed tape or faint printing by consulting the manual․
Cleaning the Tape Cutter
Clean the tape cutter regularly to maintain performance․ Turn off the label maker and unplug it․ Use a soft, dry cloth to wipe the cutter gently․ Avoid harsh chemicals or abrasive materials․ For stubborn residue, dampen the cloth slightly with water, but ensure the cutter is dry before reuse․ Cleaning ensures smooth cuts and prevents tape jams․ Regular maintenance prolongs the life of your P-Touch label maker and keeps it functioning efficiently․
Resolving Common Issues
If your P-Touch label maker encounters issues, start by turning it off and on again․ Check for jammed tapes or debris․ Ensure the tape is properly loaded and compatible with your model․ If error messages appear, refer to the manual for specific troubleshooting steps․ Clean the tape cutter and printer head regularly․ For connectivity problems, restart your device or update the software․ Visit Brother’s support website for detailed solutions or to download updated drivers․ Proper maintenance and quick troubleshooting keep your label maker running smoothly․
Extending the Life of Your Label Maker
To extend the life of your Brother P-Touch label maker, ensure regular cleaning of the tape cutter and printer head․ Use only Brother TZ tapes to prevent damage․ Store the device in a cool, dry place and avoid exposure to direct sunlight․ Update firmware when available and replace batteries or charge properly․ Avoid overloading the machine and handle it gently․ Proper care and maintenance will ensure optimal performance and longevity of your label maker․
Customization and Advanced Features
Explore advanced customization options, including changing fonts, styles, and margins․ Use frames and underlining for decorative labels․ Flexible ID tapes offer durability for specialized labeling needs․
Changing Fonts and Styles
The Brother P-Touch label maker allows you to customize your labels with various font styles and sizes․ You can choose from bold, italic, or underline options to enhance readability․ For advanced users, some models support downloading custom fonts via the P-Touch Editor software․ Adjusting font sizes ensures your text fits perfectly on the tape․ Experiment with different styles to match your labeling needs, whether for professional or creative projects․ This feature adds versatility to your labeling tasks, making your labels stand out․ Use the control panel or the Brother software to explore these options easily․
Adjusting Margins for Efficiency
Adjusting margins on your Brother P-Touch label maker helps optimize label length and reduce tape waste․ Use the control panel or P-Touch Editor software to set custom margins․ Narrower margins save tape, while wider margins improve readability․ This feature is ideal for creating concise labels in offices, homes, or workshops․ By fine-tuning margins, you can ensure your labels are neat and professional while minimizing material usage․ This customization enhances efficiency and suits various labeling needs, making your tasks quicker and more cost-effective․
Using Flexible ID Tapes for Specialized Labeling
Flexible ID tapes are designed for durable, curved, or irregular surfaces, making them ideal for cable and wire labeling․ These tapes are perfect for industrial or heavy-duty applications․ When using flexible ID tapes, ensure your Brother P-Touch label maker is compatible, as some models require specific adapters․ Refer to your manual for guidance on loading and printing with these specialized tapes․ They come in various colors and widths, offering versatility for professional and efficient labeling solutions․ Regularly clean the tape cutter to maintain performance and extend the life of your label maker․
Accessing and Utilizing the Manual
Access the Brother P-Touch manual via their official website by searching your model or product category for detailed guides, troubleshooting, and optimal usage tips․
Downloading the Latest Manual
Visit the official Brother website to download the latest P-Touch label maker manual․ Search by model name or product category for easy access․ The manual provides detailed instructions, troubleshooting guides, and tips to ensure optimal performance․ Regularly updating your manual ensures you have the most current features and support information․ This resource is essential for maximizing the functionality of your P-Touch label maker and resolving any issues efficiently․
Navigating the Manual for Specific Information
The Brother P-Touch manual is organized to help users quickly find specific information․ Use the table of contents or index to locate sections like troubleshooting, maintenance, or customization․ Each chapter is designed to address common tasks, such as loading tape, formatting text, or resolving errors․ For advanced users, detailed guides on font changes and margin adjustments are included․ This structured approach ensures easy access to the information you need to optimize your label maker’s performance․