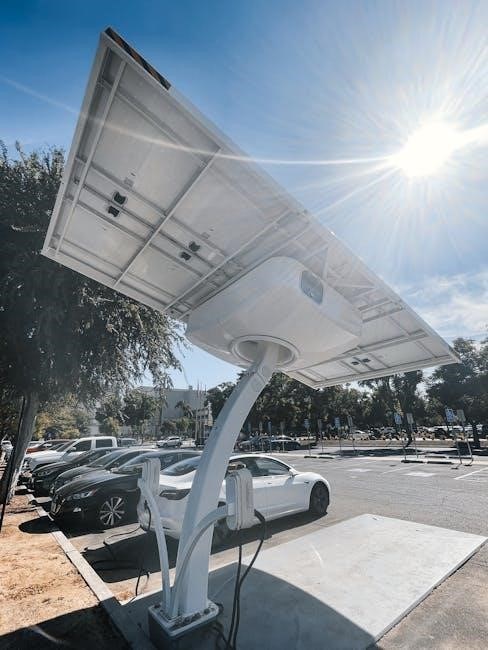
Essential for battery-based systems‚ solar charge controllers—or regulators—manage power flow․ MPPT controllers maximize energy harvest‚ differing significantly from PWM types in efficiency and application․
What is an MPPT Charge Controller?
MPPT (Maximum Power Point Tracking) charge controllers are sophisticated devices that optimize the energy harvest from solar panels․ Unlike traditional PWM (Pulse Width Modulation) controllers‚ MPPT controllers don’t simply connect the panels directly to the battery․ Instead‚ they actively track the maximum power point – the voltage and current combination where the solar panel produces the most power – and convert it to the appropriate voltage for charging the battery․
This conversion process is akin to a car’s transmission‚ adjusting the ratio between voltage and current to deliver maximum power․ They efficiently transfer power‚ especially when panel voltage significantly exceeds battery voltage‚ resulting in substantial gains in energy production‚ particularly in colder climates or during partial shading․
Why Use an MPPT Controller?
Employing an MPPT controller unlocks significantly higher efficiency compared to PWM controllers‚ especially in systems where the solar panel voltage is much higher than the battery voltage․ Traditional controllers simply deliver PV current directly‚ missing potential gains․ MPPT controllers maximize power transfer‚ boosting energy harvest by up to 30% or even more‚ depending on conditions․
This is crucial for off-grid systems where maximizing energy production is paramount․ They excel in colder weather and partial shading‚ extracting more power when conditions aren’t ideal․ Investing in an MPPT controller translates to faster battery charging‚ reduced reliance on alternative power sources‚ and a quicker return on investment․
Understanding MPPT Technology
MPPT functions like a car’s transmission‚ varying voltage and current to deliver maximum power to the battery‚ optimizing energy transfer efficiently․
Maximum Power Point Tracking Explained
Maximum Power Point Tracking (MPPT) is a sophisticated algorithm that constantly adjusts the operating point of the solar panel to extract the most power available under current conditions․ Unlike traditional controllers‚ MPPT doesn’t simply connect the panel directly to the battery․ Instead‚ it intelligently varies the voltage and current to find the “maximum power point” – the sweet spot where the panel delivers peak performance․
This is crucial because the maximum power point changes with factors like sunlight intensity‚ panel temperature‚ and shading․ The MPPT controller continuously scans for this optimal point‚ ensuring the battery receives the highest possible charge rate․ Think of it as a dynamic optimization process‚ constantly adapting to maximize energy harvest throughout the day‚ leading to significantly improved efficiency compared to PWM controllers․
Voltage and Current Conversion
MPPT controllers excel at converting excess voltage from solar panels into usable current for battery charging․ Solar panels often produce higher voltages than batteries require․ Instead of wasting this extra voltage‚ the MPPT controller efficiently steps it down‚ simultaneously increasing the current․ This conversion process is analogous to a car’s transmission‚ adjusting the ratio between speed and torque․
A higher charge voltage necessitates less current for the same power delivery․ As the battery nears full charge‚ the controller adjusts to reduce power input․ This intelligent conversion maximizes energy transfer‚ ensuring optimal battery health and minimizing energy loss․ The controller dynamically manages this process‚ adapting to changing conditions and battery needs․
Efficiency Gains with MPPT
Compared to traditional PWM controllers‚ MPPT technology delivers substantial efficiency improvements‚ often exceeding 30% more power harvested from solar panels; Traditional controllers simply connect the panels directly to the battery‚ ignoring the potential for voltage conversion․ MPPT controllers‚ however‚ actively seek the maximum power point – the optimal voltage and current combination – to maximize energy transfer․
This is particularly beneficial in colder climates or during periods of low sunlight‚ where panel voltage can be significantly higher than battery voltage․ By efficiently converting this excess voltage‚ MPPT controllers ensure that more power reaches the battery‚ leading to faster charging times and increased system performance․ This translates to a greater return on investment and a more reliable off-grid power solution․
MPPT Controller Features & Specifications
Key specifications include voltage range‚ battery compatibility‚ current ratings for charge and load‚ and display/monitoring options—crucial for system design and performance․
Voltage Range (PV Input)
The PV input voltage range is a critical specification‚ defining the limits within which the MPPT controller can effectively operate with your solar panels․ Controllers have a defined minimum voltage (Vmin) required to start power conversion‚ and a maximum voltage (Vmax) that must not be exceeded to avoid damage․
Understanding your solar panel’s voltage output under various temperature conditions is essential․ Cold temperatures increase voltage‚ while heat reduces it․ Ensure the Vmax of your panels‚ even in the coldest expected conditions‚ remains within the controller’s limit․ Similarly‚ confirm the Vmin is achievable during periods of low sunlight or cloudy weather․
Exceeding these limits can lead to inefficient operation or permanent damage to the controller‚ so careful matching of panel characteristics to the controller’s specifications is paramount for optimal performance and longevity․
Battery Voltage Compatibility
MPPT charge controllers are designed to work with various battery types and voltages․ Common compatibility includes 12V‚ 24V‚ and 48V systems‚ with some models supporting higher voltages․ It’s crucial to select a controller that precisely matches your battery bank’s nominal voltage․
Furthermore‚ ensure the controller supports your specific battery chemistry – Lead-acid (flooded‚ AGM‚ gel)‚ Lithium-ion (LiFePO4‚ NMC)‚ and others require different charging profiles․ Incorrect settings can significantly reduce battery lifespan or even cause damage․
Many controllers offer adjustable charging parameters tailored to different battery types‚ allowing for optimized charging performance and maximizing battery health․ Always consult the controller’s manual and battery manufacturer’s recommendations for proper configuration․
Current Rating (Charge & Load)
Understanding the current ratings is vital for proper system design․ The ‘charge current’ specifies the maximum current the controller can deliver to the battery bank‚ directly impacting charging speed․ Ensure this rating exceeds your battery bank’s recommended charge current for optimal performance․
The ‘load current’ rating defines the maximum current the controller can supply to connected DC loads․ If you plan to power devices directly from the controller‚ verify the total load current doesn’t exceed this limit․ Exceeding these ratings can trigger overcurrent protection and system shutdown․
Always factor in safety margins when selecting a controller‚ accounting for potential future expansion or increased load demands․ Refer to the controller’s manual for detailed specifications and derating factors․
Display and Monitoring Options
Modern MPPT controllers offer diverse display and monitoring capabilities‚ ranging from basic LED indicators to sophisticated LCD screens․ These displays typically show crucial parameters like battery voltage‚ charge current‚ load current‚ and overall power production․ More advanced models feature historical data logging and graphical representations․
Many controllers now include communication ports (USB‚ RS485‚ or Bluetooth) enabling remote monitoring via computers or mobile devices․ Dedicated software or apps allow users to track system performance‚ adjust settings‚ and receive alerts․ This remote access is invaluable for off-grid installations or systems requiring constant oversight․
Consult the controller’s manual to fully understand the available monitoring features and how to interpret the displayed data effectively․
Installation and Wiring
Proper installation is crucial for optimal performance and safety․ Carefully follow the manual’s wiring diagrams‚ considering series versus parallel panel configurations and appropriate wire sizing․
Panel Wiring Configurations (Series vs․ Parallel)
Understanding series and parallel wiring is fundamental for maximizing your MPPT controller’s efficiency․ Series connections increase voltage while maintaining current‚ ideal when the controller requires a higher input voltage than a single panel provides․ However‚ shading on one panel significantly impacts the entire series string’s output․

Parallel connections‚ conversely‚ increase current while maintaining voltage․ This configuration is more resilient to shading‚ as each panel contributes independently․ Your MPPT controller’s specifications dictate the optimal configuration; exceeding voltage or current limits can damage the controller․ Always consult the manual to determine the correct wiring method for your specific panels and controller model‚ ensuring safe and efficient operation․
Wire Sizing for Optimal Performance
Proper wire sizing is crucial to minimize voltage drop and maximize power transfer from your solar panels to the MPPT controller․ Undersized wires create resistance‚ leading to energy loss as heat and reduced charging efficiency․ The manual will specify the appropriate wire gauge (AWG) based on the current and distance involved․
Generally‚ longer distances require thicker wires․ Consider both the total current and the length of the wire run when calculating the necessary gauge․ Online wire size calculators can assist with this process․ Using a larger wire gauge than required is acceptable‚ but using a smaller gauge is not and can pose a fire hazard․ Always prioritize safety and efficiency by adhering to the manufacturer’s recommendations․
Distance Considerations & Voltage Drop
As distance increases between solar panels and the MPPT charge controller‚ voltage drop becomes a significant concern․ Voltage drop reduces the overall system efficiency‚ meaning less power reaches your batteries․ The manual will detail acceptable voltage drop percentages‚ typically around 3-5%․
To mitigate voltage drop‚ use thicker gauge wires for longer runs‚ as previously mentioned․ Increasing the system voltage (e․g․‚ using a 48V system instead of 12V) also reduces voltage drop for a given power level․ Regularly check the voltage at the controller terminals to ensure it remains within acceptable limits․ Proper planning and wire selection are vital for optimal performance․
Grounding and Safety Precautions
Your MPPT charge controller manual will emphasize the critical importance of proper grounding for safety and system protection․ Grounding helps prevent electrical shock and protects against lightning strikes or surges․ Always follow local electrical codes and regulations when grounding your system․
Disconnect all power sources before working on the controller or wiring․ Never work with electrical components in wet conditions․ Use appropriately rated fuses and circuit breakers to protect against overcurrents․ Regularly inspect wiring for damage or corrosion․ The manual provides specific grounding instructions and diagrams; adhere to them strictly for a safe and reliable solar power setup․
Troubleshooting Common Issues
Refer to your MPPT controller’s manual for diagnosing problems like low output‚ charging failures‚ or error codes; systematic checks are crucial for resolution․
Low Power Output

Investigate several factors when experiencing reduced power․ First‚ confirm adequate sunlight reaches the panels‚ checking for shading or dirt accumulation․ Verify all wiring connections are secure and corrosion-free‚ as loose connections impede current flow․ Consult your MPPT controller manual to ensure correct settings for your battery type and panel configuration․
Additionally‚ examine the panel’s voltage and current output using a multimeter‚ comparing readings to the panel’s specifications․ A mismatch between panel and controller voltage ranges can limit performance․ If using long cable runs‚ voltage drop could be a significant contributor; refer to wire sizing guidelines in the manual․ Finally‚ check for any error codes displayed on the controller‚ as these often pinpoint the source of the issue‚ guiding you towards a targeted solution․
Battery Not Charging
If your battery isn’t charging‚ begin by verifying the battery voltage – it must be within the MPPT controller’s acceptable range․ Check the controller’s display for error codes; the manual provides detailed explanations for each․ Ensure the battery connections are clean‚ tight‚ and properly polarized (positive to positive‚ negative to negative)․
Confirm the charge settings within the controller align with your battery type (e․g․‚ lead-acid‚ lithium)․ Incorrect settings can prevent charging․ Inspect the fuse protecting the battery circuit; a blown fuse indicates a potential short circuit․ Finally‚ temporarily disconnect the load to isolate whether the charging issue stems from excessive demand․ Refer to the manual for troubleshooting steps specific to your controller model․
Error Codes and Their Meanings
MPPT charge controllers utilize error codes to diagnose issues‚ detailed in your controller’s manual․ Common codes include “PV Overvoltage‚” indicating excessive solar panel voltage‚ potentially requiring panel rewiring or voltage reduction․ “Battery Overvoltage” signals a problem with battery charging or settings‚ demanding immediate attention to prevent damage․
“Low Battery Voltage” suggests insufficient solar input or a failing battery․ “Overload” signifies the connected load exceeds the controller’s capacity․ “Short Circuit” indicates a fault in the wiring or load․ Always consult the manual for specific code definitions and recommended corrective actions․ Ignoring error codes can lead to system failure or safety hazards․

Advanced MPPT Controller Settings
Fine-tuning settings like battery type‚ charge stages (bulk‚ absorption‚ float)‚ and temperature compensation optimizes performance and extends battery lifespan‚ as detailed in the manual․

Battery Type Selection
Accurate battery type selection is crucial for optimal charging and preventing damage․ MPPT controllers support various chemistries – Flooded Lead Acid‚ Sealed Lead Acid (AGM/Gel)‚ and Lithium-ion (LiFePO4‚ etc․)․ The manual details specific voltage parameters for each type․
Incorrect settings can lead to undercharging‚ reducing battery capacity‚ or overcharging‚ causing gassing‚ plate corrosion‚ or even thermal runaway in lithium batteries․ Most controllers offer pre-programmed profiles; however‚ custom settings are often available for specialized batteries․
Refer to your battery manufacturer’s specifications for recommended charge voltages and equalization settings․ The controller’s manual will guide you through navigating the menu to select the appropriate profile and adjust parameters if needed‚ ensuring longevity and peak performance․
Charge Stages (Bulk‚ Absorption‚ Float)
MPPT controllers utilize multi-stage charging to optimize battery health․ The Bulk stage rapidly replenishes the battery with maximum current․ Once nearing full charge‚ the controller enters Absorption‚ maintaining a constant voltage while current decreases‚ completing the charge․
Finally‚ the Float stage reduces voltage to a maintenance level‚ compensating for self-discharge and keeping the battery fully charged without overstressing it․ The manual details adjustable parameters for each stage – voltage‚ time limits‚ and tapering options;
Understanding these stages allows for fine-tuning based on battery type and usage patterns․ Proper configuration maximizes battery lifespan and ensures consistent power availability‚ as detailed within the controller’s operational guide․
Temperature Compensation
Battery performance is significantly affected by temperature․ Temperature Compensation adjusts charging voltages based on ambient temperature‚ preventing overcharging in hot conditions and undercharging when cold․ The MPPT controller’s manual explains how to connect a remote temperature sensor․
This sensor relays temperature data to the controller‚ which then modifies the absorption and float voltages accordingly․ Proper temperature compensation extends battery life and maintains optimal capacity․ The manual provides specific compensation coefficients for various battery chemistries․
Without this feature‚ batteries can suffer reduced lifespan or even damage․ Accurate temperature sensing and voltage adjustment are crucial for long-term system reliability‚ as outlined in the controller’s documentation․

RFI Considerations for Ham Radio Operators
Ham radio operators should seek MPPT controllers with low RFI emissions‚ especially on critical bands․ Proper grounding and shielded cables are essential for mitigation․
Identifying Potential Sources of Interference
Several components within an MPPT charge controller can generate Radio Frequency Interference (RFI); The switching power supply‚ responsible for voltage conversion‚ is a primary culprit‚ often radiating noise across a broad spectrum․ DC-to-DC converters‚ utilized for battery charging‚ can also contribute significantly to RFI‚ particularly at their switching frequencies and harmonics․
Furthermore‚ the controller’s internal circuitry‚ including microprocessors and control logic‚ can emit spurious signals․ Poorly shielded wiring and inadequate filtering exacerbate these issues‚ allowing RFI to escape the device․ Even the physical enclosure itself can act as a radiator if not properly grounded․ Identifying the specific source requires careful investigation‚ potentially using a spectrum analyzer to pinpoint the offending frequencies․
Mitigation Techniques
Effective RFI reduction involves a multi-faceted approach․ Employing shielded cables for all DC connections—solar panel to controller‚ and controller to battery—is crucial‚ ensuring proper grounding of the shield․ Adding ferrite chokes to these cables can further suppress high-frequency noise․
Inside the controller enclosure‚ careful component placement and the use of filtering capacitors can minimize internal interference․ A well-grounded enclosure itself acts as a Faraday cage‚ containing radiated emissions․ For persistent issues‚ consider using an external line filter on the AC input (if applicable)․ Finally‚ physically separating the controller from sensitive radio equipment can reduce interference coupling․