frigidaire stackable washer dryer repair manual

Frigidaire Stackable Washer Dryer Repair Manual: A Comprehensive Guide

Navigating Frigidaire appliance upkeep requires diligent attention, especially with stackable units. This manual provides detailed guidance, covering common issues and repair procedures,
from error code decoding to component replacement, ensuring optimal performance and longevity for your Frigidaire laundry system.

Understanding Your Frigidaire Stackable Unit

Frigidaire’s stackable washer and dryer combinations offer space-saving convenience, but their integrated design necessitates a unique understanding for effective troubleshooting and repair. These units, often featuring ventless dryer technology, demand specific knowledge regarding their operation and potential failure points. Unlike traditional standalone appliances, stackable units share certain components and rely on a synchronized control system.

Recognizing the interplay between the washer and dryer is crucial. Issues in one unit can sometimes manifest as problems in the other. For example, a blocked drain line in the washer could potentially trigger an error code affecting the dryer’s operation. Furthermore, Frigidaire has a long history of innovation, continually introducing new features like Air Fry in their Gallery Range, and these advancements are reflected in their laundry appliances. Understanding the specific model year and features of your unit, as indicated by the model number, is paramount for accessing the correct repair information and parts.

Model Number Identification & Location

Locating your Frigidaire stackable washer and dryer’s model number is the first step towards successful repair. This unique identifier is essential for accessing the correct repair manuals, schematics, and replacement parts. The model number typically consists of a series of letters and numbers, providing specific details about the unit’s features and manufacturing date.

On Frigidaire stackable units, the model number is usually found in one of several locations: inside the washer door jamb, on the dryer’s rear panel, or on a sticker affixed to the unit’s side. Carefully inspect these areas, often requiring you to gently pull the appliance away from the wall. Knowing the model number allows you to pinpoint specific issues reported by other owners, like the dishwasher drain problems discussed online, and ensures compatibility when ordering parts. Remember, Frigidaire’s legacy of innovation means variations exist, so precise identification is key.

Accessing Repair Manuals & Schematics

Obtaining the correct repair manual and schematics is crucial for effectively diagnosing and resolving issues with your Frigidaire stackable washer and dryer. While a physical manual may have been included with your appliance, these are often misplaced or lack detailed troubleshooting information. Fortunately, several online resources offer digital copies.

Frigidaire’s official website is a primary source, though navigation can sometimes be challenging. Numerous third-party websites specialize in appliance repair documentation, often providing downloadable PDFs for a small fee. Searching online forums and communities, like those discussing Samsung dishwasher issues, can also yield valuable links and shared resources. Schematics, detailing the appliance’s internal wiring and component layout, are particularly helpful for complex repairs. Remember to always verify the manual’s compatibility with your specific model number to ensure accuracy and avoid incorrect procedures.

Common Frigidaire Washer Dryer Issues

Frigidaire stackable units, while reliable, can experience a range of common problems requiring attention. Washer issues frequently include failure to start, inadequate draining, and water leaks – potentially stemming from door seals, as seen with refrigerator door leaks reported online. Dryer problems often manifest as a lack of heating, failure to tumble, or excessive noise during operation. Mid-cycle shutdowns are also reported, potentially linked to overheating or control board malfunctions.

Error codes, like those encountered with Samsung dishwashers, provide valuable diagnostic clues. These issues can often be traced to worn drive belts, faulty water inlet valves, or malfunctioning heating elements. Regular maintenance, such as cleaning the lint filter, is vital to prevent dryer-related problems. Addressing these common issues promptly can prevent more significant and costly repairs down the line, extending the lifespan of your appliance.

Washer Problems

Frigidaire washer malfunctions can disrupt laundry routines, ranging from simple inconveniences to complete breakdowns. A common issue is the washer failing to start, often due to a faulty lid switch or control board problem. Inadequate draining is another frequent complaint, potentially caused by a clogged drain pump or kinked drain hose. Water leaks, similar to those reported with Frigidaire refrigerators, can occur around the door seal or from internal hoses.

Furthermore, a washer drum that won’t spin suggests issues with the drive belt, motor coupling, or control board. Diagnosing these problems requires a systematic approach, utilizing error codes as a starting point – mirroring troubleshooting steps for Samsung dishwashers. Addressing these issues promptly prevents further damage and ensures efficient operation, maintaining the longevity of your Frigidaire washing machine.

Washer Not Starting

A Frigidaire washer refusing to start is a common frustration, often stemming from a few key culprits. First, verify the power supply – a tripped breaker or loose connection is a simple fix. Next, inspect the lid switch; if faulty, the washer won’t initiate a cycle, mirroring safety features in other appliances like dishwashers. The control board itself could be the issue, potentially requiring replacement, similar to diagnosing a Samsung dishwasher’s control panel.

Additionally, a jammed motor or a defective motor start capacitor can prevent operation. Checking for error codes, as with other Frigidaire appliances, provides valuable diagnostic clues. Before attempting repairs, always disconnect power – safety is paramount. A methodical approach, combined with a repair manual, will help pinpoint the cause and restore functionality.

Washer Not Draining

Encountering a Frigidaire washer that won’t drain is a frequent issue, often linked to a clogged drain pump or a kinked drain hose. Begin by inspecting the drain hose for obstructions – lint, small items, or bends can restrict water flow. Next, access and examine the drain pump itself; debris frequently accumulates here, halting its operation. Similar to troubleshooting a Samsung dishwasher’s draining issues, a blocked pump is a prime suspect.

If the pump appears clear, test it for continuity with a multimeter to confirm it’s receiving power and functioning correctly. A faulty pump requires replacement. Also, check for error codes displayed on the control panel, as these can pinpoint the exact problem. Remember to disconnect power before any inspection or repair work, prioritizing safety throughout the process.

Washer Leaking Water

A leaking Frigidaire washer demands immediate attention to prevent water damage. Common leak sources include loose hose connections, a damaged door seal, or an overfilled tub. Begin by inspecting all hoses – inlet and drain – ensuring they are securely fastened and free from cracks. Similar to a freezer door leak reported in online forums, the door seal is a frequent culprit; examine it for tears, gaps, or deterioration.

If the seal is compromised, replacement is necessary. An overfilled tub can result from a faulty water inlet valve or a malfunctioning water level sensor. Check these components for proper operation. Disconnect power before any inspection. Remember, addressing leaks promptly minimizes potential damage and maintains the appliance’s efficiency, much like resolving a faulty dispenser issue.

Washer Drum Not Spinning

A Frigidaire washer drum failing to spin can stem from several issues, ranging from a simple obstruction to a more complex motor problem. First, ensure the load isn’t unbalanced or overloaded, as this triggers safety mechanisms preventing spin. Next, inspect the drive belt – a common failure point – for breakage or looseness. A snapped belt necessitates replacement, while a loose one may require adjustment or tensioning.

If the belt is intact, the motor or motor control board could be at fault. Testing the motor’s continuity with a multimeter can reveal if it’s burned out. Like diagnosing a dishwasher’s blinking light, careful troubleshooting is key. Always disconnect power before inspecting internal components. Remember, a non-spinning drum often indicates a mechanical or electrical issue requiring professional attention if initial checks prove inconclusive.

Dryer Problems

Frigidaire dryer issues can disrupt laundry routines, often stemming from heating, tumbling, or operational malfunctions. Common complaints include the dryer not heating, failing to tumble clothes effectively, producing excessive noise during operation, or unexpectedly shutting off mid-cycle. Addressing these problems promptly prevents further damage and ensures efficient drying.

Troubleshooting begins with simple checks: a full lint filter drastically reduces airflow and heating efficiency. A clogged vent poses a fire hazard and hinders performance. Beyond these, electrical components like the heating element and thermal fuse are frequent culprits. Mechanical issues, such as a worn drum support or a faulty motor, can cause noise and tumbling problems. Like diagnosing a fridge leak, methodical investigation is crucial for accurate repair.

Dryer Not Heating

A Frigidaire dryer failing to heat is a common issue, often stemming from a faulty heating element, a malfunctioning thermal fuse, or a problematic thermostat. Begin by verifying power supply and ensuring the unit isn’t in a ‘no heat’ cycle, sometimes activated by specific settings. A blown thermal fuse, designed to prevent overheating, is a frequent cause and requires replacement.

The heating element itself can burn out over time, necessitating a continuity test with a multimeter to confirm its functionality. A defective thermostat prevents the element from receiving power. Always disconnect power before inspecting these components. Remember, similar to diagnosing a refrigerator’s cooling issues, a systematic approach is key. Prioritize safety and consult schematics for accurate component location and testing procedures.

Dryer Not Tumbling

If your Frigidaire dryer isn’t tumbling, the issue often lies with the drive belt, motor, or associated components. First, disconnect power! Inspect the drive belt for breaks or excessive wear – a snapped belt is a common culprit. If the belt is intact, check the motor for obstructions or signs of failure; a humming sound without rotation suggests a motor issue.

Additionally, examine the idler pulley and tensioner assembly, as these components maintain proper belt tension. A worn or seized idler pulley can prevent tumbling. Verify the drum rollers are spinning freely; resistance indicates a need for replacement. Like troubleshooting a dishwasher’s draining problems, a methodical check of these parts is crucial. Always refer to the unit’s schematic for correct part identification and placement during reassembly.

Dryer Making Excessive Noise

Unusual noises from your Frigidaire dryer often signal mechanical issues requiring attention. A squealing sound frequently indicates a worn drive belt or idler pulley – these components experience friction during operation. Grinding noises could stem from worn drum rollers or a failing motor bearing. Before investigating, disconnect the dryer from the power source for safety.

Inspect the drum rollers by manually rotating the drum; any resistance or rough patches suggest replacement. Check the blower wheel for obstructions like lint or small objects, as these can cause rattling. A humming noise might point to a failing motor. Similar to diagnosing a dishwasher issue, pinpointing the source requires careful listening and component inspection. Refer to the dryer’s schematic to accurately identify parts and ensure proper repair.

Dryer Shutting Off Mid-Cycle

A Frigidaire dryer ceasing operation mid-cycle is a common frustration, often linked to overheating or electrical issues. The thermal fuse is a primary suspect; it’s designed to cut power if the dryer gets too hot, protecting against fire hazards. A faulty door switch can also trigger this, as the dryer interprets an open door even when it’s closed.

Inspect the vent system for blockages – restricted airflow causes overheating. Check the thermal fuse for continuity using a multimeter; if it’s blown, replace it. Similarly, test the door switch for proper function. Error codes, if displayed, provide valuable clues; decoding these (see troubleshooting section) narrows down the problem. Like diagnosing a Samsung dishwasher with blinking lights, methodical testing is key. Always disconnect power before any internal inspection or repair work.

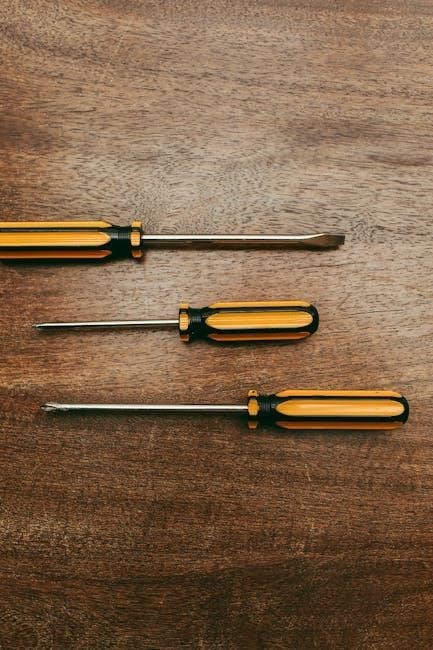
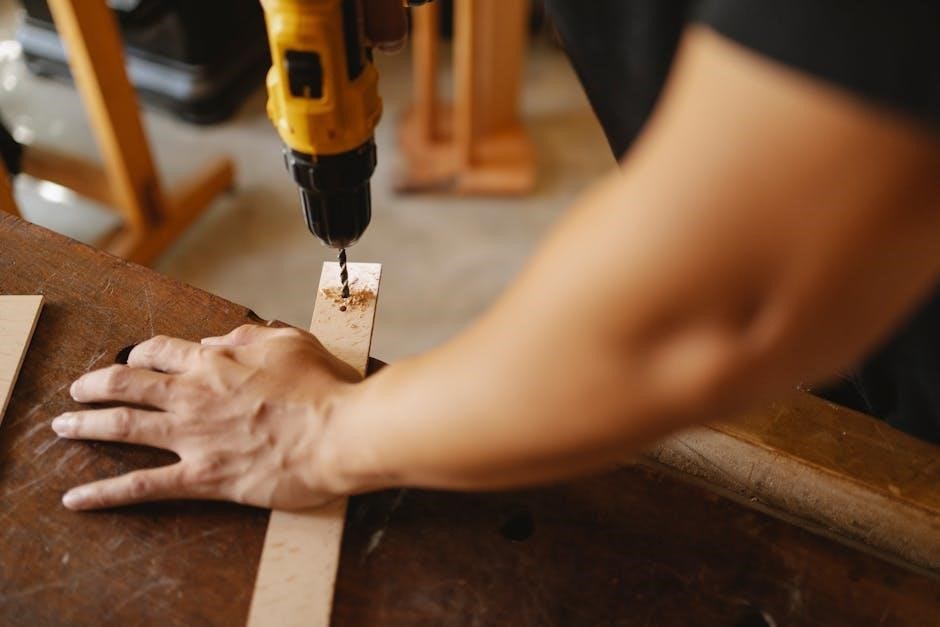
Essential Repair Tools

Successfully tackling Frigidaire stackable unit repairs demands a specific toolkit. A multimeter is crucial for testing electrical components like heating elements, thermal fuses, and door switches – essential for diagnosing issues like a dryer shutting off mid-cycle. Screwdrivers (Phillips and flathead) in various sizes are fundamental for disassembly. Pliers, including needle-nose, aid in gripping and manipulating small parts.

A socket set provides leverage for removing larger components. A nut driver set simplifies fastener removal. Don’t forget a voltage tester to confirm power is off before working on electrical connections. A work light illuminates dark areas, and a small mirror helps inspect hard-to-reach spots. Having replacement parts readily available, sourced from reliable suppliers, streamlines the repair process, similar to having the correct Everydrop filter.

Safety Precautions Before Repair

Prioritizing safety is paramount when repairing your Frigidaire stackable washer and dryer. Always disconnect the appliance from the power supply – unplug it or switch off the circuit breaker. Water and electricity are a dangerous combination; ensure the washer is completely drained before commencing any work, preventing potential electrical shock. Wear appropriate personal protective equipment (PPE), including gloves and eye protection, to shield against sharp edges and potential irritants.

Be mindful of gas lines if your dryer is gas-powered; shut off the gas supply before any repairs. Properly ventilate the area, especially when dealing with refrigerant or cleaning agents. If you’re unsure about any step, consult a qualified technician – attempting repairs beyond your skill level could lead to further damage or injury, much like misdiagnosing a faulty dispenser.

Replacing the Drive Belt

A worn drive belt commonly causes a washer drum failing to spin or a dryer not tumbling. Begin by disconnecting power. Access the belt typically involves removing the rear access panel. Carefully note the belt’s routing around the motor pulley and drum before removal – a photograph is helpful! Gently release tension on the old belt and remove it.

Install the new belt, ensuring it’s correctly seated in the grooves of the motor pulley and drum. Double-check the routing against your reference photo. Slowly rotate the drum by hand to confirm the belt tracks properly. Reattach the access panel and restore power. If the drum still doesn’t spin or tumble, re-examine the belt’s routing or consider other potential issues, like a faulty motor.

Troubleshooting Error Codes

Frigidaire stackable units utilize error codes to signal malfunctions, simplifying diagnostics. These codes, displayed on the control panel, pinpoint the source of the problem, ranging from water inlet issues to motor failures. Refer to your specific model’s manual for a comprehensive code list – variations exist! Common washer codes relate to draining, filling, or unbalanced loads.

Dryer error codes often indicate heating element problems, thermal fuse failures, or sensor malfunctions. Resetting the unit by unplugging it for several minutes can sometimes clear minor errors. However, persistent codes require further investigation. Online resources and Frigidaire’s support website offer detailed code explanations and potential solutions, guiding you towards effective repairs.

Decoding Washer Error Codes

Frigidaire washer error codes are crucial for pinpointing issues. An “F01” code often signals a water inlet valve problem, preventing filling. “F02” typically indicates a drain blockage or a faulty drain pump, causing water retention. An “F03” error suggests an unbalanced load, triggering safety shutdowns. “F04” frequently points to excessive suds, disrupting the wash cycle.

Codes like “F05” and “F06” can relate to lid switch malfunctions or motor control board issues, hindering operation. Always consult your model’s manual for precise definitions, as variations exist. Before assuming a major repair, check for simple causes like a kinked drain hose or an overloaded drum. Remember to disconnect power before any inspection or repair attempt for safety.

Decoding Dryer Error Codes

Frigidaire dryer error codes offer vital clues to malfunctions. An “E01” code commonly indicates a heating element failure, resulting in no heat. “E02” often signals a blocked vent or lint filter, causing overheating. A “E03” error typically points to a faulty temperature sensor, disrupting temperature regulation. “E04” frequently suggests a motor overload or a drive belt issue, preventing tumbling.

Codes like “E05” and “E06” can relate to a faulty door switch or control board problems, hindering operation. Always refer to your specific model’s manual for accurate interpretations, as codes vary. Before initiating repairs, ensure the lint filter is clean and the vent is unobstructed. Disconnect power before any inspection or repair for safety precautions.

Diagnosing and Replacing the Water Inlet Valve (Washer)

A faulty water inlet valve prevents water from entering the washer, causing a “no fill” situation. Diagnose by checking if the valve receives power during the fill cycle using a multimeter. If power is present but no water flows, the valve is likely defective. Before replacement, disconnect the water supply and electrical power.

To replace, locate the valve (typically at the back of the washer); Disconnect the water hoses and electrical connectors. Remove any retaining clips or screws. Install the new valve, reconnecting hoses and connectors securely. Ensure proper sealing to prevent leaks. Test the washer to confirm proper water filling. A leaking valve also necessitates immediate replacement to avoid water damage.

Diagnosing and Replacing the Heating Element (Dryer)

A malfunctioning heating element is a common cause of a dryer not heating. Diagnose by using a multimeter to test the element for continuity. If there’s no continuity, the element is burned out and needs replacement. Always disconnect the dryer from power before proceeding.

To replace the element, access it by removing the dryer’s access panels (usually rear). Disconnect the wires connected to the element terminals. Carefully remove the old element and install the new one, ensuring secure connections. Reassemble the dryer and test its functionality. A broken element poses a fire hazard, so prompt replacement is crucial. Verify proper operation before resuming normal use.

Cleaning the Lint Filter & Vent (Dryer)

Regular lint removal is paramount for dryer safety and efficiency. Clean the lint filter after every load to maintain optimal airflow. A clogged filter restricts airflow, causing the dryer to overheat and potentially start a fire. Beyond the filter, the dryer vent—the duct leading outside—requires periodic cleaning.

Inspect and clean the vent at least annually, or more frequently with heavy use. Disconnect the vent from the dryer and vacuum out any accumulated lint. A blocked vent significantly increases drying time and energy consumption. Consider using a vent cleaning kit for thorough removal. Proper ventilation prevents moisture buildup and reduces fire risk, ensuring safe and efficient operation.

Checking and Replacing the Drain Pump (Washer)

A malfunctioning drain pump prevents proper water removal, leading to standing water in the washer drum. First, verify the pump isn’t blocked by foreign objects like socks or coins. Access the pump—typically located at the base of the washer—and inspect for obstructions. If clear, test the pump’s functionality using a multimeter to check for continuity.

If the pump lacks continuity or is visibly damaged, replacement is necessary. Disconnect power and water supply before removing the old pump. Install the new pump, ensuring secure connections for both electrical and water lines. Proper installation prevents leaks and ensures efficient drainage. A functioning drain pump is crucial for complete wash cycles and prevents potential water damage.

Inspecting and Replacing Door Seals (Washer & Dryer)

Compromised door seals lead to energy loss, reduced efficiency, and potential leaks. Regularly inspect the washer and dryer door seals for cracks, tears, or signs of deterioration. A simple test involves placing a dollar bill between the door and the frame; if it slides out easily, the seal is likely weak.

Replacing a door seal typically involves removing the door (consult your model’s service manual for specific instructions). Carefully pry out the old seal and clean the groove before installing the new one. Ensure the new seal is seated correctly and evenly around the entire doorframe. A properly sealed door maintains internal temperature, prevents water leakage, and extends the lifespan of your Frigidaire appliances.

Understanding the Control Board & Its Functions

The control board serves as the brain of your Frigidaire stackable washer and dryer, orchestrating all operational functions. It receives input from sensors, interprets user selections, and sends signals to various components like the motor, valves, and heating element. Diagnosing issues often requires understanding its role.

Common control board problems include burnt components, failed relays, or software glitches. Before replacing the board, carefully inspect it for visible damage. Testing the board often requires a multimeter and a service manual to check voltage levels and continuity. Replacement involves disconnecting the wiring harness, removing the old board, and installing the new one, ensuring all connections are secure; Proper functionality is crucial for seamless operation.

Resources for Parts & Support

Finding replacement parts for your Frigidaire stackable unit is crucial for successful repairs. Authorized Frigidaire parts distributors offer genuine components, ensuring compatibility and quality. Online retailers specializing in appliance parts, like AppliancePartsPros and RepairClinic, provide extensive catalogs and often feature exploded diagrams to aid identification.

Frigidaire’s official website offers support resources, including FAQs and troubleshooting guides. Community forums, such as those on ApplianceForum.com, connect you with experienced DIYers and technicians who can offer advice. Electrolux Group’s support channels (as they own Frigidaire) can also be valuable. Remember to have your model number handy when ordering parts or seeking assistance to guarantee the correct fit and solution for your specific appliance.

coronary angiography views pdf

Coronary Angiography Views PDF: A Comprehensive Overview (Updated 12/18/2025)

Coronary angiography utilizes X-ray imaging to visualize blood flow within the heart’s arteries, often documented in PDF reports for detailed analysis and future reference.

Coronary angiography is a crucial diagnostic procedure used to assess the condition of the coronary arteries, the vessels supplying blood to the heart muscle. Often, the resulting images are compiled into a PDF document for comprehensive review and long-term storage. This minimally invasive procedure involves injecting a contrast dye into the arteries and utilizing X-ray technology to create detailed visualizations of blood flow.

The primary goal of coronary angiography is to identify any blockages or narrowing within the arteries, indicative of coronary heart disease. These images, frequently found in PDF format, allow cardiologists to pinpoint the location and severity of obstructions, guiding treatment decisions. Understanding the different views obtained during angiography – such as LAO, RAO, PA, and Left Lateral – is essential for accurate interpretation and diagnosis, often detailed within the PDF report itself.

What is Coronary Heart Disease?

Coronary heart disease (CHD), also known as coronary artery disease or ischemic heart disease, develops when the coronary arteries become narrowed or blocked, hindering the heart’s ability to receive sufficient oxygen-rich blood. This narrowing is typically caused by a buildup of plaque – fatty deposits – within the artery walls. The resulting reduction in blood flow can lead to various symptoms, including chest pain (angina), shortness of breath, and even heart attack.

Understanding CHD is vital when interpreting coronary angiography views, often documented in PDF reports. Angiography helps visualize the extent of plaque buildup and assess the severity of arterial narrowing. Early detection, facilitated by procedures like angiography and detailed in PDF imaging, is crucial for implementing preventative measures and treatment strategies to manage and potentially reverse the progression of CHD.

The Development of Coronary Heart Disease

Coronary heart disease (CHD) typically develops gradually over many years, a process often visualized and documented through coronary angiography and its associated PDF reports. Initially, plaque begins to accumulate within the coronary artery walls, causing a slow narrowing. As this plaque buildup progresses, blood flow is increasingly restricted, potentially leading to symptoms during exertion or stress.

These symptoms, like chest pain or shortness of breath, often subside with rest. However, continued plaque accumulation can lead to more severe blockages. Analyzing angiography views in PDF format allows clinicians to track this progression and assess the impact on blood flow. Understanding this development is key to interpreting the images and determining appropriate interventions, ultimately improving patient outcomes;

Risk Factors for Coronary Heart Disease

Coronary heart disease (CHD) risk is influenced by a combination of factors, some modifiable and others not. Identifying these risks is crucial when interpreting coronary angiography images, often reviewed in PDF reports. Adjustable risk factors, such as high blood pressure and unhealthy cholesterol levels, can be addressed through lifestyle changes and medical interventions.

Conversely, non-adjustable factors like age, family history, and ethnicity contribute to overall risk. The severity of CHD, as visualized in angiography views documented in PDF format, often correlates with the number and intensity of these risk factors. Understanding a patient’s risk profile aids in accurate diagnosis and personalized treatment planning, enhancing the value of the angiographic assessment.

Adjustable Risk Factors

Adjustable risk factors for coronary heart disease, frequently considered alongside coronary angiography PDF reports, offer opportunities for intervention. These include managing high blood pressure through diet and medication, controlling cholesterol levels with lifestyle changes and statins, and maintaining a healthy weight. Smoking cessation is paramount, as it significantly damages blood vessels.

Regular physical activity and a heart-healthy diet also play vital roles. Addressing these factors can positively impact the severity of plaque buildup visualized during angiography. The extent of stenosis observed in angiography views, detailed in PDF analyses, can often be improved by modifying these lifestyle elements, potentially delaying or avoiding more invasive procedures.

Non-Adjustable Risk Factors

Non-adjustable risk factors for coronary heart disease, while not modifiable, are crucial considerations when interpreting coronary angiography PDF results. These include age – risk increases with each decade – and family history of early heart disease. Genetic predisposition plays a significant role, influencing the likelihood of plaque development.

Race and ethnicity also contribute to varying levels of risk. While these factors cannot be changed, awareness allows for more proactive monitoring and earlier consideration of angiography if symptoms arise. Understanding these inherent risks helps clinicians contextualize the findings presented in angiography views documented within PDF reports, guiding personalized treatment strategies.

Understanding Coronary Arteries and Blood Flow

Coronary arteries are vital blood vessels supplying oxygen-rich blood to the heart muscle, and their visualization is central to coronary angiography, often reviewed in detailed PDF reports. These arteries branch off the aorta and encircle the heart, ensuring continuous function. Proper blood flow is essential; any narrowing due to plaque buildup – a key finding in angiography views – restricts oxygen delivery.

Understanding this anatomy is crucial when interpreting angiography images. The PDF reports showcase these arteries, revealing any obstructions. The heart’s continuous need for oxygen highlights the importance of unobstructed arteries, directly impacting the interpretation of coronary angiography results and subsequent treatment decisions.

Coronary Angiography Procedure

Coronary angiography involves inserting a catheter to visualize heart arteries using X-rays, with detailed images often compiled into a comprehensive PDF report.

Preparation for Coronary Angiography

Prior to coronary angiography, several preparations are crucial for a successful and safe procedure. Patients are typically instructed to fast for several hours beforehand, usually overnight, to ensure an empty stomach.

Medications, particularly blood thinners, may need to be adjusted or temporarily stopped, as directed by your physician, to minimize bleeding risks during the catheter insertion.

It’s essential to inform your doctor about any allergies, especially to iodine or contrast dye, as these can cause adverse reactions.

A review of your medical history, including kidney function, is vital, as the contrast dye is processed by the kidneys. Hydration is often recommended to help flush the dye from your system post-procedure.

The detailed images obtained during angiography are often compiled into a PDF report for comprehensive review.

The Angiography Process: Step-by-Step

The coronary angiography process begins with local anesthesia at the insertion site, typically the wrist or groin. A thin, flexible tube – a catheter – is then guided through a blood vessel to the heart.

Using X-ray guidance, the catheter is carefully maneuvered into the coronary arteries. Contrast dye is injected through the catheter, allowing visualization of blood flow and identifying any blockages or narrowings.

Multiple X-ray images, representing different views of the heart, are captured during dye injection.

These images are crucial for assessing the extent of coronary artery disease. The resulting images are often compiled into a detailed PDF report for thorough analysis by cardiologists.

Throughout the procedure, patients may feel a warm sensation as the dye is injected.

Common Views Obtained During Coronary Angiography

Coronary angiography employs several standard views to comprehensively assess the coronary arteries. Left Anterior Oblique (LAO) provides visualization of the left coronary artery, while Right Anterior Oblique (RAO) focuses on the right coronary artery.

The Posterior Anterior (PA) view offers a frontal perspective, useful for overall assessment. Left Lateral view provides a side profile, aiding in identifying subtle lesions.

These views, captured as digital images and often compiled into a PDF report, allow cardiologists to evaluate the location and severity of any blockages or narrowing within the coronary arteries.

Each view offers unique information, contributing to a complete understanding of the coronary circulation. The PDF format facilitates easy sharing and review of these critical diagnostic images.

Left Anterior Oblique (LAO) View

The Left Anterior Oblique (LAO) view, a cornerstone of coronary angiography, is obtained by angling the X-ray tube to the left and slightly downwards. This positioning provides an excellent visualization of the left coronary artery and its major branches – the left anterior descending (LAD) and the circumflex artery.

In a typical LAO view, the LAD appears as a relatively straight vessel extending anteriorly, while the circumflex artery curves around the left side of the heart. This view is crucial for identifying stenoses, or narrowing, within these vital arteries.

Images from the LAO view are commonly included in the coronary angiography PDF report, allowing for detailed assessment of left coronary artery health and potential blockages.

Right Anterior Oblique (RAO) View

The Right Anterior Oblique (RAO) view is a critical component of coronary angiography, achieved by rotating the X-ray tube to the right and angling it downwards. This perspective offers a superior visualization of the right coronary artery (RCA), a vessel frequently involved in coronary heart disease.

In a standard RAO image, the RCA appears prominently, allowing cardiologists to assess its origin, course, and the presence of any obstructions. This view also provides a good assessment of the proximal portions of the LAD and circumflex arteries.

Detailed RAO images are essential for inclusion in the coronary angiography PDF report, aiding in comprehensive evaluation of coronary artery anatomy and identifying potential areas of concern.

Posterior Anterior (PA) View

The Posterior Anterior (PA) view in coronary angiography is a foundational projection, obtained by positioning the X-ray tube behind the patient and directing the beam towards the front. This view provides a comprehensive overview of the entire coronary artery system, serving as a baseline for subsequent angled projections.

In a PA image, the aorta and both coronary arteries – the left main, left anterior descending (LAD), circumflex, and right coronary artery (RCA) – are generally well-visualized. It’s crucial for assessing overall coronary anatomy and identifying significant stenoses or irregularities.

High-quality PA images are fundamental for inclusion in the coronary angiography PDF report, offering a complete initial assessment of the coronary vasculature.

Left Lateral View

The Left Lateral view in coronary angiography is acquired by rotating the patient 90 degrees to the left, with the X-ray beam passing from right to left. This projection is particularly valuable for visualizing the left ventricular outflow tract and assessing the proximal segments of the left anterior descending (LAD) and circumflex arteries.

It helps to delineate the origins of these vessels and identify any subtle narrowing or obstructions not clearly visible in anterior or oblique views. The left lateral view also aids in evaluating the size and function of the left ventricle.

Detailed left lateral images are essential components of a comprehensive coronary angiography PDF report, providing a complementary perspective to other projections.

Interpreting Coronary Angiography Images (PDF Focus)

Coronary angiography PDF reports present images requiring careful interpretation to assess heart health. Radiologists focus on identifying plaque buildup, appearing as constrictions or irregularities within the artery walls. The severity of stenosis – the narrowing of the arteries – is crucial; it’s quantified by visually estimating the percentage of luminal diameter reduction.

PDF reports often include measurements and annotations highlighting significant blockages. Experienced cardiologists analyze these images, considering multiple views (LAO, RAO, PA, Lateral) for a complete picture. Accurate interpretation guides treatment decisions, from lifestyle changes to interventions like angioplasty or bypass surgery.

Identifying Plaque Buildup

Coronary angiography PDF reports visually demonstrate plaque buildup as irregularities along the artery walls. These appear as areas of narrowing or filling defects when contrast dye flows through the coronary arteries. The images reveal the location and extent of these deposits, which consist of fatty substances, cholesterol, and cellular waste.

Radiologists assess plaque characteristics – whether they are soft, calcified, or mixed – as this impacts stability and risk. PDF annotations often pinpoint specific plaque locations. Identifying plaque is the first step in determining the severity of coronary artery disease and guiding appropriate treatment strategies, potentially preventing future cardiac events.

Assessing the Severity of Stenosis

Coronary angiography PDF reports are crucial for assessing the severity of stenosis – the narrowing of coronary arteries. Radiologists visually estimate the percentage of artery blockage based on the degree of contrast dye flow restriction. This is often quantified and documented within the PDF. Significant stenosis, typically exceeding 70%, often indicates a need for intervention.

The PDF images, viewed from multiple angles, allow precise evaluation. Measurements are taken to determine the diameter of the artery both at the narrowed segment and a healthy reference point. Accurate stenosis assessment guides decisions regarding medical therapy, angioplasty with stenting, or potentially, coronary artery bypass grafting (CABG).

Alternative Imaging Techniques

Coronary CT angiography (CCTA) presents a non-invasive alternative to traditional angiography, utilizing X-rays and computer processing to visualize coronary arteries.

Coronary CT Angiography (CCTA)

Coronary CT angiography (CCTA) is a less invasive imaging technique used to assess the coronary arteries. It employs a specialized X-ray machine – a CT scanner – to acquire multiple images of the heart, creating detailed cross-sectional views. These images are then processed by a computer to visualize blood flow through the coronary arteries.

Unlike traditional coronary angiography, CCTA doesn’t require catheter insertion into a blood vessel. Instead, a contrast dye is injected intravenously to enhance the visibility of the arteries. This allows doctors to identify any narrowing or blockages caused by plaque buildup. CCTA is particularly useful for patients with a low to intermediate risk of coronary artery disease, offering a valuable alternative for diagnosis and risk stratification. The resulting images are often compiled into a PDF report for comprehensive review.

Comparison: Coronary Angiography vs. CCTA

Coronary angiography remains the “gold standard” for visualizing coronary arteries, offering high resolution and the ability to perform interventions during the procedure. However, it’s invasive, involving catheter insertion and potential risks like bleeding or artery damage. The images are typically documented in a PDF report post-procedure.

Coronary CT angiography (CCTA) is non-invasive, utilizing X-ray technology and intravenous contrast dye. While CCTA provides excellent anatomical detail, it may be less effective in patients with significant calcium buildup in the arteries. CCTA also exposes patients to radiation, though doses are continually being optimized. CCTA is often preferred for initial screening, while angiography is reserved for cases requiring intervention or when CCTA results are inconclusive. Both techniques generate PDF reports for detailed analysis.

Post-Angiography Care & Potential Outcomes

Post-angiography, patients require monitoring for complications; outcomes range from managing risk factors to needing procedures like CABG, documented in PDF reports.

Recovery After Coronary Angiography

Following coronary angiography, patients typically experience a recovery period involving close monitoring for bleeding at the catheter insertion site. Bed rest is crucial for several hours, often requiring lying flat to allow the access point to heal and prevent complications.

Hydration is strongly encouraged to help flush the contrast dye from the system, and light meals are usually resumed gradually. Some individuals may experience mild bruising or discomfort at the insertion site, manageable with over-the-counter pain relievers.

Detailed findings, including the views obtained during the procedure – LAO, RAO, PA, and Left Lateral – are compiled into a comprehensive PDF report. This report aids in understanding the extent of any blockages and guides subsequent treatment decisions. Full recovery and a return to normal activities usually occur within a few days, contingent on individual health and the procedure’s complexity.

Coronary Artery Bypass Grafting (CABG) as a Treatment Option

If coronary angiography reveals significant obstructive coronary heart disease, Coronary Artery Bypass Grafting (CABG) may be recommended. This surgical procedure creates new routes for blood flow around blocked arteries, utilizing grafts from other vessels in the body.

The decision to pursue CABG is made collaboratively by the heart care team and the patient, considering the severity and location of blockages visualized during angiography – detailed in the PDF report showcasing views like LAO and RAO.

CABG isn’t a cure, but effectively alleviates symptoms like chest pain and shortness of breath. Post-CABG recovery involves a longer period of rehabilitation, but can significantly improve quality of life and long-term heart health. The angiography PDF serves as a vital pre-operative planning tool for surgeons.

osha 30 study guide

OSHA 30 Study Guide: A Comprehensive Plan (Updated 12/12/2025)

This guide prepares you for the OSHA 30 construction exam, covering fall hazards, electrical safety, PPE, hazard communication, and crucial safety regulations for 2025/2026.

Understanding OSHA’s role is fundamental. The Occupational Safety and Health Administration (OSHA) establishes and enforces workplace safety standards, aiming to prevent injuries, illnesses, and fatalities. This OSHA 30-hour course specifically targets construction professionals, equipping them with knowledge of hazards unique to the industry.

Key areas include recognizing potential dangers – from falls and electrical risks to excavation collapses – and implementing effective control measures. The course emphasizes a proactive safety culture, focusing on hazard identification, employee training, and adherence to regulations.

Success on the final exam, and more importantly, in real-world application, relies on grasping these core principles.

II. OSHA’s Authority and Responsibilities

OSHA derives its authority from the Occupational Safety and Health Act of 1970. This legislation empowers OSHA to conduct workplace inspections, issue citations, and impose penalties for safety violations. Their primary responsibility is ensuring a safe and healthful working environment for all employees.

OSHA’s duties encompass developing and enforcing standards, providing training and education, and fostering a collaborative relationship with employers and employees. They also investigate workplace fatalities and serious injuries.

Understanding the scope of OSHA’s power is crucial for compliance and promoting a robust safety program within any construction setting.

III. Management Responsibilities

Effective management is paramount to construction site safety. Employers are legally obligated to provide a workplace free from recognized hazards, adhering to all OSHA standards. This includes implementing a comprehensive safety program, ensuring proper equipment maintenance, and providing necessary personal protective equipment (PPE).

Furthermore, management must conduct regular hazard assessments, provide thorough employee training, and promptly address any safety concerns raised. A proactive approach, prioritizing safety over production, is essential for preventing incidents and fostering a culture of safety.

III.a. Developing a Safety Program

A robust safety program is the cornerstone of workplace safety. It begins with a written safety policy outlining management’s commitment to hazard prevention. Key elements include hazard identification procedures, safe work practices for specific tasks (like excavation or fall protection), and detailed emergency action plans.

Regular program evaluations, incorporating employee feedback, are crucial for continuous improvement. Documentation of all safety procedures, training records, and incident investigations is essential for demonstrating compliance and fostering a proactive safety culture.

III.b. Employee Involvement

Actively engaging employees in safety initiatives is paramount for success. This includes providing comprehensive training on hazard recognition and safe work practices, ensuring they understand their rights and responsibilities. Encourage employees to report hazards without fear of reprisal, fostering open communication.

Safety committees, comprised of both management and employees, can effectively identify and address workplace concerns. Their participation in incident investigations and program development strengthens the safety culture and promotes a shared commitment to preventing injuries.

IV. Hazard Identification, Evaluation, and Control

Proactive hazard identification is the cornerstone of a robust safety program. This involves regularly inspecting the worksite to detect potential dangers – from fall hazards and electrical risks to unsafe equipment and improper lifting techniques. Once identified, hazards must be evaluated based on severity and probability.

Control measures, utilizing the hierarchy of controls (elimination, substitution, engineering controls, administrative controls, and PPE), should then be implemented to mitigate these risks, ensuring a safe working environment for all personnel.

V. Fall Protection

Falls are a leading cause of construction fatalities, demanding rigorous fall protection measures. Understanding fall hazard recognition – unprotected edges, openings, and deteriorating work surfaces – is crucial. OSHA mandates the use of guardrail systems, safety net systems, and personal fall arrest systems (PFAS) when working at heights.

Proper selection, inspection, and use of PFAS components (harness, lanyard, anchorage point) are paramount. Employers must provide comprehensive training on these systems, ensuring employees can safely perform work at elevated levels.

V.a. Fall Hazard Recognition

Identifying fall hazards is the first line of defense against construction-related injuries. Common hazards include unprotected edges and sides of roofs, platforms, and excavations. Openings in floors or walls, even temporary ones, pose significant risks. Deteriorated work surfaces – rotted wood, corroded metal – can unexpectedly give way.

Employees must be trained to recognize these dangers and report them immediately. Regular site inspections are vital to proactively identify and mitigate potential fall hazards before incidents occur, ensuring a safer work environment.

V.b. Guardrail Systems

Guardrail systems are a primary means of fall protection, creating a physical barrier to prevent workers from falling. OSHA standards dictate specific requirements for height, strength, and construction of guardrails. Top rails must be smooth and graspable, midrails prevent passage, and toeboards contain tools and materials.

Proper installation and maintenance are crucial; damaged or incomplete guardrails offer false security. Regular inspections ensure continued effectiveness, safeguarding employees from potentially fatal falls in construction zones.

V.c. Safety Net Systems

Safety net systems provide a passive fall arrest solution, catching workers should a fall occur. OSHA regulations detail specific requirements for net strength, size, and clearance distances below work areas. Nets must be installed and maintained by a qualified person, ensuring proper anchorage and impact absorption;

Regular inspections are vital to identify damage or deterioration. While effective, nets require sufficient clear fall distance and aren’t suitable for all situations, demanding careful evaluation of the work environment.

V.d. Personal Fall Arrest Systems (PFAS)

Personal Fall Arrest Systems (PFAS) are crucial for protecting workers at heights, consisting of an anchorage point, body harness, and connecting device. OSHA mandates proper training on PFAS use, inspection, and limitations.

Components must be regularly inspected for damage, and systems must be used according to manufacturer’s instructions. Adequate clear fall distance is essential to prevent striking lower levels. Rescue plans are also vital, ensuring prompt retrieval after a fall event to mitigate suspension trauma.

VI. Excavation and Trenching Safety

Excavation and trenching operations present significant hazards, demanding strict adherence to OSHA regulations. Proper soil classification – Type A, B, or C – is paramount for selecting appropriate protective systems.

These systems include shoring, sloping, and benching, designed to prevent cave-ins. Daily inspections are mandatory, alongside the presence of a competent person. Underground utilities must be located and marked before digging. Access and egress require safe means, like ladders or ramps, ensuring worker safety within these confined spaces.

VI.a. Soil Classification & Types

OSHA categorizes soil into Type A, B, and C, based on unconfined compressive strength and unit weight, dictating protective system requirements. Type A, the most stable, includes clay or dense granular soils. Type B, less stable, comprises loamy clay or sandy loam. Type C, the least stable, consists of granular soils like gravel, sand, or loose soil.

Accurate classification, often by a competent person, is crucial. Changes in soil conditions due to weather necessitate re-evaluation, ensuring worker safety during excavation and trenching operations.

VI.b. Protective Systems (Shoring, Sloping, Benching)

OSHA mandates protective systems to prevent cave-ins in excavations and trenches, safeguarding workers from collapse hazards. Shoring utilizes supports to prevent soil movement. Sloping involves cutting back the trench wall at a safe angle. Benching creates horizontal steps in the excavation face.

The chosen system depends on soil type, depth, and water presence. Competent person inspection is vital before daily work and after any rain or changes, ensuring the selected system adequately protects employees.

VII. Electrical Safety

Electrical hazards pose significant risks on construction sites, demanding strict adherence to OSHA regulations. Key areas include identifying underground electrical hazards before digging, and maintaining safe distances from overhead power lines – crucial for preventing electrocution;

Proper grounding, GFCI usage, and lockout/tagout procedures are essential. Workers must be trained to recognize and avoid electrical dangers, utilizing appropriate PPE. Regular equipment inspections and safe work practices are paramount for a secure work environment.

VII.a; Underground Electrical Hazards

Before any excavation begins, thorough investigation for underground electrical hazards is mandatory. This includes contacting the local one-call system (811) to locate buried utilities.

Careful hand digging or vacuum excavation is required near suspected lines. Workers must maintain safe distances, and protective measures like barricades are essential.

Properly trained personnel should expose and identify utilities before mechanical excavation. Ignoring these precautions can lead to severe injuries or fatalities from contact with live electrical cables.

VII.b. Overhead Power Line Clearance Distances

Maintaining safe distances from overhead power lines is critical during construction. OSHA mandates specific clearance distances based on voltage – the higher the voltage, the greater the required distance.

Equipment operation near power lines requires careful planning and potentially de-energizing or insulating the lines. Workers must be trained to recognize hazards and maintain awareness of line locations.

Using range limiters or warning devices can provide additional protection. Contacting the utility company for assistance is crucial when working near overhead power lines.

VIII. Hazard Communication (HazCom)

The Hazard Communication Standard (HazCom) ensures employees understand the dangers of chemicals in the workplace. This involves comprehensive training on chemical hazards, proper handling procedures, and protective measures.

Crucially, employers must maintain Safety Data Sheets (SDS) for each chemical, readily accessible to all employees.

Proper labeling of containers is also essential, clearly identifying the chemical and its associated hazards. HazCom aims to prevent illness and injury through informed awareness and safe chemical management practices.

VIII.a. SDS (Safety Data Sheets) Requirements

Safety Data Sheets (SDS) are vital documents providing comprehensive chemical hazard information. Employers must maintain SDS for all hazardous chemicals, ensuring they are easily accessible to employees during each work shift.

SDS detail chemical properties, health hazards, safe handling practices, and emergency control measures.

They are structured into a standardized 16-section format, facilitating quick information retrieval. Proper SDS management is crucial for employee safety, enabling informed decision-making and minimizing potential risks associated with chemical exposure.

VIII.b. Labeling Requirements

Hazardous chemical containers must be clearly labeled with specific information, as mandated by OSHA’s Hazard Communication Standard. Labels must include the chemical’s identity, signal words (Danger or Warning), hazard statements describing the nature of the hazard, and precautionary statements outlining safety measures.

Pictograms visually represent the hazards, enhancing understanding;

Manufacturers and importers are responsible for initial labeling, while employers ensure labels remain affixed and legible. Proper labeling is essential for communicating hazards and protecting employees from potential chemical exposures.

IX. Personal Protective Equipment (PPE)

Personal Protective Equipment (PPE) is crucial for minimizing workplace hazards when engineering and administrative controls aren’t sufficient. Employers must provide appropriate PPE and training on its proper use and maintenance.

Common PPE includes respiratory protection, head protection (helmets), eye and face protection, hearing protection, and protective clothing.

Selection depends on specific hazards. Proper fit and consistent use are vital for effectiveness. Employers are responsible for ensuring PPE doesn’t create new hazards and is regularly inspected.

IX.a. Respiratory Protection

Respiratory protection is essential when hazardous airborne contaminants exceed permissible exposure limits. OSHA mandates a comprehensive respiratory protection program, including medical evaluations, fit testing, and proper training.

This program ensures respirators effectively protect employees. Types include air-purifying respirators (APRs) and supplied-air respirators (SARs), chosen based on the hazard.

Proper respirator selection, fit, and maintenance are critical. Employers must establish procedures for cleaning, storing, and inspecting respirators regularly to guarantee their continued effectiveness.

IX.b. Head Protection

Head protection, primarily hard hats, is crucial in construction to safeguard against impacts, penetrations, and electrical hazards. OSHA requires employers to provide appropriate head protection when hazards exist.

Hard hats must meet ANSI standards and be worn correctly throughout the worksite. Regular inspection for damage – cracks, dents, or deterioration – is vital.

Employees must receive training on proper usage, limitations, and maintenance of head protection. Suspension systems and shell materials offer varying levels of protection, tailored to specific job demands.

X. Machine Guarding

Machine guarding is essential to protect employees from hazards associated with moving parts. OSHA standards mandate safeguarding of points of operation, pinch points, rotating parts, and flying debris.

Effective guards prevent contact, create a barrier, or utilize safety devices like light curtains and emergency stops. Regular inspections and maintenance of guards are critical.

Training must cover safe operating procedures, hazard awareness, and proper use of guarding systems. Employers are responsible for ensuring machines are safe before use, preventing serious injuries.

XI. Crane Safety

Crane safety demands strict adherence to OSHA regulations to prevent catastrophic failures. Understanding load chart ratings is paramount; exceeding these limits compromises stability.

Qualified operators, thorough inspections, and proper rigging techniques are non-negotiable. Factors like ground conditions, boom angles, and load weight must be carefully calculated.

Regular maintenance, including cable inspections and brake testing, is crucial. Clear communication between the operator and signal person is vital. Employers must ensure comprehensive training and safe work practices.

XI.a. Load Chart Ratings

Load chart ratings are essential for safe crane operation, dictating the maximum weight a crane can lift at specific boom lengths and angles. These charts account for crane stability and structural capacity.

Operators must understand how to interpret these charts, considering factors like radius, boom configuration, and operating conditions. Exceeding load limits can lead to crane collapse.

Properly utilizing load charts prevents accidents and ensures worker safety. Regular training and verification of chart comprehension are vital employer responsibilities.

XII. Incident Investigation

Thorough incident investigations are crucial for preventing future workplace injuries and illnesses. OSHA requires employers to report specific incidents and conduct investigations to determine root causes, not just immediate failures.

Investigations should involve a team, including employee representatives, and focus on identifying contributing factors – equipment, procedures, or training deficiencies.

Corrective actions must be implemented and documented to address identified hazards. Effective investigations promote a proactive safety culture and demonstrate a commitment to worker well-being.

XIII. OSHA Recordkeeping

Accurate OSHA recordkeeping is a legal requirement for most employers, enabling tracking of workplace injuries and illnesses. Employers must complete Form 300, 300A, and 301 to document incidents, providing valuable data for hazard analysis and prevention.

Proper classification of incidents is vital, and employers must notify OSHA of severe injuries or fatalities within specified timeframes.

Maintaining these records demonstrates a commitment to safety and allows for informed decision-making to improve workplace conditions and reduce risks.

XIV. Steel Erection Safety

Steel erection presents significant fall hazards, demanding strict adherence to OSHA regulations. Comprehensive planning, qualified personnel, and proper fall protection are paramount.

This includes utilizing guardrails, safety nets, and personal fall arrest systems (PFAS) correctly.

Pre-erection surveys, connection inspections, and stable footing are crucial for preventing collapses. Employers must ensure workers are trained in safe steel erection practices, including recognizing and mitigating potential dangers during all phases of the process.

XV. Safe Lifting Techniques

Proper lifting techniques are essential to prevent musculoskeletal disorders (MSDs) on construction sites. Workers should be trained to assess load weight, maintain a neutral spine, and use their legs, not their back, when lifting.

Team lifting should be employed for heavy or awkward loads. Employers must provide appropriate mechanical aids, like forklifts or hoists, to reduce manual lifting demands.

Regular training and reinforcement of safe lifting practices are vital for minimizing injuries and promoting a safe work environment.

XVI. Ladders and Scaffolds

Ladders and scaffolds are frequently used, requiring strict adherence to OSHA standards for worker safety. Ladders must be inspected before each use, maintained properly, and used on stable, level surfaces. Extension ladders require a 4:1 angle for safe operation.

Scaffolds need competent person inspections, guardrails, and proper footing. Workers must be trained on safe access and load limits.

Fall protection is crucial when working at heights on both ladders and scaffolds, minimizing the risk of serious injuries.

XVI.a. Ladder Types and Safe Usage

OSHA recognizes several ladder types – step, extension, and specialty – each with specific safe usage guidelines. Step ladders must be fully opened and locked before use, never standing on the top step. Extension ladders require proper overlap and secure footing, maintaining a 4:1 angle.

Always inspect ladders for defects before use, ensuring rungs are secure. Avoid overreaching and maintain three points of contact.

Proper ladder selection and adherence to these guidelines are vital for preventing falls and ensuring worker safety.

XVII. Confined Space Entry

Confined spaces, like tanks or vessels, pose serious hazards due to limited entry/exit and potential atmospheric risks. OSHA mandates a comprehensive permit-required confined space program. This includes hazard identification, atmospheric testing for oxygen levels, flammability, and toxic substances, and continuous monitoring during entry.

Proper ventilation, isolation procedures, and rescue plans are crucial.

Attendants must be stationed outside the space, maintaining communication with entrants, ensuring strict adherence to safety protocols to prevent engulfment, asphyxiation, or exposure to harmful substances.

XVIII. Fire Prevention and Protection

Construction sites present significant fire hazards due to flammable materials, hot work, and electrical equipment. OSHA requires comprehensive fire prevention plans, including proper storage of combustibles, regular inspections of fire protection equipment (extinguishers, alarms), and designated fire watch personnel during welding or cutting.

Employee training on fire hazards, evacuation procedures, and extinguisher use is essential.

Maintaining clear access to exits and ensuring functional fire suppression systems are vital for minimizing risks and ensuring a swift, safe response in case of a fire emergency.

XIX. First Aid and Emergency Procedures

Effective first aid and well-defined emergency procedures are crucial on any construction site. OSHA mandates readily available first-aid supplies and adequately trained personnel to address injuries.

Emergency action plans must outline procedures for various scenarios – medical emergencies, fires, natural disasters – including evacuation routes, communication protocols, and designated assembly points.

Regular drills are essential to ensure employees understand and can execute these plans efficiently, minimizing response times and maximizing the chances of a positive outcome during critical incidents.

XX. Employee Rights and Responsibilities

OSHA guarantees employees the right to a safe and healthy workplace. This includes the right to request OSHA inspections without fear of retaliation, access to hazard information (via SDS), and participation in safety and health programs.

Employees also have responsibilities: following safety rules, using PPE correctly, reporting hazards, and cooperating with safety investigations.

Understanding these reciprocal rights and responsibilities fosters a culture of safety, where everyone actively contributes to preventing injuries and illnesses on the job site.

XXI. OSHA Inspections and Citations

OSHA inspections can be triggered by fatalities, injuries, complaints, or programmed inspections targeting high-hazard industries. Inspectors have broad authority to examine workplaces and interview employees.

Following an inspection, OSHA may issue citations for violations, categorized by severity (de minimis, other-than-serious, serious, willful).

Penalties accompany citations, and employers have the right to appeal. Understanding the inspection process and potential citations is crucial for maintaining compliance and preventing future violations.

XXII. Review and Updates to the OSHA 30 Curriculum

The OSHA 30 curriculum is regularly reviewed and updated to reflect changes in safety regulations and industry best practices. Staying current with these revisions is essential for maintaining a safe work environment;

Updates often address emerging hazards, new technologies, and lessons learned from incident investigations.

Continuous professional development, utilizing resources like updated study guides and OSHA’s website, ensures compliance and promotes a proactive safety culture within construction organizations, especially for the 2025/2026 standards.

arks of omen the lion pdf

Arks of Omen: The Lion, A Comprehensive Overview (Updated 12/04/2025)

Today, December 4th, 2025, marks the release of Arks of Omen: The Lion PDF, concluding the epic saga with datasheets and a compelling narrative.

This final chapter features Lion El’Jonson’s return, alongside units like Commander Dante, Navis Imperialis, and Adeptus Arbites, accessible via a Warhammer 40,000 app code.

The PDF unveils Vashtorr’s unraveling scheme and Dark Mechanicum lore discovered on Pergamatos, requiring the core rulebooks and Arks of Omen: Abaddon for full utilization.

Utilize download managers like JDownloader and readers like ReadEra for optimal viewing of this extensive Warhammer 40,000 resource, offering a complete narrative experience.

(Updated 12/04/2025 23:59:46)

The Arks of Omen series represents a pivotal narrative campaign within the vast Warhammer 40,000 universe, meticulously crafted to unfold over five distinct installments. This campaign isn’t merely a collection of rules and datasheets; it’s a sprawling, interconnected storyline designed to immerse players in a galaxy teetering on the brink of chaos.

Each book within the series, culminating in The Lion PDF, serves as a chapter in a larger saga, progressively revealing a grand scheme orchestrated by forces seeking to exploit ancient and dangerous technologies. The series focuses heavily on the pursuit of power and the consequences of unchecked ambition, particularly as embodied by Abaddon the Despoiler.

Arks of Omen bridges gaps in the existing lore, introducing new characters and expanding upon established factions, all while providing players with the resources needed to enact these events on the tabletop. The series’ strength lies in its ability to blend compelling storytelling with engaging gameplay, making it a cornerstone for Warhammer 40,000 enthusiasts.

The Lion: Final Chapter of the Saga

Arks of Omen: The Lion PDF marks the dramatic conclusion to a sprawling narrative arc, eagerly anticipated by Warhammer 40,000 fans worldwide. This final installment centers on the momentous return of Lion El’Jonson, the enigmatic Primarch of the Dark Angels, after a decade-long absence; The book doesn’t simply feature the Lion; it explores his motivations, his impact on the unfolding galactic events, and the consequences of his re-emergence;

The narrative directly addresses the unraveling of Vashtorr’s scheme, a sinister plot threatening to destabilize the Imperium. Furthermore, the discovery of ancient Dark Mechanicum lore on Pergamatos plays a crucial role, adding layers of complexity to the overarching storyline.

Beyond the narrative, the PDF provides essential wargaming content, including updated datasheets for key characters and units, solidifying its place as a vital resource for players.

Narrative Context and Significance

Arks of Omen: The Lion PDF isn’t a standalone story; it’s the culmination of a five-part narrative campaign, deeply interwoven with the broader Warhammer 40,000 lore. The book’s significance lies in its resolution of key plot threads established throughout the Arks of Omen series, particularly concerning the machinations of Abaddon the Despoiler and the threat posed by the resurrected Primarchs.

The narrative directly impacts the ongoing conflict between the Imperium and Chaos, showcasing the desperate measures taken by both sides. The return of Lion El’Jonson isn’t presented as a simple victory for the Imperium, but rather a complex event with potentially far-reaching consequences.

Understanding the preceding books – especially Arks of Omen: Abaddon – is crucial for fully appreciating the weight of the events unfolding within this final chapter.

Key Characters and Factions

The Arks of Omen: The Lion PDF prominently features Lion El’Jonson, Abaddon the Despoiler, and Commander Dante, alongside their respective factions in conflict.

Lion El’Jonson: The Dark Angels Primarch

The Arks of Omen: The Lion PDF delivers the long-awaited return of Lion El’Jonson, the enigmatic Primarch of the Dark Angels Legion. His re-emergence dramatically shifts the galactic power balance, forcing both loyalist and traitor forces to reassess their strategies.

Within the PDF, players gain access to a comprehensive datasheet for Lion El’Jonson, detailing his formidable combat prowess, strategic acumen, and unique wargear. This datasheet allows players to field the Primarch himself in Warhammer 40,000 battles, commanding the Dark Angels with unmatched authority.

The narrative explores his motivations for returning after millennia of self-imposed exile, revealing a complex character driven by duty, honor, and a deep-seated concern for the Imperium’s fate. His interactions with other key figures, particularly Abaddon, are pivotal to the storyline’s unfolding drama.

His presence is a beacon for the Dark Angels, but also a source of internal conflict and scrutiny.

Abaddon the Despoiler: The Warmaster’s Pursuit

The Arks of Omen: The Lion PDF showcases Abaddon the Despoiler’s relentless pursuit of a galaxy-altering weapon, a quest that directly intersects with Lion El’Jonson’s return. Abaddon views the Primarch’s reappearance as a significant threat to his ambitions and a potential obstacle to achieving ultimate dominion.

The narrative details Abaddon’s strategic maneuvering and brutal tactics as he attempts to anticipate and counter El’Jonson’s actions. His forces clash with the Dark Angels and their allies in a series of escalating conflicts, vividly depicted within the PDF’s storyline.

The PDF reveals Abaddon’s desperation to secure the ancient data-tome discovered on Pergamatos by a Dark Mechanicum Magos, believing it holds the key to unlocking unimaginable power. His pursuit is fraught with peril, as he faces opposition from both the Imperium and rival Chaos factions.

Abaddon’s character is further explored, revealing his unwavering dedication to the ruin of the Imperium.

Commander Dante: A Loyal Son of the Imperium

Within the Arks of Omen: The Lion PDF, Commander Dante embodies unwavering loyalty to the Imperium, standing as a stalwart defender against the encroaching darkness. His inclusion signifies the Imperium’s response to both the return of Lion El’Jonson and Abaddon’s machinations.

Dante’s role is crucial in navigating the complex political landscape and coordinating forces to confront the emerging threats. The PDF details his strategic insights and battlefield prowess, showcasing his leadership qualities amidst chaos.

His datasheet, included in the PDF, provides wargaming enthusiasts with the tools to deploy this iconic Space Marine commander in their own battles. Dante’s presence represents hope and resilience in a galaxy teetering on the brink of destruction, a beacon of Imperial strength.

The PDF highlights Dante’s dedication to the Emperor and the Imperium’s ideals.

Content Breakdown of the PDF

The Arks of Omen: The Lion PDF delivers datasheets for key characters, including Lion El’Jonson, alongside Navis Imperialis and Adeptus Arbites units.

Datasheets Included: A Unit Overview

The Arks of Omen: The Lion PDF boasts a comprehensive collection of datasheets, significantly expanding army options for Warhammer 40,000 players. Central to this release is the highly anticipated datasheet for Lion El’Jonson himself, detailing his formidable abilities and wargear, allowing players to field the Dark Angels Primarch on the battlefield.

Beyond the Primarch, the PDF includes dedicated datasheets for units within Navis Imperialis, representing the vital warp-traveling fleet, and the Adeptus Arbites, the galaxy-spanning law enforcement agency. These additions provide tactical flexibility and narrative depth to existing forces; Players can expect detailed statlines, weapon profiles, and special rules for each unit, enabling diverse army compositions and strategic gameplay. The inclusion of these datasheets enhances the overall gaming experience, bringing the lore of the Arks of Omen saga to life on the tabletop.

Lion El’Jonson Datasheet Details

The Arks of Omen: The Lion PDF unveils a meticulously crafted datasheet for Lion El’Jonson, reflecting his legendary status as a Primarch. His statline showcases exceptional strength, skill, and resilience, befitting his reputation as a master strategist and warrior. The datasheet details his unique wargear, including the Blade of Khaine and the Armor of Triumph, each granting significant combat advantages.

Special rules highlight his tactical acumen, such as abilities enhancing Dark Angels units and disrupting enemy formations. Players will find options for customizing his loadout, tailoring him to specific battlefield roles. The datasheet also includes stratagems specifically designed for Lion El’Jonson, allowing for devastating attacks and cunning maneuvers. This datasheet isn’t merely a set of stats; it’s a representation of the Primarch’s power and presence on the tabletop.

Navis Imperialis and Adeptus Arbites Units

The Arks of Omen: The Lion PDF expands tabletop options with dedicated datasheets for Navis Imperialis and Adeptus Arbites units. These additions represent the Imperium’s vital infrastructure and law enforcement, offering unique tactical possibilities. The Navis Imperialis entries detail various transport vessels and skilled navigators, crucial for warp travel and logistical support. Datasheets showcase their defensive capabilities and specialized equipment.

Adeptus Arbites units are presented with a focus on urban warfare and maintaining order. Expect to find Arbites squads equipped for riot control and investigation, alongside heavily armored enforcers. These datasheets provide rules for their unique weaponry and investigative abilities, allowing players to deploy them effectively in diverse scenarios. These additions enrich the narrative and broaden army composition choices.

Lore and Storyline Highlights

Arks of Omen: The Lion PDF unveils Vashtorr’s scheme’s conclusion, the Dark Mechanicum’s secrets on Pergamatos, and the Primarch’s impactful return.

Vashtorr’s Scheme and its Unraveling

Arks of Omen: The Lion PDF dramatically portrays the culmination of Vashtorr the Arkifane’s insidious plot, a scheme woven throughout the entire saga. The narrative details how his ambition to forge a new galactic order, built upon the ruins of the Imperium, begins to fracture under the weight of unforeseen circumstances and the return of the Lion El’Jonson.

The PDF reveals the intricate layers of Vashtorr’s manipulations, exposing his reliance on ancient, forbidden technologies and his exploitation of the galaxy’s vulnerabilities. His pursuit of power, fueled by a twisted vision, ultimately leads to his downfall as the Dark Angels Primarch confronts him, disrupting his carefully laid plans. The unraveling isn’t simply a military defeat, but a collapse of Vashtorr’s ideological foundation, showcasing the resilience of the Imperium and the enduring strength of the Primarchs.

The Discovery on Pergamatos: Dark Mechanicum Lore

Arks of Omen: The Lion PDF centers around a pivotal discovery on the moon of Pergamatos, revealing a trove of forbidden knowledge unearthed by a rogue Dark Mechanicum Magos. This data-tome contains ancient lore detailing technologies and rituals predating even the Horus Heresy, offering insights into the darkest corners of the Mechanicum’s past.

The PDF meticulously details the nature of this lore, showcasing its corrupting influence and the dangerous potential it holds. It explores the heretical beliefs and twisted experiments conducted by the Dark Mechanicum, revealing their attempts to transcend the limitations of flesh and machine. This discovery directly fuels Vashtorr’s scheme, providing him with the tools and knowledge necessary to challenge the Imperium, and ultimately draws the Lion El’Jonson into the conflict.

The Lion’s Return: Motivations and Impact

Arks of Omen: The Lion PDF dramatically portrays the long-awaited return of Primarch Lion El’Jonson, a figure shrouded in mystery and burdened by a complex past. His motivations aren’t simply to aid the Imperium; rather, he pursues a hidden agenda tied to the secrets uncovered on Pergamatos and the unraveling of Vashtorr’s plans.

The PDF explores the profound impact of his arrival, both on the battlefield and within the ranks of the Dark Angels. His presence ignites hope amongst the loyalists, while simultaneously sowing discord and suspicion. The narrative delves into his interactions with Commander Dante, highlighting the contrasting ideologies and approaches to warfare. Ultimately, the Lion’s return reshapes the galactic landscape, setting the stage for future conflicts.

Technical Aspects and Accessibility

The Arks of Omen: The Lion PDF requires compatible readers like ReadEra, alongside a Warhammer 40,000 app code for digital content access.

PDF Format and Compatibility

Arks of Omen: The Lion is primarily distributed as a PDF file, ensuring broad accessibility across numerous devices and operating systems. However, due to the document’s extensive size and detailed imagery, utilizing a robust PDF reader is highly recommended for optimal viewing and performance.

Standard PDF readers such as Adobe Acrobat Reader, Foxit Reader, and SumatraPDF are all compatible, but for enhanced features like annotation and form-filling, more advanced software may be preferred. The PDF is designed to be visually rich, containing high-resolution artwork and detailed unit profiles, potentially causing slowdowns on older or less powerful systems.

For seamless integration with the Warhammer 40,000 ecosystem, the PDF includes a unique code granting access to corresponding content within the official Warhammer 40,000 app. This digital component enhances the experience, offering interactive datasheets and streamlined army building capabilities. Ensure your device meets the app’s system requirements for full functionality.

Utilizing the Warhammer 40,000 App Content

Arks of Omen: The Lion PDF unlocks exclusive digital content within the official Warhammer 40,000 app, enhancing gameplay and army management. Each copy includes a unique redemption code, granting access to all datasheets, rules, and lore presented in the book, directly within the app’s interface.

This integration allows for streamlined army building, digital battles, and easy access to unit profiles during games. The app’s interactive features provide a dynamic experience, surpassing the limitations of a static PDF. Users can digitally organize their armies, track wargear, and quickly reference rules during play.

Ensure you have a stable internet connection during code redemption and initial content download. Regularly updating the Warhammer 40,000 app guarantees compatibility and access to the latest features. This digital component complements the PDF, offering a comprehensive and modern Warhammer 40,000 experience.

Recommended Download Managers and Readers

Downloading the Arks of Omen: The Lion PDF, a substantial file, benefits greatly from utilizing a robust download manager. We recommend JDownloader, known for its ability to resume interrupted downloads and manage multiple files simultaneously, ensuring a complete and efficient acquisition.

For viewing the PDF, several excellent readers are available. Annas Archive provides an online viewer, eliminating the need for installation. Alternatively, ReadEra offers a dedicated reading experience with advanced features, while Calibre serves as a comprehensive ebook management solution.

Consider utilizing online conversion tools if format compatibility becomes an issue. These tools can transform the PDF into other formats for broader accessibility. Selecting the right tools optimizes your experience with this extensive Warhammer 40,000 resource.

Prerequisites for Using the Book

To fully utilize Arks of Omen: The Lion PDF, you must possess the Warhammer 40,000 Core Rulebooks and Arks of Omen: Abaddon.

Required Core Rulebooks

Successfully deploying the strategies and units detailed within the Arks of Omen: The Lion PDF necessitates a foundational understanding of the core rules governing Warhammer 40,000 gameplay. Specifically, access to the most current edition of the Warhammer 40,000 Core Rulebook is absolutely essential. This rulebook provides the fundamental mechanics for movement, shooting, close combat, and psychic powers – the very building blocks upon which all battles are fought.

Furthermore, a solid grasp of the core rules ensures accurate interpretation of the datasheets included in the PDF, allowing players to effectively field their armies and engage in balanced, competitive matches. Without this foundational knowledge, utilizing the new units and strategic options presented by The Lion will prove significantly challenging, hindering the overall gaming experience and potentially leading to misinterpretations of key rules.

Necessity of “Arks of Omen: Abaddon”

The Arks of Omen: The Lion PDF doesn’t exist in a vacuum; it’s a crucial continuation of a larger narrative campaign. Therefore, possessing Arks of Omen: Abaddon is not merely recommended, but fundamentally required for a complete understanding of the unfolding storyline. Abaddon establishes the initial context, introducing key characters, plot threads, and the overarching conflict that culminates in The Lion.

Many of the lore elements and character motivations presented in The Lion directly build upon events and revelations detailed within Abaddon. Skipping this initial volume will leave significant gaps in comprehension, diminishing the impact of the narrative and potentially causing confusion regarding character allegiances and strategic objectives. It provides essential background for fully appreciating the stakes involved.

Digital Tools for Conversion and Viewing

Accessing the Arks of Omen: The Lion PDF efficiently requires suitable digital tools. While standard PDF readers like Adobe Acrobat Reader are functional, specialized options enhance the experience. Annas Archive provides an online viewer, eliminating software installation. ReadEra is a robust offline reader, while Calibre excels at ebook management and format conversion.

For those needing to alter the file format – perhaps for compatibility with specific devices – online conversion tools prove invaluable. These services can transform the PDF into formats like EPUB or MOBI. Furthermore, employing a reliable download manager, such as JDownloader, is highly recommended, especially for larger files, preventing interruptions and ensuring a complete download.