kenmore washer model 110 repair manual pdf

This manual provides essential guidance for repairing and maintaining the Kenmore Washer Model 110․ It includes troubleshooting tips, DIY repair instructions, and safety precautions to ensure effective solutions․

Overview of the Kenmore Washer Model 110

The Kenmore Washer Model 110 is a reliable, top-loading appliance designed for efficient laundry cleaning․ Known for its durability, it features a straightforward design with key components like the motor, belts, and hoses․ The model includes variations such as 110․20702990 and 110․20922990, each with specific parts and systems․ This washer is popular for its robust performance and easy maintenance․ The official repair manual provides detailed diagrams, troubleshooting guides, and step-by-step repair instructions, ensuring users can address common issues effectively․ It’s a trusted resource for DIY enthusiasts and professionals alike․

Importance of Using the Official Repair Manual

Importance of Using the Official Repair Manual

Using the official Kenmore Washer Model 110 repair manual is crucial for safe and effective repairs․ It provides detailed diagrams, safety precautions, and model-specific instructions, ensuring accurate troubleshooting and maintenance․ The manual covers essential steps to diagnose and fix issues like leaks, spin cycle problems, and noise concerns․ By following the official guide, users can avoid costly mistakes and ensure compliance with manufacturer standards, prolonging the appliance’s lifespan and maintaining warranty validity․ It’s a vital resource for both DIY enthusiasts and professional technicians․

Where to Find the Kenmore Washer Model 110 Repair Manual

The Kenmore Washer Model 110 repair manual is available for download as a PDF from Sears Parts Direct․ It covers models like 110․20702990 and 110․20922990, ensuring accurate repairs․ Users can also search by model number on the Sears website to access the manual directly․

Downloading the PDF Manual from Sears Parts Direct

To download the Kenmore Washer Model 110 repair manual, visit the Sears Parts Direct website․ Enter your specific model number, such as 110․20702990 or 110․20922990, in the search bar․ The PDF manual is available for free and includes detailed troubleshooting guides, diagrams, and step-by-step repair instructions․ This resource is essential for diagnosing and fixing issues like leaks, spin cycle problems, and noise concerns․ It also provides safety precautions and DIY tips to help you perform repairs confidently and effectively, saving time and money․

Alternative Sources for the Repair Manual

Besides Sears Parts Direct, the Kenmore Washer Model 110 repair manual can be found on online forums, DIY repair communities, and third-party websites․ Websites like Repair Clinic or iFixit often host user-contributed manuals and guides․ Additionally, some model-specific PDFs, such as the Kenmore Model 110․22842100 manual, are available for free download on platforms like Scribd or ManualsLib․ These sources provide accessible alternatives for those seeking repair instructions without purchasing from official retailers, ensuring widespread availability for DIY enthusiasts and professionals alike․

Understanding the Kenmore Washer Model 110

The Kenmore Washer Model 110 is a reliable top-load washing machine designed for efficient cleaning․ Its robust design includes key components like the motor, belts, and hoses, ensuring durability and performance․ The official repair manual provides detailed insights into its mechanical and electrical systems, making it easier to diagnose and fix issues․ Understanding this model is essential for effective repairs and maintaining its longevity․

Identifying Your Specific Model Number

To ensure accurate repairs, it’s crucial to identify your Kenmore Washer Model 110’s specific model number․ Locate the model number on the washer’s serial plate, typically found on the lid or back panel․ Common model variations include 110․20702990 and 110․20922990․ Use this number to download the correct PDF manual from Sears Parts Direct or other trusted sources․ This step ensures you access precise instructions, diagrams, and parts lists tailored to your washer․ Accurate model identification is vital for effective troubleshooting and repairs․

Key Components and Parts of the Washer

The Kenmore Washer Model 110 consists of essential components like the motor, belts, and hoses, which are vital for its operation․ Key parts include the tub, agitator, and drain pump, ensuring efficient washing and draining․ The control panel manages cycle settings, while the lid switch and balance springs maintain safe and stable operation․ Specific parts like the rear seat base assembly and spacers are crucial for alignment and structural integrity․ Understanding these components helps in diagnosing issues and performing effective repairs, as detailed in the repair manual․

Troubleshooting Common Issues

This section helps identify symptoms of leaks, spin cycle malfunctions, and noise issues․ It guides users through diagnostic steps to pinpoint problems efficiently․

Diagnosing Leaks and Spin Cycle Problems

Leakage and spin cycle issues are common challenges with the Kenmore Washer Model 110․ Leaks may stem from worn hoses, faulty pumps, or loose connections․ Spin cycle problems often result from imbalanced loads or malfunctioning sensors․ The repair manual provides detailed steps to identify these issues, including visual inspections and diagnostic tests․ By following the guide, users can pinpoint the root cause and apply the appropriate fix․ This section ensures effective troubleshooting to restore optimal washer performance and prevent further damage․

Addressing Noise and Vibration Concerns

Noise and vibration issues in the Kenmore Washer Model 110 can often be resolved by addressing imbalances or worn components․ The repair manual suggests checking the washer’s balance and leveling as a first step․ If vibrations persist, inspecting and replacing worn belts, dampeners, or shock absorbers may be necessary․ Additionally, unusual noises could indicate issues with the motor, bearings, or drain pump․ By following the manual’s diagnostic steps, users can identify and resolve these problems effectively, ensuring smoother operation and minimizing disruption during cycles․

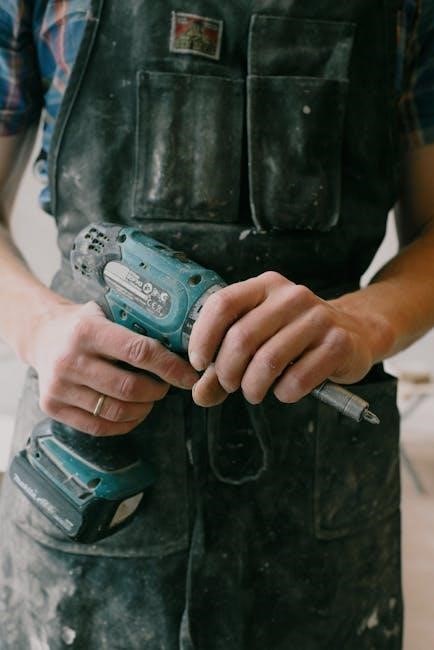
Safety Precautions and DIY Repair Tips

Always disconnect power before starting repairs․ Wear protective gear and ensure the washer is stable․ Follow the manual’s instructions carefully to avoid injuries or further damage․

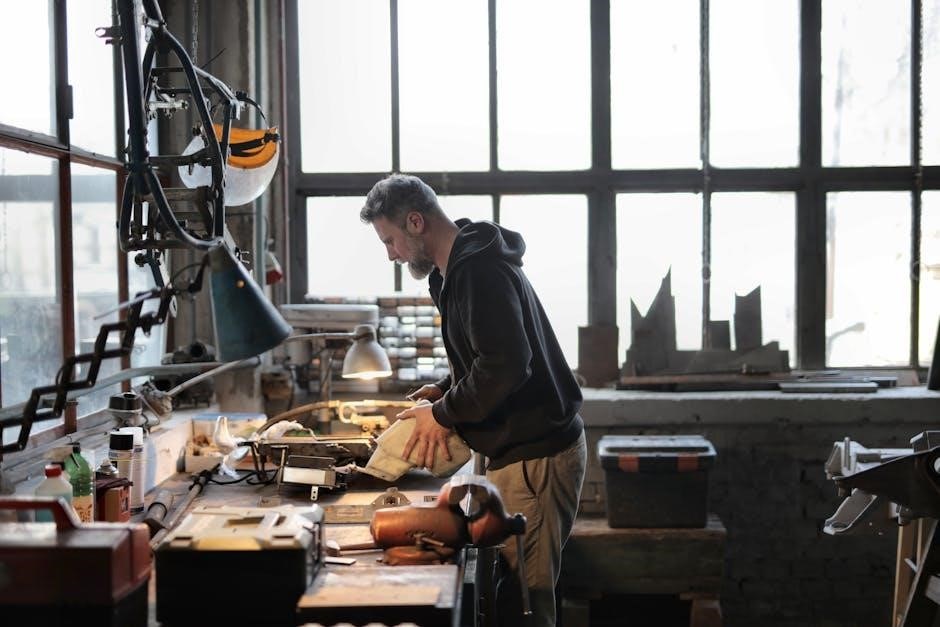
Essential Safety Measures Before Starting Repairs

Before beginning any repairs on your Kenmore Washer Model 110, ensure the power is disconnected and the washer is unplugged․ Wear protective gear, including gloves and safety glasses, to prevent injuries․ Ensure the appliance is stable and on a level surface to avoid accidental tipping; Never attempt repairs with wet hands or while standing on a damp surface․ Avoid reaching into moving parts or bypassing safety features․ Always follow the manual’s instructions and use proper tools to avoid further damage or harm․

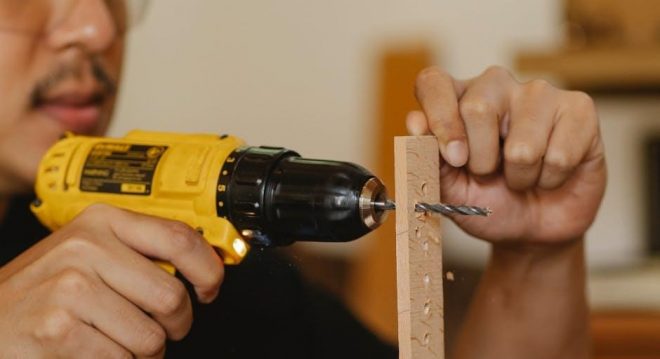
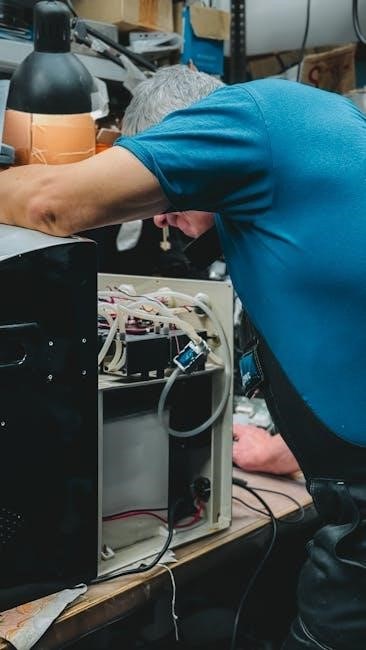
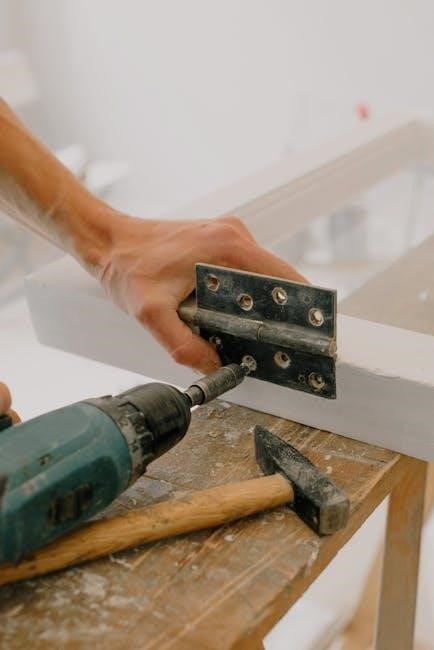
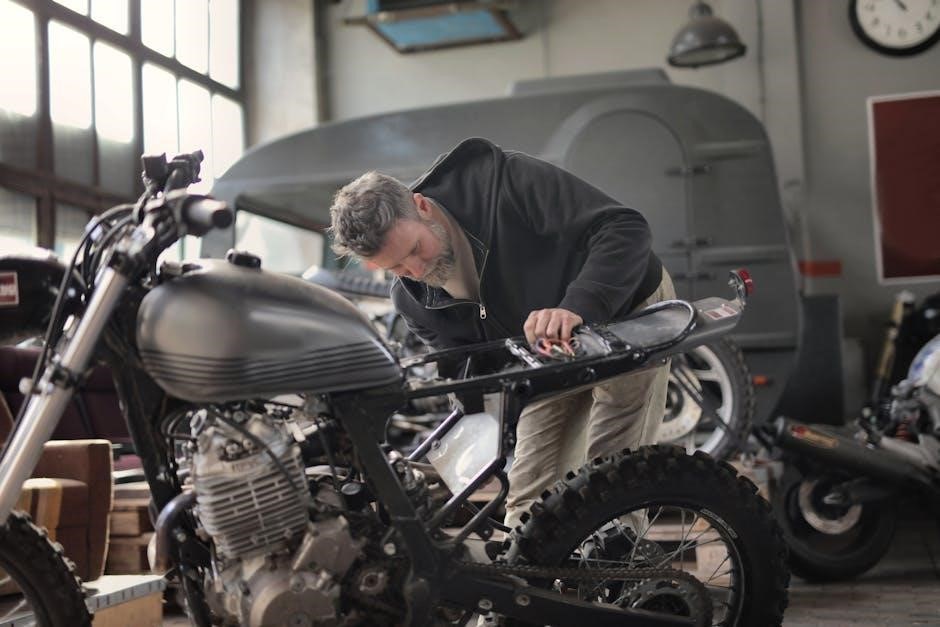
Step-by-Step DIY Repair Instructions

Start by disconnecting power to the washer and ensuring it is unplugged․ Assess the issue using the troubleshooting guide in the manual․ For common problems like leaks or spin cycle malfunctions, refer to the detailed diagrams and step-by-step repair instructions․ Use appropriate tools to access internal components, following the manual’s guidance․ Replace faulty parts with genuine replacements from Sears Parts Direct․ After completing repairs, test the washer on a short cycle to ensure proper function․ Always follow safety guidelines and verify repairs with the manual’s instructions․

Mechanical and Electrical Component Diagnosis

Inspect belts, hoses, and motor components for wear or damage․ Check wiring diagrams to identify electrical issues․ Ensure all connections are secure and functioning properly․

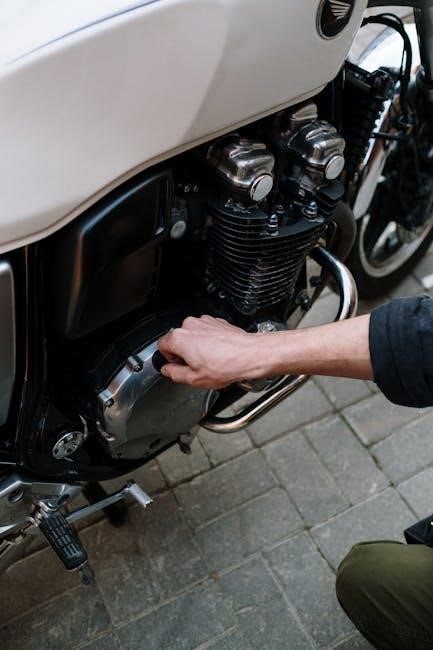
Inspecting Belts, Hoses, and Motor Components

Inspect belts for cracks, frays, or excessive wear․ Check hoses for leaks, kinks, or damage․ Ensure motor components are clean and free from debris․ Look for signs of wear on pulleys and bearings․ Verify belt tension and alignment to prevent misalignment issues․ Replace any damaged or worn parts immediately to avoid further damage․ Always refer to the wiring diagram for electrical connections related to motor components․ Proper inspection ensures optimal performance and prevents costly repairs․

Understanding Wiring Diagrams and Electrical Systems

Wiring diagrams are essential for diagnosing electrical issues in your Kenmore Washer Model 110․ They provide a visual representation of the machine’s electrical circuits, helping you identify connectors, switches, and motor controls․ Always disconnect power before working on electrical components․ Use the diagram to trace circuits and locate faulty parts․ Pay attention to color-coded wires and their functions․ This guide ensures safe and accurate repairs, preventing short circuits or electrical hazards․ Refer to the manual for specific wiring details and safety protocols․

Community Support and Additional Resources

Online forums and DIY repair communities offer valuable troubleshooting tips and repair experiences․ Professional services are available for complex issues, ensuring expert solutions for your Kenmore washer․

Online Forums and DIY Repair Communities

Engage with online forums and DIY repair communities for troubleshooting tips and real-world repair experiences․ Websites like Sears Parts Direct and RepairClinic offer extensive resources, including part diagrams and manuals․ These platforms connect you with experienced DIYers and professionals, providing step-by-step repair guides and safety advice․ Participating in these communities can help you identify common issues and find cost-effective solutions․ Additionally, many forums share user-generated repair manuals and videos, enabling you to tackle repairs confidently․ Leverage these resources to save time and money while ensuring your Kenmore washer operates efficiently․

Professional Repair Services for Complex Issues

For complex issues beyond DIY capabilities, consider professional repair services․ Sears Home Services offers trusted, nationwide appliance repair, including Kenmore washers․ Their certified technicians provide expert diagnostics and genuine parts, ensuring reliable fixes․ Additional services like RepairClinic connect you with skilled professionals for intricate repairs․ These services often include warranties and satisfaction guarantees, providing peace of mind․ For severe mechanical or electrical faults, relying on professionals ensures safety and optimal results, saving you time and potential further damage․

bread slicer guide for homemade bread

A bread slicer is an essential tool for achieving even, clean cuts in homemade bread, ensuring consistent slices and preventing crumbling, especially for crusty or sourdough loaves.

1.1 What is a Bread Slicer?

A bread slicer is a tool designed to cut bread into uniform slices. It ensures clean, even cuts, reducing crumbs and waste. Available in manual or electric models, bread slicers feature adjustable thickness settings and stable bases. Compact designs, often made from eco-friendly materials like bamboo, provide durability and ease of use. Whether for crusty sourdough or soft loaves, a bread slicer enhances slicing precision, making it a must-have for homemade bread enthusiasts seeking professional-grade results at home. Its simplicity and functionality make it a practical addition to any kitchen.

1.2 Importance of Using a Bread Slicer for Homemade Bread

Using a bread slicer offers numerous benefits for homemade bread enthusiasts. It ensures uniform slices, preserving the bread’s texture and preventing crumbling. This consistency is ideal for sandwiches, toast, and serving. By minimizing waste, a slicer helps maintain the freshness and quality of your loaf. Additionally, it enhances safety, reducing the risk of accidents when cutting manually. A bread slicer also streamlines the slicing process, saving time and effort. Whether for crusty sourdough or delicate loaves, it ensures professional-grade results, making it an essential tool for any home baker seeking precision and convenience.

Types of Bread Slicers Available

Bread slicers come in manual and electric models, offering convenience and precision. Manual slicers are compact and budget-friendly, while electric slicers provide faster, effortless slicing for homemade bread.

2.1 Manual vs. Electric Bread Slicers

Manual bread slicers are ideal for small batches, offering precision and control at an affordable price. They are compact, easy to clean, and require no electricity. Electric slicers, on the other hand, are perfect for large families or frequent use, providing quick and consistent results. They often feature adjustable thickness settings and are great for slicing multiple loaves efficiently. Both options cater to different needs, ensuring homemade bread can be sliced neatly and effortlessly regardless of preference or workload.

2.2 Adjustable Bread Slicers for Custom Thickness

Adjustable bread slicers offer versatility by allowing users to customize slice thickness, catering to various preferences and bread types. These slicers are designed for precision, ensuring even cuts whether you prefer thin slices for sandwiches or thicker ones for toast. Many models feature durable materials like bamboo or stainless steel, providing long-lasting performance. Their compact designs and ease of use make them ideal for homemade bread enthusiasts. Additionally, some include crumb trays for mess-free slicing, enhancing convenience and cleanliness in the kitchen.

Choosing the Right Bread Slicer for Your Needs

Selecting the ideal bread slicer involves considering size, material, and ease of use to suit your baking habits and storage space, ensuring optimal performance for homemade bread.

3.1 Factors to Consider: Size, Material, and Ease of Use

When choosing a bread slicer, consider its size to fit your countertop and bread loaves. Opt for durable materials like bamboo or stainless steel for longevity. Ease of use is crucial; look for adjustable thickness settings and a stable design. Compact models are ideal for small spaces, while foldable options offer versatility. Ensure the slicer is easy to clean and maintain, with features like a crumb tray for mess-free slicing. These factors ensure the slicer meets your needs and enhances your homemade bread experience.

3.2 Safety Features to Look For

Safety is paramount when selecting a bread slicer. Look for models with a stable base to prevent slipping and accidents. A safety guard or blade cover can protect your hands from sharp edges. Opt for slicers with non-slip feet for added stability. Additionally, easy-to-clean designs with a crumb tray help maintain hygiene and prevent crumbs from causing slips. Durable materials like bamboo or stainless steel ensure longevity and reduce the risk of breakage. Prioritizing these features ensures a secure and efficient slicing experience for homemade bread.

How to Use a Bread Slicer Effectively

Place the bread on the slicer, align the blade, and gently saw in a smooth, consistent motion. Adjust settings for desired thickness and evenness.

4.1 Step-by-Step Guide to Slicing Homemade Bread

Begin by positioning the bread on a stable surface. Place the slicer guide or tool over the loaf. Hold the knife firmly and start at the top, slicing evenly downward in a smooth motion. Apply gentle pressure, maintaining consistent thickness. Use a back-and-forth sawing motion if needed. Repeat until all slices are cut, adjusting the guide as necessary for uniformity. This method ensures clean, even slices without crumbling the bread.

4.2 Tips for Achieving Even and Clean Slices

To achieve even and clean slices, use a sharp serrated knife and let the bread cool slightly before slicing. Place the loaf on a stable surface and align it with a slicing guide or tool for consistent thickness. Apply gentle, even pressure, using a back-and-forth sawing motion. Avoid pressing too hard, as this can cause the bread to crumble. For crusty bread, cut in one smooth motion without sawing. Handle each slice carefully to prevent tearing, and place them on a clean surface to avoid crumbs sticking together.

Maintaining and Cleaning Your Bread Slicer

Regularly clean your bread slicer with a damp cloth to remove crumbs and residue. Avoid using harsh chemicals, as they may damage the material. Dry thoroughly after cleaning to prevent rust or mold. For electric slicers, check and replace blades as needed. Store the slicer in a dry place to maintain its longevity and performance. Proper care ensures your slicer remains hygienic and functions optimally for consistent, clean slices every time.

5.1 Best Practices for Longevity

To ensure your bread slicer lasts, store it in a dry place away from direct sunlight. Avoid using abrasive cleaners or scrubbers, as they can damage surfaces. For electric models, regularly check and sharpen or replace blades to maintain efficiency. Lubricate moving parts if recommended by the manufacturer. Clean the slicer after each use to prevent crumbs and residue buildup, which can attract pests or cause rust. Proper storage and consistent maintenance will extend the life of your slicer and keep it functioning smoothly. Regular care ensures durability and optimal performance over time.

5.2 Cleaning Hacks to Keep Your Slicer in Top Condition

Regular cleaning is crucial for maintaining your bread slicer. Use a soft brush or damp cloth to remove crumbs and dust after each use. For tougher residue, mix equal parts water and white vinegar on a cloth, gently wipe surfaces, then dry thoroughly. Avoid harsh chemicals or abrasive scrubbers, as they can damage finishes or harm materials. For electric slicers, detachable parts can often be hand-washed or placed in the dishwasher if manufacturer-approved. Always dry the slicer completely to prevent rust or mold growth. Cleanliness ensures hygiene and optimal performance while extending the slicer’s lifespan.

Common Mistakes to Avoid When Slicing Homemade Bread

Common mistakes include using dull blades, slicing too quickly, and improper alignment. These errors can lead to uneven slices or damage to the bread or slicer.

6.1 Avoiding Uneven or Crumbly Slices

To avoid uneven or crumbly slices, use a high-quality bread slicer with an adjustable width guide. Ensure the bread is completely cool, as slicing warm bread can lead to unevenness. Place the loaf securely on the slicing surface and apply gentle, consistent pressure. Using a serrated knife or blade is also crucial for clean cuts. Additionally, a crumb tray can help contain mess and keep slices intact. Regularly cleaning and maintaining your slicer will ensure optimal performance and even results every time.

6.2 Preventing Damage to the Slicer or Bread

To prevent damage to your bread slicer or bread, always use the correct blade type for your slicer and ensure the bread is firmly secured. Avoid applying excessive force, which can bend or break the slicer. Handle the bread gently to prevent tearing or compression. Regularly clean and lubricate moving parts to maintain smooth operation. Store the slicer in a dry, protected area to avoid rust or damage. Proper alignment of the blade and guide ensures even slicing and minimizes wear on both the slicer and the bread.

A bread slicer is a valuable tool for homemade bread enthusiasts, ensuring even slices and maintaining bread freshness. Invest in one for consistent, professional-quality results every time.

7.1 Final Thoughts on Using a Bread Slicer for Homemade Bread

Using a bread slicer for homemade bread offers unparalleled convenience and precision, ensuring even slices and reducing waste. Whether you prefer manual or electric models, a slicer enhances the bread-cutting experience, making it easier to achieve professional-quality results. For enthusiasts of crusty sourdough or soft loaves, a bread slicer is a game-changer, preserving freshness and making meal prep a breeze. Invest in a sturdy, adjustable slicer to elevate your homemade bread experience and enjoy perfectly sliced loaves every time.

manual motorola walkie talkie

Motorola walkie-talkie manuals provide essential guidance for setup, operation, and troubleshooting, ensuring optimal performance and safety. They cover various models, from basic to advanced, offering detailed instructions for users to maximize functionality while complying with regulations and enhancing communication experiences.

Overview of Motorola Walkie-Talkie Models

Motorola offers a diverse range of walkie-talkie models, catering to various user needs, from basic communication to advanced professional use. Models like the T5800, T5820, and MG7550 provide unique features such as extended range, interoperability, and enhanced audio quality. These devices are designed for individuals, small teams, and large organizations, ensuring reliable communication across different environments and scenarios.

Importance of Using the Manual for Optimal Performance

Using the Motorola walkie-talkie manual is crucial for maximizing functionality and ensuring safe operation. It provides detailed instructions for setup, troubleshooting, and compliance with RF exposure guidelines. The manual helps users understand advanced features, resolve network issues, and maintain optimal performance. By following the guide, users can prevent common errors, ensure legal operation, and enhance overall communication effectiveness while adhering to safety standards and regulatory requirements.

Key Features of Motorola Walkie-Talkies

Motorola walkie-talkies offer advanced communication solutions with crystal-clear audio and noise reduction. They feature robust network capabilities, secure transmission, programmable channels, and special codes like PL and DPL for efficient operations. Durable designs ensure reliability in various environments, making them ideal for professional and personal use, aligning with industry standards.

Transmission and Reception Capabilities

Motorola walkie-talkies deliver exceptional transmission and reception performance, ensuring clear and reliable communication over long distances. Advanced technologies minimize interference, providing crisp audio quality even in challenging environments. The devices support various frequency bands and feature programmable codes like PL and DPL to enhance privacy and reduce cross-talk. Robust signal strength and intelligent noise filtering ensure seamless connectivity, making them ideal for both personal and professional use.

Audio Quality and Noise Reduction

Motorola walkie-talkies feature advanced noise reduction technologies, ensuring crystal-clear audio even in noisy environments. Built-in filters minimize wind interference and background static, enhancing voice clarity. These devices utilize digital signal processing to suppress unwanted sounds, delivering sharp and intelligible communication. The noise-canceling microphones further improve call quality, making them ideal for professional and outdoor use where clear audio is critical for effective communication and safety.

Setting Up Your Motorola Walkie-Talkie

Setting up involves initial configuration, network registration, and programming channels; Follow model-specific guides for optimal performance and functionality, ensuring seamless communication from the start.

Initial Configuration and Network Registration

Initial setup involves selecting your Motorola walkie-talkie model and registering it on the network. Follow the manual to configure settings, ensuring proper network recognition and connectivity. This step is crucial for enabling communication features and optimizing performance. Refer to the guide for specific instructions to avoid errors and ensure compliance with operational requirements.

Programming Channels and Talkgroups

Programming channels and talkgroups requires selecting your Motorola model and configuring settings as per the manual. This ensures proper network and talkgroup alignment, enabling efficient communication. Follow the guide to program frequencies, codes, and settings accurately. Proper programming prevents interference and ensures clear connectivity, optimizing your walkie-talkie’s performance for seamless communication across networks and teams.

Advanced Features and Functions

Motorola walkie-talkies offer advanced features like interoperability, special modes, and programmable codes, enhancing communication efficiency. These functions enable seamless connectivity across networks and teams, ensuring reliable performance in diverse environments.

Interoperability and Mutual Aid Communications

Motorola walkie-talkies support interoperability, enabling seamless communication across different networks and systems. This feature is crucial for mutual aid operations, allowing teams to collaborate effectively during emergencies or large-scale events. By scanning and registering additional networks, users can expand connectivity, ensuring reliable communication in diverse environments. This capability enhances public safety and operational efficiency, making Motorola devices indispensable for coordinated responses and critical situations.

Using Special Modes and Codes (PL, DPL)

Motorola walkie-talkies utilize Private Line (PL) and Digital Private Line (DPL) codes to minimize interference and ensure private communication. PL codes filter unwanted signals, while DPL codes enhance privacy by encoding transmissions. These modes are programmable via the manual, allowing users to customize settings for specific channels. Proper configuration ensures clear and secure communication, reducing external noise and improving overall efficiency in various operational environments.

Troubleshooting Common Issues

Identify and resolve issues like poor reception, interference, or network registration problems. Consult the manual for diagnostic steps, ensuring proper antenna use and signal strength checks.

Resolving Network Coverage Problems

  • Network coverage issues often arise due to poor signal strength or incorrect settings. Ensure antennas are properly attached and positioned for optimal reception.
  • Move to higher ground or areas with fewer obstructions to improve signal clarity and reduce interference.
  • Consult the manual for guidance on adjusting network scanning settings to increase connectivity range and registration success.

Addressing RF Exposure Compliance

Motorola walkie-talkie manuals emphasize the importance of adhering to RF exposure guidelines to ensure user safety and regulatory compliance. Proper antenna placement and usage practices are outlined to minimize exposure. Users are advised to follow recommended operating procedures and refer to the manual’s specific section on RF safety guidelines to ensure compliance with established standards and maintain safe communication practices at all times.

Safety and Compliance Information

Motorola walkie-talkie manuals provide critical safety guidelines to ensure user well-being and regulatory adherence. Proper handling, storage, and usage practices are detailed to prevent hazards and ensure compliance with safety standards.

Understanding RF Safety Guidelines

Motorola walkie-talkie manuals emphasize RF safety guidelines to ensure user protection from exposure. Proper handling, such as maintaining a safe distance during transmission, is crucial. The manuals outline compliance with international standards and provide instructions to minimize exposure risks. Users are advised to follow specific usage practices and avoid modifications that could compromise safety. Adhering to these guidelines ensures safe operation and regulatory compliance, safeguarding both users and devices.

Ensuring Compliance with Regulations

Motorola walkie-talkie manuals stress the importance of complying with local and federal regulations. Users must adhere to FCC guidelines in the U.S. and similar standards internationally. Proper licensing, frequency usage, and device modifications are covered to ensure legal operation; The manuals provide clear instructions on approved accessories and configurations, helping users avoid non-compliance issues and potential penalties. Following these guidelines ensures lawful and efficient communication while maintaining regulatory standards.

Maintenance and Care

Regularly clean the device and accessories to prevent dirt buildup. Check and replace batteries as needed. Update software for optimal performance and longevity.

Best Practices for Longevity

Keep your Motorola walkie-talkie clean using a soft cloth to avoid damage. Store it in a dry place, away from extreme temperatures. Regularly inspect antennas and accessories for wear. Avoid overcharging batteries and use Motorola-approved chargers. Update firmware periodically to ensure optimal performance. Clean speaker grills to maintain audio clarity. Proper care extends the lifespan and ensures reliable operation of your device.

Updating Firmware and Software

To ensure optimal performance, regularly update your Motorola walkie-talkie’s firmware and software using Motorola-approved tools. Connect your device to a computer, download the latest updates from Motorola’s official website, and follow the installation instructions carefully. Always back up settings before updating. Check for updates periodically to access new features, improve security, and enhance reliability. A stable internet connection is essential for a smooth update process.

Interoperability and Compatibility

Motorola walkie-talkies are designed to work seamlessly with various devices and systems, ensuring enhanced communication across networks. They support interoperability, enabling efficient collaboration in diverse environments and emergencies.

Working with Different Devices and Systems

Motorola walkie-talkies are designed to integrate seamlessly with various devices and systems, ensuring reliable communication across diverse networks. They support network registration, channel programming, and interoperability protocols, enabling smooth operation with other brands and systems. This versatility makes them ideal for organizations requiring scalable and adaptable communication solutions in multiple environments.

Enhancing Communication Across Networks

Motorola walkie-talkies offer advanced features to enhance communication across networks, ensuring seamless connectivity and clarity. They support network scanning, interoperability protocols, and special modes like PL/DPL codes to minimize interference. These capabilities enable efficient coordination across different systems, making them ideal for organizations requiring reliable communication in diverse environments and large-scale operations.

Motorola walkie-talkie manuals are crucial for optimal performance, safety, and compliance. They guide users through setup, troubleshooting, and advanced features, ensuring reliable communication and adherence to regulations.

Final Tips for Effective Use

Regularly reprogram your device to ensure optimal performance. Always check for firmware updates to maintain functionality. Monitor battery life and charge when necessary. Operate within RF exposure guidelines for safety. Keep antennas clear for better reception. Test communication in new environments beforehand. Use volume-check features to adjust settings. Store the walkie-talkie properly when not in use to prolong lifespan and ensure reliability.

brother sew machine manual

The Brother sewing machine manual is an essential guide for understanding and optimizing your machine’s performance. It covers various models, maintenance tips, and troubleshooting solutions, ensuring seamless sewing experiences for both beginners and experienced users.

Importance of the Manual for Effective Sewing

The Brother sewing machine manual is a crucial resource for mastering your machine. It provides detailed guidance on understanding features, troubleshooting common issues, and maintaining optimal performance. By following the manual, users can avoid costly mistakes and ensure their projects turn out professionally. Regular reference to the manual helps sewists of all skill levels achieve consistent results and extend the machine’s lifespan. It serves as both a troubleshooting guide and a roadmap for unlocking the machine’s full potential, ensuring every stitch is perfect.

Overview of Brother Sewing Machine Models

Brother offers a diverse range of sewing machines, from basic mechanical models to advanced computerized and embroidery machines. Popular models like the Brother CS6000i, Brother XM2701, and Brother SE600 cater to different sewing needs. Each model features unique capabilities, such as automatic threading, multiple stitch options, and large LCD displays; Whether you’re a beginner or an experienced sewist, Brother provides a machine tailored to your sewing preferences, ensuring versatility and precision for various projects, from garments to home decor.

Understanding the Brother Sewing Machine Manual

The Brother sewing machine manual serves as a comprehensive guide, simplifying machine operation. It details features, troubleshooting, and maintenance, empowering users to maximize their sewing experience effectively.

Navigating the Manual: Sections and Guides

The Brother sewing machine manual is structured into clear sections for easy navigation. It begins with setup instructions, followed by detailed guides on basic operations and advanced features. Troubleshooting sections help resolve common issues like tension problems or error codes. Maintenance guides provide step-by-step instructions for cleaning and oiling, ensuring optimal performance. Additionally, the manual includes diagrams and illustrations to visually assist users in understanding complex procedures. This organized layout makes it user-friendly for both beginners and experienced sewists to find the information they need quickly and efficiently.

Key Features and Functions Explained

The Brother sewing machine manual highlights key features such as automatic threading, multiple stitch options, and customizable settings. These functions are designed to enhance sewing efficiency and creativity. The manual explains how to utilize advanced stitching techniques and adjust settings for various fabric types. It also details the use of specialized feet for tasks like quilting or embroidery. By understanding these features, users can unlock the full potential of their machine, ensuring professional-grade results for both simple and complex projects. This section is particularly useful for beginners seeking to expand their sewing skills.

Maintenance and Care Instructions

Regular cleaning, oiling, and checking for dust buildup are crucial for maintaining your Brother sewing machine. Follow manual guidelines to ensure optimal performance and longevity of the machine.

Regular Maintenance Tips for Optimal Performance

Regular maintenance is key to extending the life of your Brother sewing machine. Dust and lint can accumulate, so clean the bobbin area and tension discs frequently. Oil the machine as recommended to keep parts lubricated and running smoothly. Check for loose screws and ensure all components are tightened. Skipping maintenance can lead to issues like skipped stitches or uneven tension. By following these tips, you ensure your machine operates efficiently and delivers professional results every time.

Cleaning and Oiling the Machine

Cleaning and oiling are crucial for maintaining your Brother sewing machine. Use a soft brush to remove lint and debris from the bobbin area and tension discs. Apply a few drops of sewing machine oil to the hook race and other moving parts as specified in the manual. Avoid over-oiling to prevent residue buildup. Regular cleaning ensures smooth operation, prevents dust accumulation, and extends the machine’s lifespan. Always use high-quality oil recommended for sewing machines to keep it running efficiently and delivering consistent stitching results.

Troubleshooting Common Issues

The Brother sewing machine manual helps identify and resolve issues like error codes, thread tension problems, and mechanical malfunctions, ensuring smooth operation and minimizing downtime.

Identifying and Resolving Tension Problems

Tension issues are common in sewing machines, often causing uneven stitches or fabric pulling. The Brother manual guides users to check thread tension dials and ensure proper setup. If stitches are too tight or loose, adjust the upper or lower tension accordingly. Using the knee lift for tension control can also help maintain even stitching. Regular cleaning and oiling are recommended to prevent mechanical friction that might affect tension. Refer to the manual for specific adjustment steps tailored to your Brother model to resolve tension-related problems effectively.

Understanding Error Codes and Solutions

The Brother sewing machine manual provides clear explanations for error codes, helping users identify and fix issues quickly. Common codes like E1 or E3 often indicate mechanical problems or sensor malfunctions. Solutions may involve checking the power supply, ensuring proper needle alignment, or clearing thread jams. The manual offers step-by-step guidance for each code, ensuring users can troubleshoot effectively. Regular maintenance, as outlined in the manual, can prevent many errors, keeping your machine running smoothly and extending its lifespan.

Beginner’s Guide to Using the Brother Sewing Machine

This guide helps newcomers start sewing with ease. Learn to unpack, understand machine parts, thread properly, and sew basic stitches. Follow step-by-step tutorials for confidence.

Setting Up the Machine for First Use

Unpack and place the machine on a stable surface. Install the sewing foot and other accessories as outlined in the manual. Wind and thread the bobbin correctly, ensuring proper tension. Thread the machine, following the guides carefully. Test stitches on scrap fabric to ensure everything is working smoothly. Familiarize yourself with the control panel and basic settings. Refer to the manual for specific setup instructions tailored to your Brother model. A well-prepared machine ensures a hassle-free sewing experience from the start.

Basic Stitching and Fabric Handling

Start by selecting the appropriate stitch type for your fabric. Ensure proper thread tension and align fabric edges accurately. Guide the fabric smoothly under the presser foot, maintaining steady control. Use the manual to identify suitable stitches for different materials. Practice on scrap fabric to achieve even stitching. For delicate fabrics, adjust the tension and use a walking foot if necessary. Always cut fabric neatly and remove loose threads to prevent issues. Proper handling ensures professional-looking results and extends the machine’s lifespan.

Advanced Features of Brother Sewing Machines

Explore programmable stitches, automatic threading, and customizable settings for enhanced creativity. These features simplify complex techniques, saving time and ensuring professional-quality results for advanced sewists.

Exploring Special Stitches and Techniques

Brother sewing machines offer a wide range of special stitches, including decorative, heirloom, and quilting options. Techniques like free-motion quilting and using the knee lift for fabric control enhance creativity. Programmable stitches allow customization, while automatic threading and tension ensure precision. These features enable users to experiment with intricate designs, from embroidery to heavy-duty sewing, making it easier to achieve professional-quality results and expand creative possibilities for sewists of all skill levels.

Customizing Settings for Professional Results

Customizing settings on your Brother sewing machine enhances your sewing experience. Adjust stitch length, width, and tension for specific fabrics and techniques. Programmable stitches allow you to save favorite patterns, while automatic threading and tension settings simplify the process. Explore advanced features like mirror imaging and stitch combining for unique designs. These customization options enable precise control, ensuring professional-quality results for various projects, from delicate fabrics to heavy-duty materials. Consult the manual to unlock these features and optimize your machine for exceptional stitching outcomes.

Mastery of your Brother sewing machine comes with practice and understanding. Regular maintenance, proper thread tension, and referencing the manual ensure optimal performance and professional results.

Final Tips for Mastering Your Brother Sewing Machine

Consistent practice and patience are key to mastering your Brother sewing machine. Regularly oil and clean the machine to maintain its performance. Always check thread tension for even stitches. Use the appropriate accessories for different fabrics and techniques. Refer to the manual for troubleshooting and maintenance schedules. Experiment with various stitches and techniques to enhance your sewing skills. By following these tips, you can achieve professional results and extend the life of your machine.

yanmar service manual pdf free download

Yanmar service manuals are official guides providing detailed instructions for engine maintenance, troubleshooting, and repair. They ensure accurate servicing, enhancing engine longevity and performance. Available as free PDF downloads, these manuals cover models like 4Tnv88 and 3Tnv82A, offering essential information for optimal engine operation and safety. They are indispensable resources for both professionals and DIY enthusiasts, ensuring compliance with manufacturer standards and best practices. Accessing these manuals helps users maintain their Yanmar engines efficiently, preventing costly breakdowns and ensuring reliability. Always refer to the latest version for updates and specific model details.

What is a Yanmar Service Manual?

A Yanmar service manual is a comprehensive guide providing detailed instructions for the maintenance, repair, and troubleshooting of Yanmar engines. It includes specifications, diagrams, and step-by-step procedures to ensure proper servicing. Available as free downloadable PDFs, these manuals cover various models like 4Tnv88 and 3Tnv82A, offering essential information for professionals and DIY enthusiasts. They are designed to promote safety, efficiency, and compliance with manufacturer standards, ensuring optimal engine performance and longevity. These manuals are indispensable for anyone working with Yanmar engines, offering clear guidance for complex tasks and routine maintenance alike. By following the manual, users can address common issues effectively, reducing downtime and extending engine lifespan. They also provide critical safety precautions and best practices, making them a vital resource for all engine operations. Accessing these manuals ensures users have the knowledge needed to keep their Yanmar engines running smoothly and efficiently.

Importance of Using a Service Manual for Yanmar Engines

Using a Yanmar service manual ensures safe and accurate engine maintenance, preventing potential damage. It provides detailed troubleshooting guides and maintenance schedules, helping users identify and resolve issues quickly. The manual also outlines essential safety precautions, reducing risks during repairs. By following the manual, users can maintain warranty compliance and extend engine lifespan. It serves as a comprehensive guide for optimal performance, empowering both professionals and DIY enthusiasts to handle repairs confidently and efficiently.

Benefits of Using a Yanmar Service Manual

Yanmar service manuals offer precise repair guidance, troubleshooting solutions, and safety tips, ensuring efficient engine maintenance. They provide detailed diagrams and step-by-step instructions, enhancing DIY and professional servicing accuracy.

Accurate Repair and Maintenance Guidance

Yanmar service manuals provide precise instructions for repairing and maintaining engines, ensuring tasks are performed correctly. They include step-by-step procedures, diagrams, and troubleshooting sections for common issues. By following the manual, users can avoid guesswork, prevent damage, and extend engine lifespan. Detailed maintenance schedules and inspection checklists help keep engines in optimal condition, while specific guidance for models like 4Tnv88 and 3Tnv82A ensures tailored solutions. This accuracy minimizes errors and ensures reliability.

Safety Precautions and Best Practices

Always follow safety guidelines in Yanmar service manuals to minimize risks. Ensure proper ventilation, avoid hot surfaces, and use protective gear. Adhere to fuel quality standards, keeping it free from water and dust. Regular inspections and timely repairs prevent accidents. Consult authorized professionals for complex issues. Proper maintenance schedules and troubleshooting procedures ensure engine longevity and reliability. Safety practices outlined in manuals are crucial for optimal performance and user protection, emphasizing preventive measures and adherence to manufacturer recommendations.

Where to Download Yanmar Service Manuals for Free

Yanmar service manuals are available for free download on official Yanmar websites and third-party platforms, offering easy access to PDF versions for various engine models.

Official Yanmar Websites and Resources

Yanmar’s official websites provide authentic service manuals for free download, ensuring reliability and accuracy. Models like the 4Tnv88 and 3Tnv82A are covered, with detailed parts manuals and operation guides. These resources are designed to help users maintain and repair their engines effectively. Official Yanmar platforms also offer troubleshooting guides, warranties, and technical support, making them the most trustworthy source for engine maintenance needs. Always verify the authenticity of the source for safe downloads.

Third-Party Platforms for Free Downloads

Several third-party websites offer free downloads of Yanmar service manuals, providing easy access to essential repair and maintenance guides. Platforms like Southern Farm Equipment and other online repositories host manuals for various Yanmar models, including the 4Tnv88 and 3Tnv82A. These resources are convenient for users seeking quick access to detailed service information, ensuring they can perform repairs and maintenance efficiently. Always verify the authenticity and completeness of manuals from third-party sources to ensure reliability and safety.

Troubleshooting Guide for Yanmar Engines

This section provides solutions for common engine issues, helping users identify and resolve problems efficiently. It includes diagnostic techniques and repair procedures for optimal engine performance.

Common Issues and Solutions

Common issues with Yanmar engines include overheating, low power output, and fuel system leaks. Solutions often involve checking coolant levels, cleaning fuel injectors, and ensuring proper lubrication. The service manual provides step-by-step diagnostics for these problems, emphasizing the importance of regular maintenance. Addressing these issues promptly prevents major breakdowns and extends engine lifespan. Always refer to the manual for model-specific troubleshooting guidance to ensure safe and effective repairs.

Advanced Troubleshooting Techniques

Advanced troubleshooting involves diagnosing complex issues using specialized tools and methodologies. Yanmar service manuals provide detailed diagnostic charts and step-by-step procedures for identifying faults in fuel systems, cooling circuits, and electronic controls; Techniques include analyzing error codes, performing compression tests, and inspecting sensor functionality. These methods ensure precise repairs and minimize downtime. Always reference the latest manual version for updated troubleshooting strategies tailored to specific engine models like the 4Tnv88 and 3Tnv82A, ensuring efficient and accurate resolutions.

Maintenance and Inspection Procedures

Regular maintenance and inspections are crucial for optimal engine performance. Yanmar service manuals provide detailed schedules, inspection items, and procedures to ensure reliability and prevent breakdowns. Follow periodic checks, lubrication intervals, and part replacements as outlined. Proper maintenance extends engine lifespan and ensures safety. Always refer to the manual for model-specific guidance. Adhering to these procedures helps maintain warranty compliance and prevents costly repairs; Use genuine parts and follow safety precautions for all servicing tasks to ensure longevity and efficiency.

Periodic Inspection and Service Schedules

Yanmar service manuals outline detailed periodic inspection and maintenance schedules to ensure engine longevity. Regular checks, such as oil level monitoring and filter replacements, are essential. Daily, weekly, and monthly inspection routines are specified, covering components like belts, hoses, and coolant levels. Adhering to these schedules helps prevent unexpected breakdowns and maintains optimal performance. The manuals provide timelines and procedures for servicing, ensuring compliance with manufacturer recommendations for reliable operation and extended engine life.

DIY Maintenance Tips for Yanmar Engines

Regular maintenance is key to extending the life of Yanmar engines. DIY tasks include checking oil levels, replacing air and fuel filters, and inspecting belts for wear. Refer to your Yanmar service manual for model-specific guidance, such as for the 4Tnv88 or 3Tnv82A. Ensure fuel is clean and free of contaminants to prevent engine damage. Following the manual’s schedule helps avoid costly repairs and keeps your engine running smoothly. Always use genuine parts for reliability and safety.

Yanmar Engine Models and Their Manuals

Overview of Popular Yanmar Models (e.g., 4Tnv88, 3Tnv82A)

Yanmar offers a range of engine models, including the 4Tnv88 and 3Tnv82A, each with specific service manuals. These manuals provide detailed guidance for maintenance, repair, and troubleshooting, ensuring optimal performance and longevity. They are available as free PDF downloads, catering to both professionals and DIY enthusiasts. Each manual is tailored to the unique features of its respective engine model, making them indispensable for proper servicing and operation. Always use the correct manual for your specific Yanmar engine to ensure accuracy and safety.

Yanmar’s 4Tnv88 and 3Tnv82A are widely recognized for their reliability and performance. The 4Tnv88 model is known for its robust design, making it ideal for industrial applications, while the 3Tnv82A is praised for its fuel efficiency and compact size. Their service manuals provide detailed instructions for maintenance, troubleshooting, and repair, ensuring optimal operation. These models are popular in marine and agricultural sectors, with manuals available as free PDF downloads, offering comprehensive guidance for users to maintain and service their engines effectively.

Specific Features of Each Model’s Service Manual

Each Yanmar model’s service manual offers tailored guidance, ensuring precise maintenance for specific engines. The 4Tnv88 manual includes detailed repair procedures and troubleshooting for its turbocharged engine, while the 3Tnv82A focuses on fuel injection systems and emissions compliance. The 4JH3 series manual emphasizes marine diesel specifications, including cooling systems and electronic controls. These manuals provide model-specific diagrams, torque specifications, and diagnostic tips, making them essential for accurate servicing and optimal performance. They cater to both professional technicians and DIY enthusiasts, ensuring comprehensive coverage of each model’s unique features.

Legal and Safety Considerations

Respect copyright laws by using official Yanmar service manuals. Ensure compliance with safety protocols and manufacturer guidelines for proper engine servicing and legal operation.

Copyright and Usage Rights for Service Manuals

Yanmar service manuals are protected by copyright, and their usage is governed by specific legal rights. While many manuals are available for free download, they are intended for personal, non-commercial use. Unauthorized distribution or modification is prohibited. Always ensure you access manuals through official Yanmar channels or authorized distributors to comply with copyright laws. Proper usage helps maintain the integrity and reliability of the information provided.

Safety Warnings and Precautions in the Manual

Yanmar service manuals emphasize critical safety measures to prevent accidents. They outline proper handling of engine components, use of protective gear, and adherence to shutdown procedures. Warnings highlight risks associated with hot surfaces, moving parts, and fuel handling. Manuals stress the importance of following recommended practices to avoid injuries and ensure safe operation. Always prioritize these guidelines to maintain a secure working environment while servicing Yanmar engines.

Future Trends in Yanmar Service Manuals

Future Yanmar service manuals will likely feature digital and interactive formats, enhancing user experience with real-time updates. Integration with diagnostic tools and augmented reality will simplify complex procedures, offering step-by-step guidance and improving efficiency for technicians and enthusiasts alike.

Digital and Interactive Manuals

Digital Yanmar service manuals offer enhanced user experiences through interactive features like search functions, hyperlinks, and zoom capabilities. These manuals are accessible on various devices, ensuring convenience for technicians and enthusiasts. Integration with diagnostic tools enables real-time troubleshooting and data analysis. Digital formats reduce storage needs and environmental impact, making them a sustainable choice. Regular updates ensure users have the latest information, aligning with technological advancements and improving efficiency in engine maintenance and repair processes.

Integration with Modern Diagnostic Tools

Yanmar service manuals are increasingly integrated with modern diagnostic tools, enhancing troubleshooting efficiency. Digital manuals now include interactive features, such as error code lookup and real-time data analysis, streamlining repair processes. Compatibility with diagnostic software enables technicians to identify issues faster and access detailed repair procedures. This integration ensures accurate diagnostics, reducing downtime and improving overall engine performance. Manuals for models like the 4Tnv88 and 3Tnv82A often include advanced diagnostic guides, empowering users to resolve complex problems effectively.

Yanmar service manuals are essential resources for engine maintenance and repair, offering detailed guidance and troubleshooting solutions. Free PDF downloads ensure accessibility, helping users optimize engine performance and longevity while adhering to safety standards and manufacturer recommendations.

Final Thoughts on the Importance of Service Manuals

Yanmar service manuals are invaluable for ensuring proper engine maintenance and repair. They provide detailed, model-specific guidance, helping users avoid costly breakdowns and extend engine lifespan. Accessing free PDF downloads simplifies servicing, while adherence to safety protocols enhances overall efficiency. Whether for professionals or DIY enthusiasts, these manuals are essential for optimal performance and compliance with manufacturer standards. Prioritizing their use ensures reliability, safety, and long-term satisfaction with Yanmar engines.

Encouragement to Use Official Resources

Using official Yanmar service manuals ensures access to accurate, up-to-date information tailored to your engine model. These resources are designed to optimize performance, safety, and compliance with manufacturer standards. By downloading from trusted platforms like Southern Farm Equipment or Yanmar’s official website, you avoid risks associated with unauthorized or incomplete manuals. Prioritize reliability and legality by choosing official sources for your Yanmar service manual needs. This guarantees comprehensive guidance and support for maintaining your engine effectively.

the boy at the back of the class pdf

“The Boy at the Back of the Class” by Onjali Q․ Raúf is a poignant tale exploring themes of empathy, inclusion, and friendship․ The story follows a young boy navigating school life, highlighting the challenges faced by refugees and fostering understanding․ This award-winning book is a vital resource for classrooms, encouraging discussions on social issues and human kindness․

Overview of the Book and Its Significance

“The Boy at the Back of the Class” by Onjali Q․ Raúf is a heartwarming and thought-provoking novel that explores themes of friendship, empathy, and inclusion․ The story centers around a young refugee boy who joins a new class, highlighting the challenges he faces and the kindness of his peers․ This award-winning book has gained widespread acclaim for its ability to address complex social issues, such as refugee experiences and bullying, in an accessible way for young readers․ Its significance lies in its power to foster empathy and encourage discussions about acceptance and understanding in classrooms and beyond․ The book is often used as a valuable educational resource to promote inclusivity and social awareness․

Author Background: Onjali Q․ Raúf

Onjali Q․ Raúf is a British author and human rights activist, known for her compelling storytelling and advocacy for social justice․ Her work highlights marginalized voices, inspiring empathy and change․

Biography and Writing Style

Onjali Q․ Raúf is a British author and human rights campaigner, born to a Bangladeshi family․ She draws inspiration from her heritage and advocacy work․ Her writing style is lyrical, blending humor with emotional depth․ Raúf’s stories are accessible yet profound, making complex issues relatable for young readers․ Her commitment to social justice shines through her characters, fostering empathy and understanding․ With a background in psychology and education, Raúf crafts narratives that resonate across generations․ Her unique voice has earned her critical acclaim and a loyal readership, cementing her place in contemporary children’s literature․ Her work continues to inspire meaningful conversations and reflections․

Plot Summary and Key Themes

The Boy at the Back of the Class follows a young boy navigating school life and friendship․ Themes of empathy, inclusion, and social justice are central, fostering understanding and kindness․

Central Characters and Their Development

The story centers around a young refugee boy who joins a new class, struggling to adapt due to language barriers and cultural differences․ His classmates, initially unsure how to interact with him, gradually develop empathy and understanding․ Through their shared experiences, the characters evolve, showcasing growth in compassion and inclusivity․ The boy’s resilience and kindness inspire those around him, fostering meaningful connections and challenging stereotypes․ His journey highlights the importance of human kindness and the impact of embracing diversity, making him a powerful symbol of hope and acceptance in a complex world․

Educational Resources and Activities

Educational resources for “The Boy at the Back of the Class” include classroom activities, discussion guides, and lesson plans․ These tools help teachers engage students with the story’s themes, fostering empathy and understanding through creative tasks and reflective exercises;

Classroom Discussion Ideas and Lesson Plans

Classroom activities for “The Boy at the Back of the Class” include group discussions on empathy, kindness, and inclusion․ Teachers can assign reflective writing tasks, encouraging students to explore the refugee experience․ Role-playing scenarios help pupils understand social dynamics and bullying impacts․ Lesson plans incorporate creative tasks, such as designing welcome kits for new students or crafting stories about friendship․ These activities promote critical thinking and collaboration, fostering a deeper connection to the story’s themes․ Educators can also use guided questions to spark conversations about diversity and acceptance, creating a safe space for open dialogue and emotional growth․

Themes of Inclusion and Empathy

“The Boy at the Back of the Class” powerfully explores themes of inclusion, empathy, and kindness, highlighting the refugee experience and the importance of human connection in fostering understanding․

How the Book Addresses Social Issues

“The Boy at the Back of the Class” tackles pressing social issues such as refugee crises, bullying, and social exclusion․ The story sheds light on the challenges faced by displaced children, emphasizing their struggles to adapt to new environments․ It highlights the importance of empathy and understanding in breaking down barriers․ The narrative encourages readers to reflect on their own behaviors and attitudes toward others․ By portraying the boy’s resilience and the kindness of his peers, the book advocates for inclusivity and compassion․ Its thought-provoking themes resonate with contemporary issues, making it a powerful tool for fostering empathy and social awareness in both children and adults․

Character Analysis: The Boy at the Back of the Class

The boy at the back of the class is a resilient refugee navigating a new school, showcasing quiet strength and emotional depth that inspire empathy and understanding in his journey․

Psychological Insights and Emotional Depth

The boy at the back of the class embodies a profound emotional journey, revealing the silent struggles of a refugee navigating an unfamiliar world․ His quiet resilience and determination to adapt to a new school highlight the psychological impact of displacement․ The narrative delves into his inner world, showcasing his longing for belonging and connection․ Through his experiences, readers gain insight into the emotional toll of isolation and the importance of empathy․ The story’s emotional depth encourages reflection on the human capacity for kindness and understanding, making it a powerful tool for fostering compassion in readers of all ages․

Teaching Strategies for the Book

The boy at the back of the class offers a deeply moving exploration of a refugee’s inner world, revealing the emotional scars of displacement and resilience․ His journey highlights the psychological struggles of adapting to a new environment, showcasing his silent strength and longing for connection․ The narrative provides profound insights into the emotional toll of isolation and the universal desire for belonging․ Through his experiences, readers are invited to reflect on empathy and compassion, making the story a powerful catalyst for emotional growth and understanding․

Engaging Students and Encouraging Reflection

Teaching strategies for “The Boy at the Back of the Class” focus on fostering empathy and critical thinking․ Group discussions and reflective exercises help students connect with the protagonist’s journey, exploring themes of inclusion and kindness․ Creative writing activities, such as writing from the boy’s perspective, deepen understanding of his emotions and challenges․ Teachers can also incorporate role-playing to simulate real-life scenarios, encouraging students to consider how they would respond․ These approaches not only engage students but also promote a culture of compassion and open-mindedness, preparing them to address social issues thoughtfully․

Reception and Reviews

“The Boy at the Back of the Class” has received widespread acclaim for its heartfelt storytelling and poignant themes․ Readers praise its ability to foster empathy and spark meaningful discussions about inclusion and kindness․ The book has been recognized with numerous awards, solidifying its place as a modern classic in children’s literature․ Critics highlight its emotional depth and relevance to contemporary social issues, making it a must-read for both students and educators․ Its impact continues to resonate, inspiring a deeper understanding of diversity and compassion․

What Readers and Critics Are Saying

Readers and critics alike have praised “The Boy at the Back of the Class” for its emotional depth and thought-provoking narrative․ Many highlight its ability to address complex social issues, such as refugee experiences and bullying, with sensitivity and authenticity․ The story has resonated deeply with educators, who appreciate its relevance to classroom discussions on empathy and inclusion․ Critics commend the book for its well-developed characters and its capacity to inspire reflection in young readers․ The novel has garnered widespread acclaim for its heartfelt storytelling, making it a cherished read for both children and adults․ Its impact continues to grow, fostering meaningful conversations about kindness and understanding․

Cultural and Social Relevance

“The Boy at the Back of the Class” holds significant cultural relevance, addressing contemporary issues like refugee integration and social exclusion․ Its themes of empathy and kindness resonate universally, fostering a deeper understanding of diverse experiences and promoting inclusivity in schools and communities․

How the Book Resonates with Contemporary Issues

“The Boy at the Back of the Class” resonates deeply with contemporary issues, particularly the refugee crisis and social exclusion․ The story humanizes the struggles of displaced children, encouraging readers to empathize with their experiences․ By addressing themes of isolation and belonging, the book highlights the challenges faced by refugees in integrating into new societies․ Its portrayal of kindness and solidarity offers a powerful counter-narrative to xenophobia and discrimination․ Educators often use the book to spark discussions on inclusivity and social responsibility, making it a vital tool for fostering understanding in classrooms․ Its relevance to modern societal challenges ensures its enduring impact on young readers and educators alike․

“The Boy at the Back of the Class” leaves a lasting impact, inspiring empathy and kindness․ Its timeless message encourages readers to embrace diversity and support one another, fostering a more inclusive world․

The Lasting Impact of the Story

“The Boy at the Back of the Class” resonates deeply, leaving readers with a profound appreciation for empathy and inclusion․ The story’s ability to humanize complex social issues fosters meaningful conversations about refugee experiences and kindness․ Teachers and students alike find the narrative a powerful tool for reflection, encouraging personal growth and a broader understanding of global challenges․ The book’s message of hope and connection remains with readers long after the final page, inspiring positive change in both individuals and communities․ Its impact is a testament to the power of storytelling in shaping a more compassionate world․

jewish calendar 2024 pdf with holidays

The Jewish Calendar 2024 PDF is a comprehensive guide to Hebrew dates, holidays, and traditions, offering a lunar-based system for planning and observance in 5784.

Overview of the Jewish Calendar System

The Jewish calendar is a lunisolar system, combining lunar months with solar adjustments to align with seasonal cycles. Each month begins with Rosh Chodesh, and the year 5784 spans 12 or 13 months. Holidays like Passover and Purim are fixed to specific dates, while others, such as Rosh Hashanah, mark the new year. This system ensures accurate tracking of Hebrew dates, zmanim, and observances, blending tradition with practicality for communal and individual use.

Significance of the Year 5784 in the Jewish Calendar

Year 5784 holds spiritual and cultural importance, marking the beginning of a new cycle in Jewish tradition. It signifies reflection, renewal, and community connection. Major holidays like Rosh Hashanah and Yom Kippur fall in this year, emphasizing repentance and forgiveness. The calendar also includes joyous celebrations such as Passover and Purim, fostering unity and cultural preservation. This year is a time for both solemn observance and festive joy, guiding Jewish communities worldwide in their faith and heritage.

Structure of the Jewish Year 2024

The Jewish Year 2024, or 5784, follows a lunar-based calendar with 12 or 13 months, beginning in March 2024. It includes major festivals and observances, guiding communal life.

Hebrew Months and Their Corresponding Gregorian Dates

The Jewish Calendar 2024 aligns Hebrew months with Gregorian dates, starting in March 2024. Tishrei (Sept-Oct) includes Rosh Hashanah and Yom Kippur. Cheshvan (Oct-Nov) follows, with Kislev (Nov-Dec) hosting Hanukkah. Tevet (Dec-Jan) marks the end of Hanukkah, while Shvat (Jan-Feb) includes Tu BiShvat. Adar I (Feb-Mar 2024) precedes Purim, and Adar II (Mar 2024) ensures a leap year adjustment. Nisan (Mar-Apr) brings Passover, Iyar (Apr-May) includes Lag BaOmer, Sivan (May-Jun) features Shavuot, Tamuz (Jun-Jul) begins the Three Weeks, and Av (Jul-Aug) commemorates Tisha B’Av. Elul (Aug-Sep) prepares for the High Holy Days, completing the 5784 cycle.

Key Jewish Holidays and Observances in 2024

In 2024, significant Jewish holidays include Rosh Hashanah (Oct 2-4), marking the New Year, and Yom Kippur (Oct 11), the Day of Atonement. Sukkot (Oct 16-23) follows, with Shemini Atzeret and Simchat Torah concluding the High Holy Days. Hanukkah (Dec 25-Jan 1) celebrates the rededication of the Temple. Purim (Mar 24-25) commemorates the salvation of Persian Jews, while Passover (Apr 22-30) honors the Exodus. Shavuot (Jun 11-13) marks the Torah’s giving, and Tisha B’Av (Jul 23) mourns Jerusalem’s destruction. These holidays are central to Jewish tradition and observance in 5784.

Downloading the Jewish Calendar 2024 PDF

The Jewish Calendar 2024 PDF is available for free download, featuring Hebrew dates, holidays, and traditions, perfect for planning and observance in 5784.

Free Printable Jewish Calendar 2024 Templates

Download free printable Jewish Calendar 2024 templates, available in PDF, Word, or image formats. These customizable templates include Hebrew dates, holidays, and Shabbat times for 5784. Perfect for personal or professional use, they allow you to plan and organize your year while staying connected to Jewish traditions. Many templates are editable, enabling you to add personal notes or events. Print them on standard paper for a convenient and user-friendly calendar. Find these templates online and stay updated with Jewish holidays and observances in 2024.

Features of the 2024 Jewish Calendar PDF

The 2024 Jewish Calendar PDF offers a detailed and organized layout, featuring Hebrew and Gregorian dates, major holidays, and Shabbat times. It includes zmanim, Torah portions, and minor observances, making it a versatile tool for religious and cultural planning. The PDF is formatted for easy printing on standard paper and includes customizable templates for personal use. It also highlights significant dates like Rosh Chodesh, Yom Kippur, and Passover, ensuring comprehensive coverage of Jewish traditions and events throughout 5784.

Cultural and Religious Significance of Jewish Holidays

Jewish holidays blend reflection, joy, and tradition, connecting individuals to their heritage and faith, while fostering community and spiritual growth through sacred rituals and observances.

Major Holidays in 2024, Such as Passover, Purim, and Rosh Hashanah

In 2024, major Jewish holidays include Passover (April 22–30), a week-long celebration of freedom, and Purim (March 24–25), a festive holiday of joy and giving. Rosh Hashanah (October 2–4) marks the Jewish New Year, beginning a period of reflection. Other key observances include Yom Kippur (October 11), Sukkot (October 16–23), and Hanukkah (December 25–January 2), each carrying unique traditions and cultural practices that enrich Jewish life and heritage.

Traditions and Observances Associated with Jewish Holidays

Jewish holidays are enriched with diverse traditions, such as lighting the Hanukkah menorah, reciting the Passover Haggadah, and fasting on Yom Kippur. Families gather for festive meals, like Rosh Hashanah’s apples with honey, symbolizing hope for a sweet year. Many observances include synagogue services, while others, like Purim, involve costume parades and charity acts. These customs strengthen communal bonds and deepen spiritual connections, preserving Jewish heritage across generations. Each tradition carries meaningful rituals that reflect the holiday’s historical and cultural significance. These practices are detailed in the 2024 Jewish calendar.

Shabbat and Special Shabbatot in 2024

Shabbat, observed weekly from Friday sunset to Saturday nightfall, is a sacred day of rest. Special Shabbatot, like Shabbat Shuvah, enhance spiritual reflection and communal gatherings.

Weekly Shabbat Times and Candle-Lighting Times

Shabbat begins at sunset each Friday and ends after sunset on Saturday. Candle-lighting times vary by location and are calculated based on the solar calendar. The Jewish Calendar 2024 PDF provides precise zmanim (halachic times) for Shabbat, including candle-lighting, Maariv, and Shema times. These times are essential for observance and are available for cities worldwide. The calendar also highlights special Shabbatot, ensuring users can plan spiritually significant moments. Download the PDF to access accurate and detailed Shabbat schedules for 2024.

Special Shabbatot and Their Importance in the Jewish Calendar

Special Shabbatot are significant in the Jewish Calendar 2024 PDF, marking unique religious and cultural moments. These include Shabbat Shuvah, Shabbat Hagadol, and Shabbat Zachor, each tied to major Jewish holidays. The calendar highlights these dates, offering insights into their traditions and rituals. Observing these Shabbatot enriches spiritual practice and connects individuals to Jewish heritage. The PDF ensures users never miss these meaningful occasions, enhancing their yearly observance with historical and cultural context. Download to stay informed and engaged throughout 5784.

Importance of Accurate Jewish Calendar Information

Accurate Jewish Calendar 2024 PDF ensures proper observance of holidays, Zmanim, and Halachic times, essential for religious practice and community unity throughout the year 5784.

Halachic Times and Zmanim in the Jewish Calendar

Halachic times and Zmanim are crucial for Jewish observance, dictating prayer schedules and ritual obligations. The Jewish Calendar 2024 PDF provides precise timings for Shacharit, Mincha, and Maariv prayers, as well as candle-lighting for Shabbat and holidays. Key dates include Rosh Chodesh, the 17th of Tammuz, and Tisha B’Av, ensuring adherence to fasting and festive rituals. These timings are essential for fulfilling religious duties accurately, reflecting the lunar-based system’s importance in Jewish practice throughout 5784.

Yom Kippur, Rosh Chodesh, and Other Significant Dates

Yom Kippur, the holiest day in the Jewish calendar, is a time for atonement and reflection, falling in October 2024. Rosh Chodesh marks the start of each Hebrew month, often celebrated with special prayers and customs. Other significant dates include Purim, Passover, and Shavuot, which are detailed in the Jewish Calendar 2024 PDF. These events, rooted in tradition, provide a framework for spiritual and communal observance throughout the year 5784.

Customizing Your Jewish Calendar 2024

Download free printable Jewish calendar 2024 templates, offering editable PDFs for personal use. Include both Hebrew and Gregorian dates, making it perfect for personal or professional planning needs.

Editable Jewish Calendar Templates for Personal Use

Download free editable Jewish calendar templates for 2024 in PDF, Word, or image formats. Customize with Hebrew and Gregorian dates, holidays, and Shabbat times. Perfect for personal, family, or organizational use, these templates allow you to tailor the calendar to suit your needs. Print or share digitally, ensuring all important dates are included. Easily modify colors, fonts, and layouts to create a personalized schedule for the year 5784.

Including Both Hebrew and Gregorian Dates in Your Calendar

Enhance your Jewish Calendar 2024 by including both Hebrew and Gregorian dates, ensuring seamless integration of cultural and civil schedules. This dual-system approach allows for easy reference between Jewish holidays and international dates, perfect for personal, professional, or educational planning. The combined format helps users align traditional observances with modern calendars, making it ideal for diverse audiences seeking to track both systems efficiently throughout the year 5784.

The Jewish Calendar 2024 PDF is an essential tool for staying connected to traditions, offering a clear and organized way to track holidays and observances in 5784.

Final Thoughts on the Jewish Calendar 2024 PDF

The Jewish Calendar 2024 PDF is a valuable resource, combining tradition and convenience; It offers a detailed schedule of holidays, Shabbat times, and Hebrew dates, making it easy to plan and observe Jewish traditions throughout the year. Whether for personal use or community planning, this calendar ensures accuracy and accessibility, providing a meaningful way to connect with cultural and religious heritage in 5784.

How to Make the Most of Your Jewish Calendar in 2024

Maximize your Jewish Calendar 2024 by integrating it into daily life for planning and reflection. Use it to track Hebrew dates, prepare for holidays, and set reminders for Shabbat candle-lighting times. Share it with family or community to align traditions and observances. Customize templates to suit personal or organizational needs, ensuring cultural and religious practices remain central. This tool bridges heritage and modernity, fostering connection and continuity throughout the year.

liftmaster csl24ul manual pdf free download

The LiftMaster CSL24UL is a high-traffic commercial slide gate operator designed for vehicular gates‚ offering 24VDC operation‚ Security 2.0‚ and fire door compliance features.

Overview of the LiftMaster CSL24UL Gate Operator

The LiftMaster CSL24UL is a high-traffic commercial slide gate operator designed for vehicular gates‚ featuring 24VDC operation and compatible with Security 2.0 technology. It ensures fire door compliance and includes a manual disconnect for emergencies. Built for durability‚ it supports Class I‚ II‚ III‚ and IV vehicular applications. The operator weighs 140 lbs and requires professional installation. Its accessory power output is 24VDC‚ 500mA‚ making it suitable for high-demand commercial settings. The manual emphasizes safety and proper maintenance for optimal performance.

Importance of the Manual for Installation and Operation

The manual is essential for proper installation and operation of the LiftMaster CSL24UL‚ providing detailed instructions and safety guidelines. It ensures compliance with fire door regulations and outlines troubleshooting steps. The manual covers setup‚ maintenance‚ and repair procedures‚ emphasizing the need for a trained technician. Adhering to the manual prevents malfunctions and hazards‚ ensuring the gate operates efficiently and safely. Regular maintenance‚ as specified‚ prolongs the operator’s lifespan and maintains security features like Security 2.0.

Why You Need the LiftMaster CSL24UL Manual

The manual is crucial for proper installation‚ safety‚ and troubleshooting. It provides detailed instructions to understand features‚ ensure compliance‚ and maintain optimal performance of your gate operator.

Installation Requirements and Safety Precautions

Proper installation of the LiftMaster CSL24UL requires adherence to specific guidelines to ensure safety and functionality. The operator is designed for vehicular gates only‚ not pedestrian use‚ and must be installed by a trained technician. It is intended for Class I‚ II‚ III‚ and IV vehicular slide gate applications. Safety symbols and signal words in the manual alert users to potential hazards. Always follow safety precautions to avoid serious injury or death. Regular maintenance and inspections are critical to ensure optimal performance and compliance with safety standards.

Troubleshooting Common Issues

Troubleshooting the LiftMaster CSL24UL involves addressing common issues like product ID failure‚ which requires unplugging the harness and reconnecting after a brief wait. The manual disconnect feature allows gates to be opened manually during power loss. Battery maintenance is crucial to ensure uninterrupted operation. Regular checks for firmware updates and proper alignment of safety sensors can prevent malfunctions. Consulting the manual or contacting customer support is recommended for persistent issues to ensure safe and effective resolution.

Understanding Features and Specifications

The LiftMaster CSL24UL features 24VDC operation‚ providing reliable power for high-traffic commercial gates. It includes Security 2.0 for encrypted signal transmission and compliance with fire door standards. The operator supports Class I‚ II‚ III‚ and IV vehicular gate applications‚ ensuring versatility. Weighing 140 lbs‚ it offers accessory power with a 500mA output. The manual highlights its quick close feature and compatibility with the myQ app for remote monitoring‚ enhancing security and convenience for users.

Key Features of the LiftMaster CSL24UL

The LiftMaster CSL24UL is a high-traffic commercial slide gate operator with 24VDC operation‚ Security 2.0 for enhanced security‚ and fire door compliance for emergency access solutions.

High-Traffic Commercial Slide Gate Operator

The LiftMaster CSL24UL is designed for high-traffic commercial applications‚ ensuring smooth and reliable operation for vehicular gates. Its robust construction and advanced features make it suitable for demanding environments. The operator is compatible with Class I‚ II‚ III‚ and IV vehicular gate applications‚ ensuring versatility for various commercial needs. With Security 2.0 technology‚ it provides enhanced security and extended range for remote access. The manual offers detailed installation‚ operation‚ and troubleshooting guides‚ ensuring optimal performance and compliance with safety standards. Download the free PDF manual for comprehensive setup and maintenance instructions.

24VDC Operation and Accessory Power

The LiftMaster CSL24UL operates on a 24VDC system‚ ensuring efficient and reliable performance for high-traffic commercial gates. It features a 500mA accessory power output‚ supporting additional devices like sensors or lights. This design allows for seamless integration with other gate accessories‚ enhancing functionality without compromising performance. The manual provides detailed instructions for configuring the 24VDC system and accessory power‚ ensuring safe and optimal operation. Download the free PDF manual for guidance on setup and maintenance.

Security 2.0 and Fire Door Compliance

The LiftMaster CSL24UL features Security 2.0 technology‚ ensuring encrypted signals for enhanced protection against unauthorized access. It also complies with fire door standards‚ enabling automatic gate opening during power loss or emergencies. This ensures safe evacuation and fire department access. The manual details how to configure these features for optimal security and compliance‚ providing peace of mind for commercial applications. Download the free PDF manual to learn more about these advanced safety and security functionalities.

Installation and Setup Guide

The LiftMaster CSL24UL manual provides detailed step-by-step instructions for installation‚ including safety symbols and post-mounting plate setup. Ensure proper configuration for optimal performance and compliance.

Step-by-Step Installation Instructions

The LiftMaster CSL24UL manual provides a comprehensive guide for installing the gate operator. Begin by ensuring all safety precautions are followed‚ such as disconnecting power and wearing protective gear. Mount the operator securely‚ ensuring proper alignment with the gate. Connect the necessary wiring and accessories‚ referencing the diagram for clarity. Test the operator to ensure smooth operation and adjust settings as needed. Refer to the manual for specific instructions on post-mounting plates and internet gateway setup. Always follow the manufacturer’s guidelines for optimal performance and safety.

Post-Mounting Plate and Internet Gateway Setup

After installing the operator‚ attach the post-mounting plate securely to ensure proper alignment and stability. Connect the internet gateway to the router using an Ethernet cable and power it on. Download and use the myQ app to configure remote monitoring and control. Follow the manual’s instructions to link the gateway to the post-mounting plate‚ enabling advanced features like real-time notifications and system updates. Test the setup to ensure seamless connectivity and functionality.

Safety and Compliance

The LiftMaster CSL24UL manual emphasizes safety with clear symbols and signal words‚ ensuring compliance with Class I‚ II‚ III‚ and IV vehicular gate applications and UL standards.

Safety Symbols and Signal Words

The LiftMaster CSL24UL manual includes essential safety symbols and signal words to alert users of potential hazards. These symbols are crucial for understanding proper installation‚ operation‚ and maintenance procedures. They help prevent accidents by clearly indicating risks associated with electrical components‚ mechanical parts‚ and gate movement. Adherence to these symbols ensures compliance with safety standards‚ such as UL 325‚ and promotes a secure environment for users and technicians. The manual emphasizes that only trained professionals should perform installations and repairs to maintain safety and system integrity.

Class I‚ II‚ III‚ and IV Vehicular Gate Applications

The LiftMaster CSL24UL gate operator is designed for use in Class I‚ II‚ III‚ and IV vehicular gate applications‚ ensuring compatibility with various traffic levels and gate types. Class I is for light vehicular traffic‚ such as residential use‚ while Class IV is for heavy-duty‚ high-traffic commercial applications. The manual provides specific guidelines for each class‚ ensuring safe and proper installation tailored to the gate’s intended use. This classification system helps users select the right operator for their needs‚ guaranteeing reliability and compliance with safety standards.

Troubleshooting and Maintenance

Regular maintenance and troubleshooting ensure optimal performance. The manual outlines steps for common issues‚ such as power failures and sensor malfunctions‚ and provides maintenance tips.

Common Issues and Solutions

Common issues with the LiftMaster CSL24UL include power failures‚ sensor malfunctions‚ and manual disconnect problems. Solutions involve checking power connections‚ realigning sensors‚ and ensuring proper battery maintenance. The manual provides detailed troubleshooting steps for these issues‚ ensuring smooth operation and addressing potential faults promptly. Regular maintenance‚ as outlined in the guide‚ helps prevent these problems and extends the operator’s lifespan. Always refer to the manual for specific instructions and safety precautions when resolving issues.

Manual Disconnect and Battery Maintenance

The LiftMaster CSL24UL features a manual disconnect option‚ allowing gates to be opened manually during power outages. This ensures continued access and security. Battery maintenance is also critical‚ with guidelines in the manual for checking charge levels and ensuring reliable backup power. Regular inspection of battery terminals and connections prevents operational disruptions. Proper care extends the lifespan of the system‚ ensuring consistent performance and safety. Always follow the manual’s instructions for these procedures to maintain optimal functionality.

Downloading the Manual

The LiftMaster CSL24UL manual is available for free download in English‚ French‚ and Spanish. It provides essential installation and troubleshooting guides for optimal gate operation.

Free PDF Download Options

The LiftMaster CSL24UL manual is available for free download in PDF format from the official Chamberlain Group website. Users can access the manual in English‚ French‚ or Spanish. The PDF document includes detailed installation instructions‚ troubleshooting guides‚ and safety precautions. Simply visit the LiftMaster support page‚ select your preferred language‚ and download the manual instantly. This convenient option ensures you have all the necessary information to install‚ operate‚ and maintain your CSL24UL gate operator effectively.

Language Availability: English‚ French‚ Spanish

The LiftMaster CSL24UL manual is offered in English‚ French‚ and Spanish‚ ensuring accessibility for a diverse range of users. Each language version provides comprehensive instructions‚ safety guidelines‚ and technical specifications‚ making it easier for professionals and homeowners to understand and utilize the gate operator’s features effectively. This multilingual support reflects LiftMaster’s commitment to accommodating global users and ensuring seamless installation and operation worldwide.

Additional Resources

Explore additional resources‚ including user guides‚ specifications‚ and setup documents. Discover compatible accessories and customer support information for enhanced functionality and troubleshooting.

Compatible Accessories and Parts

Enhance your LiftMaster CSL24UL experience with compatible accessories like the LiftMaster 882LMW WiFi control panel and internet gateway for remote monitoring. Explore additional parts such as sensing devices‚ keypads‚ and transmitters. LiftMaster offers a range of accessories designed to integrate seamlessly with the CSL24UL‚ ensuring optimal performance and security. Visit the official LiftMaster website or authorized dealers for genuine parts and accessories to maintain your gate operator’s reliability and functionality. LiftMaster customer support provides guidance on selecting the right components for your setup.

LiftMaster Customer Support and Warranty Information

LiftMaster offers comprehensive customer support for the CSL24UL‚ including a dedicated hotline at (800) 528-6563‚ available Monday through Friday. The product is backed by a robust warranty‚ ensuring reliability and performance. Customers can access detailed support resources‚ including manuals‚ troubleshooting guides‚ and the myQ app for seamless integration. LiftMaster’s commitment to customer satisfaction extends through its extensive network of authorized dealers and technicians‚ providing assistance for installation‚ maintenance‚ and repairs. This ensures your CSL24UL operates efficiently and securely for years to come.

The LiftMaster CSL24UL manual is an essential resource for efficient and secure gate operation‚ ensuring proper installation‚ troubleshooting‚ and maintenance for optimal performance and longevity.

Final Thoughts on Using the LiftMaster CSL24UL Manual

The LiftMaster CSL24UL manual is instrumental for installing‚ operating‚ and maintaining your gate operator effectively. It provides detailed guidance on safety‚ troubleshooting‚ and advanced features like Security 2.0. By following the manual‚ users can ensure compliance with fire safety standards and optimize the operator’s performance. Regular maintenance‚ as outlined‚ prolongs the system’s lifespan. Downloading the free PDF in English‚ French‚ or Spanish ensures easy access to critical information‚ making it a vital resource for professionals and homeowners alike.

gospel in the stars pdf

The “Gospel in the Stars” theory explores the idea that the constellations and zodiac signs symbolize the story of redemption through Jesus Christ. Popularized by scholars like Joseph A. Seiss and E.W. Bullinger, this concept suggests that the heavens foretell the Gospel message, with each star group representing stages of God’s plan. Rooted in ancient astronomy and biblical symbolism, it offers a unique perspective on the connection between the cosmos and Christian theology.

Overview of the Gospel in the Stars Theory

The Gospel in the Stars theory proposes that the constellations and zodiac signs symbolize the story of redemption through Jesus Christ. It suggests that God originally revealed His plan of salvation through the celestial bodies, with each star group representing key events in the Gospel narrative. The theory connects ancient astronomy to biblical themes, arguing that the heavens foretell the coming of a Savior, His life, death, and resurrection. While intriguing, this concept remains speculative and is not universally accepted by scholars or theologians.

Historical Background and Development

The Gospel in the Stars theory traces its roots to ancient celestial observations, with early civilizations interpreting constellations as divine messages. The modern concept gained prominence in the 19th century through works like Joseph A. Seiss’s The Gospel in the Stars (1882) and E.W. Bullinger’s The Witness of the Stars (1893). These authors popularized the idea that the zodiac and constellations symbolize the story of redemption through Jesus Christ, drawing parallels between star groups and biblical narratives. Their work built on earlier astronomical and theological traditions, shaping the theory into its current form.

Key Authors and Their Contributions

Joseph A. Seiss and E.W. Bullinger are pivotal figures, with Seiss’s The Gospel in the Stars (1882) and Bullinger’s The Witness of the Stars (1893) popularizing the theory.

Joseph A. Seiss and His Work “The Gospel in the Stars”

Joseph A. Seiss, a 19th-century scholar, popularized the “Gospel in the Stars” theory through his 1882 book, which explores the connection between astronomy and theology. Seiss argued that the constellations and zodiac signs symbolize the story of redemption, with each star group representing stages of God’s plan. His work, widely read and influential, bridges ancient celestial observations with Christian narratives, offering a unique perspective on how the heavens foretell the Gospel message of Jesus Christ. The book’s enduring popularity highlights its significance in this field.

E.W. Bullinger and “The Witness of the Stars”

E.W. Bullinger’s 1893 work, “The Witness of the Stars,” is a companion to Seiss’s research, delving into the celestial story of redemption. Bullinger meticulously analyzed the zodiac and constellations, arguing they symbolize the Gospel narrative through ancient star names and configurations. His work emphasizes typology, linking astronomical observations to biblical prophecy and the life of Christ. Bullinger’s detailed approach enriched the theory, offering profound insights into the cosmic message of salvation, making his book a cornerstone of the “Gospel in the Stars” tradition.

Biblical Foundations of the Gospel in the Stars

The theory posits that the constellations and zodiac signs reflect biblical themes of redemption and divine promises, symbolizing the life, death, and resurrection of Jesus Christ.

The Story of Redemption Through Constellations

The constellations, as per the “Gospel in the Stars” theory, depict the story of redemption from creation to Christ’s triumph. Starting with Virgo, the Virgin, representing the promise of a Savior, and culminating in Leo, the Lion of Judah, symbolizing Christ’s victory. The twelve zodiac signs allegedly illustrate key events in God’s redemptive plan, from the fall of humanity to the ultimate restoration through Jesus’ life, death, and resurrection, reflecting a cosmic narrative of salvation.

Specific Biblical References and Symbolism

The “Gospel in the Stars” theory aligns constellations with biblical narratives, such as the Virgin (Virgo) symbolizing Mary and the coming Messiah. The Lion of Judah (Leo) represents Christ’s triumph, while the Scorpion (Scorpio) reflects the serpent’s defeat in Genesis 3:15. These star groups are interpreted as visual parables, reinforcing themes of sacrifice, redemption, and resurrection. Specific biblical references, like Psalm 19:1-6, highlight the heavens declaring God’s glory, tying celestial symbolism to the Gospel message of salvation through Jesus Christ.

The Zodiac and Its Connection to the Gospel

The zodiac, comprising twelve signs, is seen as a symbolic narrative of redemption. Its ancient structure, set by God, reflects the Gospel story of salvation through Jesus Christ.

The Twelve Signs of the Zodiac and Their Meaning

The twelve zodiac signs are believed to symbolize the Gospel narrative, with each representing a stage in God’s redemption plan. Starting with Virgo, the virgin, the signs depict the coming Messiah, His life, death, resurrection, and ultimate triumph. Each constellation, such as Leo as the Lion of Judah, reflects biblical themes, forming a celestial story of salvation. This ancient star map is seen as a divine revelation of Christ’s redemptive work, aligning the heavens with the Gospel message.

Symbolism of Planets and Their Roles in the Narrative

The planets in the solar system are also interpreted as symbols within the Gospel in the Stars theory. Jupiter, often called the “King planet,” represents the Messiah’s reign, while Mars, as the “Warrior,” signifies Christ’s victories. Venus, the “Morning Star,” symbolizes Jesus as the light of the world. Mercury, the “Messenger,” embodies the proclamation of the Gospel. Saturn, the “Savior,” reflects divine judgment and redemption. Uranus and Neptune are seen as symbols of heavenly intervention and the Holy Spirit’s work, enriching the cosmic narrative of salvation.

Controversies and Criticisms

The Gospel in the Stars theory faces criticism for lacking biblical and scientific basis, with scholars arguing it distracts from Scripture’s central message of salvation.

Challenges to the Gospel in the Stars Theory

Scholars like Danny Faulkner argue the theory lacks biblical and scientific support, as the zodiac’s origins are in ancient mythology, not Christianity. Critics highlight that the constellations’ interpretations vary widely, and no consensus exists among Christians about its validity. Additionally, the theory’s reliance on symbolism rather than direct biblical teaching raises concerns about its authority and relevance in understanding God’s plan of redemption.

Responses to Criticisms from Scholars and Theologians

Proponents argue the theory enhances faith by revealing God’s redemptive plan in creation. They emphasize symbolic, not literal, connections between stars and Scripture. While acknowledging cultural influences, supporters contend the original zodiac was a divine blueprint later corrupted. The theory, they claim, aligns with biblical themes like sacrifice and redemption, offering a deeper appreciation of God’s sovereignty without contradicting Scripture. It serves as a complementary, not primary, tool for understanding the Gospel.

Cultural and Artistic Impact

The “Gospel in the Stars” has inspired artists, writers, and musicians, blending symbolism from the zodiac with biblical themes. It enriches cultural expressions, reflecting the divine narrative.

Influence on Art, Literature, and Music

The “Gospel in the Stars” theory has profoundly influenced artistic expression, inspiring hymns, worship songs, and literary works that reflect its cosmic symbolism. Visual artists often depict zodiac constellations intertwined with biblical narratives, creating vivid representations of redemption. Writers have crafted novels and poems that weave celestial themes with spiritual truths. Musicians, too, draw inspiration from the theory, composing pieces that echo the divine story written in the stars. This cultural impact highlights the enduring connection between faith and astronomy.

Modern Interpretations and Popular Culture

Today, the “Gospel in the Stars” theory continues to inspire modern media, from films to books, exploring its symbolic connections. Contemporary authors and ministries reinterpret the zodiac’s biblical links for new audiences. Digital platforms and social media amplify its reach, sparking curiosity and debate. Worship music and artistic projects often draw from its themes, blending celestial imagery with spiritual truths. This timeless theory remains a fascinating bridge between astronomy, culture, and faith, captivating minds in fresh and creative ways.

How to Study the Gospel in the Stars

Begin by reading foundational works like Seiss’s “The Gospel in the Stars” and Bullinger’s “The Witness of the Stars.” Study constellation symbolism, biblical connections, and ancient astronomy. Utilize online resources, star charts, and theological commentaries to deepen understanding. Engage with communities or study groups exploring this theory to gain varied perspectives and insights.

Resources and Tools for Further Exploration

Key resources include Joseph A. Seiss’s “The Gospel in the Stars” and E.W. Bullinger’s “The Witness of the Stars,” available in PDF formats online. Star charts and astronomy software can help visualize constellations. Biblical commentaries and theological works provide deeper insights. Online courses, forums, and study groups dedicated to the topic offer interactive learning. Additionally, downloadable guides and e-books summarize the theory for easy reference, aiding in a comprehensive understanding of the Gospel in the Stars narrative.

Practical Steps for Understanding the Theory

To explore the “Gospel in the Stars,” begin by studying foundational texts like Seiss’s “The Gospel in the Stars” and Bullinger’s “The Witness of the Stars.” Use star charts to identify constellations and their biblical connections. Analyze symbolism in each zodiac sign, linking them to redemption themes. Examine the roles of planets like Jupiter and Venus in the narrative. Cross-reference with biblical passages to deepen understanding. Engage in discussions or online forums to gain insights and clarify doubts, fostering a comprehensive grasp of the theory.

The “Gospel in the Stars” offers a captivating perspective on how celestial bodies may symbolize the story of redemption. Rooted in ancient astronomy and biblical symbolism, this theory invites deeper reflection on the interconnectedness of faith and the cosmos. While debates persist, its enduring appeal lies in its unique blend of theology and stargazing, inspiring curiosity and wonder about God’s divine plan as revealed through creation. This theory remains a fascinating topic for those exploring the intersection of science and spirituality.

kantime medicare visit chart pdf

The Kantime Medicare Visit Chart PDF is a crucial resource for documenting client interactions, ensuring compliance with Medicaid requirements, and streamlining visit charting processes effectively.

Purpose and Importance of the Kantime Medicare Visit Chart

The Kantime Medicare Visit Chart is designed to ensure accurate and compliant documentation of client interactions, particularly for home health and palliative care services. Its primary purpose is to streamline the charting process, ensuring all necessary details, such as client names, Medicaid identification numbers, and assessment times, are recorded. This tool is vital for maintaining transparency, accountability, and continuity of care. By adhering to CMS guidelines, it helps healthcare professionals deliver high-quality services while advocating for improved health outcomes, especially for minority populations and those requiring palliative or hospice care.

Structure and Layout of the Kantime Medicare Visit Chart

The Kantime Medicare Visit Chart is organized into clear sections, ensuring efficient documentation. It typically includes a header with the client’s name, Medicaid ID, and visit details. Each page begins with the assessment time and features structured fields for noting observations, interventions, and outcomes. The layout incorporates checkboxes and free-text areas for comprehensive data capture. This design ensures consistency, readability, and compliance with CMS guidelines, making it easier for healthcare providers to document accurately and maintain seamless continuity of care during home health, palliative, and hospice visits.

Understanding the Kantime Medicare Visit Chart

The Kantime Medicare Visit Chart is a tool designed to streamline documentation for healthcare providers, ensuring accurate and efficient recording of client interactions and visit details.

Essential Components of the Kantime Medicare Visit Chart

The Kantime Medicare Visit Chart includes essential components such as client name, Medicaid identification number, and assessment time documentation. It also outlines visit details, care plans, and progress tracking, ensuring accurate and comprehensive documentation. These elements are designed to streamline the charting process while maintaining compliance with regulatory requirements. The chart also incorporates space for noting specific interventions, outcomes, and follow-up actions, making it a robust tool for healthcare providers to deliver efficient and standardized care.

Documentation Guidelines for the Kantime Medicare Visit Chart

Documentation guidelines for the Kantime Medicare Visit Chart emphasize accuracy and completeness. Each visit must include the client’s name, Medicaid identification number, and assessment time at the beginning; The chart should detail interventions, outcomes, and follow-up actions, ensuring clarity and compliance. Providers must sign and date entries to verify authenticity. Adherence to CMS guidelines is crucial, and all documentation should reflect the care provided accurately. Proper formatting and legibility are essential to avoid errors and ensure seamless communication among healthcare teams.

Conducting a Medicare Visit

A Medicare visit involves thorough client assessments, documenting interventions, and ensuring accurate records for compliance. Proper preparation and adherence to guidelines are essential for effective care delivery.

Preparation for a Medicare Visit

Preparation for a Medicare visit involves gathering necessary documents, such as client ID and insurance cards, and reviewing prior visit records. Use Kantime software to access historical data, ensuring all forms are pre-filled with client details. Conduct a thorough review of the client’s medical history, current conditions, and treatment plans. Verify the visit schedule and location, and ensure all necessary tools and PPE are available. Familiarize yourself with CMS guidelines to ensure compliance. Proper preparation ensures efficient and accurate documentation, improving care delivery and client outcomes. It also helps in addressing specific needs during the visit effectively.

Step-by-Step Process of a Medicare Visit

A Medicare visit begins with arrival and client identification verification. Conduct a thorough assessment, documenting vital signs, medical history, and current conditions. Use the Kantime Medicare Visit Chart to record findings, ensuring accuracy and compliance with CMS guidelines. Deliver appropriate care, addressing specific client needs and updating treatment plans as required. Document all interactions, including medications administered, therapies provided, and client responses. Conclude the visit by scheduling follow-ups and providing necessary instructions. Ensure all entries are signed and dated, maintaining a clear and organized record for future reference and improved care continuity.

Compliance and Documentation Standards

Compliance and documentation standards ensure accurate and consistent recording of client information, adhering to CMS guidelines, and maintaining the integrity of Medicare visit charts for proper accountability.

CMS Guidelines for Medicare Visit Documentation

CMS guidelines require accurate and timely documentation of Medicare visits, ensuring compliance with federal standards. Each visit must include the client’s name, Medicaid ID, and assessment time. Documentation should reflect the services provided, medical necessity, and client progress. Specific attention is given to detailed notes for specialized care, such as palliative or hospice services. Adherence to these guidelines ensures proper reimbursement and maintains the integrity of patient records. By following CMS standards, healthcare providers can deliver high-quality care while meeting regulatory requirements effectively.

Ensuring Accuracy and Compliance in Visit Charts

Accurate and compliant documentation is critical for Medicare visit charts. CMS guidelines mandate detailed, timely, and precise records, including client names, Medicaid IDs, and assessment times. Regular reviews of visit charts ensure adherence to federal standards. Training staff on documentation best practices is essential. Utilizing software like Kantime helps maintain consistency and compliance. Real-time validation features ensure data accuracy. Proper documentation also supports reimbursement claims and legal requirements. Ensuring confidentiality and secure storage of records is equally important. By following these steps, healthcare providers can maintain high standards of compliance and deliver quality care effectively.

Using the Kantime Software for Visit Charts

Kantine software streamlines Medicare visit charting, offering features like real-time validation, secure storage, and compliance tracking. It ensures accurate documentation and efficient client care management.

Features of the Kantime Medicare Visit Chart Software

The Kantime Medicare Visit Chart Software offers robust features such as real-time visit validation, secure patient data storage, and automated compliance tracking. It includes customizable templates for streamlined documentation, ensuring accuracy and efficiency. The software supports seamless integration with existing healthcare systems, enabling effortless data export and import. Additionally, it provides mobile access for on-the-go documentation, reducing administrative burdens. With advanced reporting tools, users can generate comprehensive visit summaries and track patient progress effectively. These features collectively enhance the quality of care while adhering to regulatory standards, making it an indispensable tool for healthcare professionals.

Navigating the Kantime Platform for Visit Documentation

Navigating the Kantime Platform for visit documentation is designed to be user-friendly and intuitive. The platform features a clear dashboard that allows healthcare professionals to access patient records, visit logs, and documentation templates effortlessly. Users can quickly locate specific visits and related documentation using robust search and filter functions. The platform also provides real-time updates and alerts, ensuring that all documentation remains current and accurate. With streamlined navigation, the Kantime Platform enhances efficiency, reducing administrative burdens and allowing professionals to focus on delivering high-quality patient care.

Home Health Visit Charting

Home health visit charting involves documenting routine visits, client assessments, and treatment plans, ensuring accurate and detailed records for continuous patient care and compliance with Medicaid standards.

Specific Requirements for Home Health Visits

Home health visits require detailed documentation, including client names, Medicaid identification numbers, and assessment times. Each visit must document treatment plans, progress notes, and any changes in patient condition. Accurate and timely records ensure compliance with Medicaid standards and facilitate continuous care. Proper charting also involves noting medical interventions, patient responses, and follow-up actions. Maintaining organized and legible records is essential for audit purposes and improving health outcomes. Adherence to these requirements ensures accountability and enhances the quality of care provided during home health visits.

Client Assessment and Documentation Best Practices

Effective client assessment involves comprehensive evaluation of physical, emotional, and functional status. Documenting observations, treatment plans, and client responses is critical. Use standardized tools for consistency and accuracy. Ensure client and caregiver involvement in care planning. Maintain clear, legible, and organized records, including progress notes and follow-up actions. Regularly review and update documentation to reflect changes in condition. Confidentiality and compliance with Medicaid guidelines must be prioritized. Accurate and timely documentation supports better health outcomes and accountability in home health care delivery.

Palliative Care and Hospice Documentation

Accurate documentation in palliative care ensures compassionate, patient-centered care. Record symptom management, patient wishes, and care plans. The Kantime Medicare Visit Chart PDF offers clear guidance for this process.

Importance of Accurate Documentation in Palliative Care

Accurate documentation in palliative care ensures high-quality, patient-centered care. It supports legal compliance, continuity of care, and clear communication among caregivers. Detailed records of symptoms, treatments, and patient wishes guide decision-making and improve outcomes. The Kantime Medicare Visit Chart PDF helps healthcare providers maintain thorough, organized records, ensuring consistency and accountability in palliative care services.

Integrating Palliative Care into Medicare Visit Charts

Integrating palliative care into Medicare visit charts ensures comprehensive, patient-centered care. The Kantime Medicare Visit Chart PDF allows healthcare providers to document pain management, emotional support, and advance care planning. It streamlines communication between interdisciplinary teams, ensuring consistent care. By incorporating palliative care details, the chart supports accurate billing and compliance with CMS guidelines. This integration enhances care coordination, improves patient outcomes, and ensures that palliative care services are well-documented and aligned with Medicare requirements.

The Kantime Medicare Visit Chart PDF is a vital tool for efficient, compliant documentation, enhancing care coordination and patient outcomes while streamlining Medicare visit processes effectively.

Best Practices for Using the Kantime Medicare Visit Chart

Ensure accuracy and consistency by documenting client interactions promptly and thoroughly. Always include the client’s name, Medicaid ID, and assessment times. Adhere to CMS guidelines for compliance. Use templates for standardized reporting and review charts regularly for errors. Maintain clear and concise notes to improve care coordination and outcomes. Stay updated on regulatory changes to ensure documentation meets current standards. Regular training on the Kantime platform can enhance efficiency and accuracy in visit charting, ultimately improving patient care and administrative processes.

Future Trends in Medicare Visit Documentation

The future of Medicare visit documentation lies in advanced digital solutions, with a focus on interoperability and AI-driven tools. Expect enhanced integration with platforms like MatrixCare for seamless data sharing. Real-time data synchronization and automated compliance checks will reduce errors. Telehealth integration will become standard, enabling remote visit documentation. AI will assist in predicting documentation needs, improving efficiency. These advancements aim to enhance accuracy, streamline processes, and improve patient outcomes while ensuring regulatory compliance. Staying ahead with these trends will be crucial for effective Medicare visit charting in the evolving healthcare landscape.