astronomy pdf

Astronomy is the scientific study of celestial objects, space, and the universe, exploring stars, planets, and galaxies. It combines physics, mathematics, and chemistry to understand cosmic phenomena. By examining the universe’s structure and evolution, astronomy helps us comprehend our place within it, fostering curiosity and exploration. This field has evolved significantly, from ancient observations to modern advancements in telescopes and space missions, making it a cornerstone of human knowledge and discovery.

1.1 Definition and Scope of Astronomy

Astronomy is the scientific study of celestial objects, space, and the universe. It explores stars, planets, galaxies, and cosmic phenomena, combining physics, mathematics, and chemistry. The scope of astronomy spans understanding the formation of stars, planetary motion, galaxy evolution, and the universe’s origins. It bridges human curiosity with cosmic discovery, offering insights into the universe’s workings and humanity’s place within it.

1.2 Importance of Astronomy in Understanding the Universe

Astronomy is crucial for understanding the universe’s origins, structure, and evolution. It reveals insights into cosmic phenomena, such as star formation, planetary systems, and the Big Bang. By studying the universe, astronomy drives technological advancements, fosters scientific literacy, and inspires future generations to explore and discover, making it indispensable in expanding human knowledge and curiosity.

History of Astronomy

Astronomy’s history traces humanity’s quest to understand the cosmos, from ancient stargazing to modern space exploration. It reflects evolving knowledge, technological advancements, and groundbreaking discoveries.

2.1 Ancient Civilizations and Their Contributions

Ancient civilizations like the Babylonians, Egyptians, Greeks, and Mayans laid the groundwork for astronomy. They observed celestial patterns, developed calendars, and identified constellations. Their contributions included mathematical models for planetary movements and early cosmological theories, demonstrating a deep understanding of the night sky and its significance to human life and culture.

2.2 Key Milestones in Astronomical Discoveries

Landmark discoveries include Galileo’s telescope invention, revealing celestial objects like Jupiter’s moons. Newton’s laws of motion and gravity explained planetary orbits. Einstein’s relativity reshaped cosmology, while Hubble’s observation of the expanding universe confirmed the Big Bang theory. These milestones transformed humanity’s understanding of space, laying the foundation for modern astronomy and ongoing cosmic exploration.

The Solar System

The Solar System consists of the Sun, eight planets, dwarf planets, moons, asteroids, and comets. It formed 4.6 billion years ago from a collapsing nebula, evolving into its current structure. The Sun is the central star, while planets like Earth, Mars, and Jupiter showcase diverse compositions and atmospheres, offering insights into celestial mechanics and planetary formation.

3.1 Structure and Composition of the Solar System

The Solar System’s structure includes the Sun at the center, surrounded by planets divided into terrestrial (Mercury, Venus, Earth, Mars) and gas giants (Jupiter, Saturn). Ice giants Uranus and Neptune mark the outer boundary. Composed primarily of hydrogen and helium, the Sun’s gravity binds the system, while planets, moons, asteroids, and comets orbit within this vast cosmic framework, each with unique compositions and roles.

3.2 Planets and Their Unique Features

The Solar System’s planets exhibit diverse characteristics. Mercury is the smallest and closest to the Sun, while Jupiter is the largest gas giant. Venus has a thick atmosphere, Earth hosts life, and Mars is rocky with a reddish hue. Saturn’s rings, Uranus’ tilted axis, and Neptune’s icy storms make each planet unique in composition and appearance.

3.3 Other Celestial Bodies (Moons, Asteroids, Comets)

Moons orbit planets, with some, like Jupiter’s Io, featuring volcanic activity. Asteroids, primarily in the belt between Mars and Jupiter, are remnants from the Solar System’s formation. Comets, icy bodies that release gas and dust near the Sun, create spectacular tails. These celestial bodies provide insights into the Solar System’s history and composition.

Stellar Astronomy

Stellar astronomy studies stars, their life cycles, and interactions. It explores birth in nebulae, main sequence phases, and deaths as supernovae or white dwarfs, shaping galaxies and elements.

4.1 Life Cycle of Stars

A star’s life cycle begins in a molecular cloud, forming protostars that ignite nuclear fusion. Stars spend most of their lives on the main sequence, fusing hydrogen into helium. Low-mass stars end as white dwarfs, while high-mass stars explode as supernovae, leaving remnants like neutron stars or black holes, dispersing heavy elements into space.

4.2 Types of Stars and Their Characteristics

Stars are classified into types based on their characteristics, such as temperature, luminosity, and mass. Main-sequence stars, like the Sun, fuse hydrogen into helium. Red giants are cooler and larger, while blue giants are hotter and more luminous. White dwarfs are dense remnants, neutron stars have strong magnetic fields, and black holes exhibit intense gravitational pull.

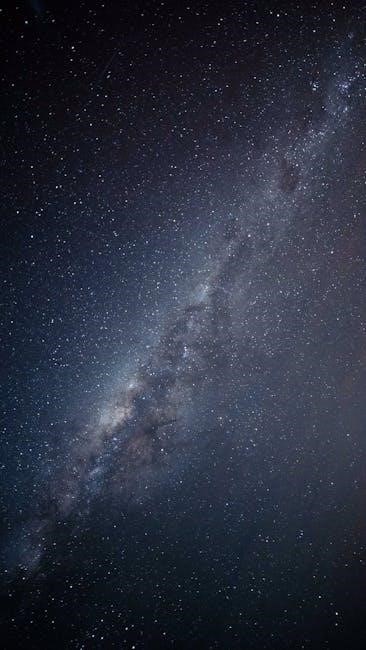
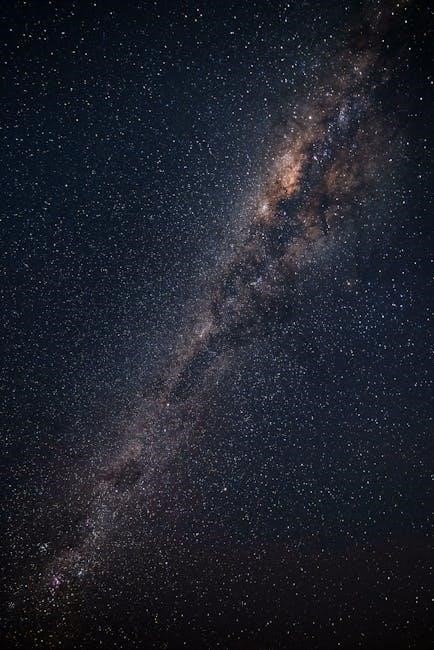
4.3 Galaxies and Their Formation

Galaxies are vast systems of stars, gas, and dust bound by gravity. They form through the gravitational collapse of gas and dust in the early universe. Spiral galaxies like the Milky Way feature rotating disks, while elliptical galaxies are older and more spherical. Irregular galaxies lack a distinct shape. Dark matter plays a key role in their formation and stability, influencing their evolution and structure over cosmic time.

Cosmology

Cosmology explores the universe’s origin, evolution, and fate, examining cosmic structures and processes through observations and theoretical models to understand the cosmos’ grand narrative.

5.1 The Big Bang Theory and the Origin of the Universe

The Big Bang Theory proposes the universe began as a singularity around 13.8 billion years ago, expanding rapidly to form space, time, and matter. This cosmic event explains the universe’s homogeneous structure, cosmic microwave background radiation, and the abundance of light elements like hydrogen and helium, serving as the foundation for understanding cosmic evolution.

5.2 Dark Matter and Dark Energy

Dark matter and dark energy are mysterious components dominating the universe’s mass-energy budget. Dark matter, invisible and non-luminous, influences galaxy dynamics through gravity. Dark energy drives cosmic expansion’s acceleration. Together, they comprise 95% of the universe, with their exact nature remaining unknown, prompting extensive astrophysical research to unravel these enigmatic phenomena.

5.3 The Expanding Universe and Cosmic Inflation

The universe’s expansion, observed through galaxy redshift, suggests ongoing growth since the Big Bang. Cosmic inflation, a rapid early expansion, explains uniformity and structure formation. This theory aligns with cosmic microwave background observations and large-scale structures, providing insights into the universe’s origins and evolution, supported by extensive astronomical and theoretical evidence.

Astronomical Techniques and Tools

Astronomical techniques include telescopes, spectroscopy, and space missions, enabling observations of celestial objects. Computational models and software analyze data, advancing our understanding of the universe’s dynamics and structure.

6.1 Telescopes and Their Role in Astronomy

Telescopes are essential tools in astronomy, enabling observations of distant celestial objects. They collect light, radiation, or other forms of electromagnetic energy, enhancing our ability to study stars, planets, and galaxies. From optical to radio and space-based telescopes, these instruments have revolutionized our understanding of the universe, facilitating groundbreaking discoveries and advancing astronomical research significantly.

6.2 Space Missions and Their Contributions

Space missions have significantly advanced our understanding of the universe, providing unprecedented data and imagery. Missions like the Hubble Space Telescope and the James Webb Space Telescope have enabled detailed observations of distant galaxies, stars, and planets. These endeavors have revealed new insights into cosmic phenomena, fostering groundbreaking discoveries and expanding humanity’s knowledge of space and its mysteries.

6.3 Astronomical Software and Data Analysis

Astronomical software and data analysis are crucial for interpreting vast cosmic datasets. Tools like NASA’s AstroPy and ESA’s tools enable scientists to process data from missions like Gaia and Webb. Advanced algorithms and AI models help identify patterns, leading to discoveries like exoplanets and understanding dark matter dynamics, enhancing our cosmic knowledge and fostering global collaboration.

Astrophysics and Theoretical Concepts

Astrophysics explores the physical nature of celestial objects and phenomena, using principles of physics and chemistry to understand stars, galaxies, and cosmic events. Theoretical models, such as black hole dynamics and dark matter theories, help explain complex observations, advancing our understanding of the universe’s fundamental laws and structures.

7.1 Black Holes and Their Mysteries

Black holes are regions in space with gravity so intense that nothing, not even light, can escape. Formed from collapsed massive stars, they are bounded by event horizons. Their mysteries include information paradoxes, singularity physics, and gravitational wave emissions, making them a focal point in astrophysics and theoretical research.

7.2 Gravitational Waves and Their Detection

Gravitational waves are ripples in spacetime caused by massive cosmic events, like merging black holes or neutron stars. Detected using observatories like LIGO and Virgo, these waves provide insights into the universe’s most violent phenomena. Their detection confirms Einstein’s predictions and opens new avenues for understanding cosmic dynamics and high-energy processes.

7.3 The Search for Extraterrestrial Life

The search for extraterrestrial life involves studying exoplanets, biosignatures, and cosmic signals. Advanced telescopes and space missions, like NASA’s James Webb Telescope, explore habitable zones. Organizations like SETI use radio astronomy to detect intelligent signals. Discoveries of exoplanets and organic molecules in space suggest potential for life beyond Earth, driving ongoing research and exploration.

Notable Astronomers and Their Contributions

Pioneers like Galileo, Newton, and Einstein revolutionized astronomy with groundbreaking discoveries. Their work laid the foundation for understanding the cosmos, inspiring future generations of astronomers and researchers.

8.1 Pioneers in Astronomy

Galileo, Newton, and Einstein were pivotal figures in astronomy. Galileo’s telescope observations confirmed heliocentrism, while Newton’s laws of motion and gravity explained planetary orbits. Einstein’s relativity reshaped understanding of spacetime and cosmic phenomena; Their groundbreaking work laid the foundation for modern astronomy, inspiring future discoveries and shaping our understanding of the universe.

8.2 Modern Astronomers and Their Discoveries

Modern astronomers like Stephen Hawking, Edwin Hubble, and exoplanet hunters have revolutionized our understanding of the cosmos. Hawking’s insights into black holes, Hubble’s discovery of the expanding universe, and the identification of thousands of exoplanets have significantly advanced astronomical knowledge, inspiring new generations to explore the mysteries of space and celestial phenomena.

Amateur Astronomy

Amateur astronomy offers enthusiasts a chance to explore the cosmos with minimal equipment, contributing to discoveries and fostering a deeper appreciation for the universe.

9.1 Getting Started with Amateur Astronomy

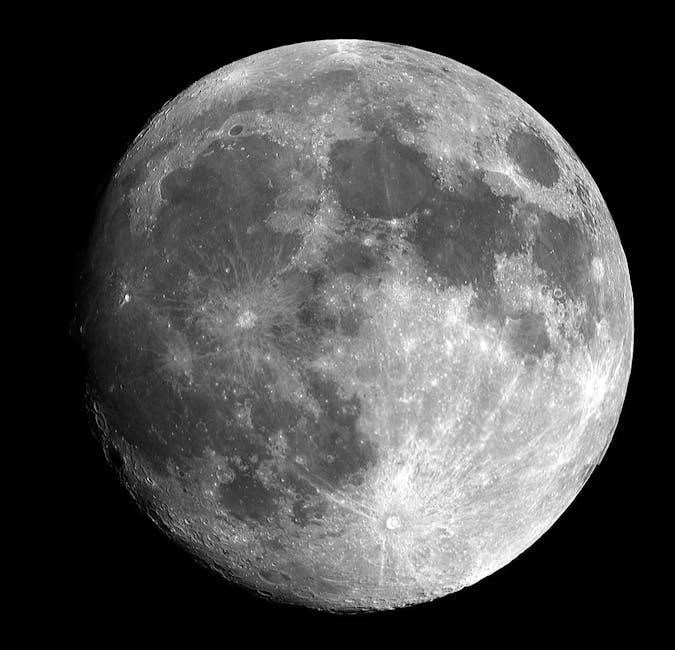
Starting amateur astronomy begins with understanding the night sky and investing in basic tools like binoculars or a telescope. Download apps like Sky Map for constellation identification. Begin with bright objects like the Moon, planets, or Orion; Join local astronomy clubs or online forums for guidance and tips. Start small, observe regularly, and gradually explore deeper celestial wonders to build your skills and passion for stargazing.

9.2 Amateur Astronomical Societies and Events

Amateur astronomical societies offer valuable resources, hosting star parties, workshops, and guest lectures. Events like astronomy festivals and viewing nights connect enthusiasts, fostering knowledge sharing and camaraderie. Joining local or online groups provides access to expert advice, equipment tips, and opportunities to participate in citizen science projects, enhancing your astronomical journey and community engagement.

Resources for Learning Astronomy

Astronomy books, online courses, and tutorials provide comprehensive learning tools. Apps and software like sky maps enhance understanding, offering interactive experiences for enthusiasts of all levels.

10.1 Recommended Astronomy Books and PDFs

Essential astronomy books include “Cosmos” by Carl Sagan and “Astrophysics for People in a Hurry” by Neil deGrasse Tyson. PDF resources like academic journals and e-books from platforms such as arXiv and NASA provide in-depth knowledge. These materials cater to both beginners and advanced learners, offering comprehensive insights into celestial phenomena and scientific discoveries.

10.2 Online Courses and Tutorials

Popular platforms like Coursera, edX, and Khan Academy offer comprehensive astronomy courses. These tutorials cover topics from introductory stargazing to advanced astrophysics. Many courses are free or low-cost, providing flexibility for learners. They often include interactive simulations, quizzes, and forums, making learning engaging and accessible for astronomy enthusiasts of all levels.

10.3 Astronomy Apps and Software

Astronomy apps like Sky Map and Stellarium offer interactive star charts, enabling users to identify constellations and celestial events. Software tools such as Adobe Acrobat and NASA’s FITS Viewer aid in analyzing astronomy PDFs and astronomical images. These resources enhance learning and exploration, making complex data accessible to both professionals and enthusiasts.

The Future of Astronomy

The future of astronomy promises groundbreaking discoveries with advanced telescopes, space missions, and technological innovations, enabling deeper exploration of the universe and its mysteries.

11.1 Upcoming Space Missions

Upcoming space missions, like the James Webb Space Telescope and Euclid, will revolutionize astronomy by exploring distant galaxies, dark matter, and cosmic expansion. These missions utilize advanced infrared technology and gravitational lensing to uncover the universe’s secrets, enabling unprecedented insights into star formation and the distribution of celestial bodies.

11.2 Advances in Technology and Their Impact

Advances in technology, such as artificial intelligence and machine learning, are transforming astronomy by enhancing data analysis and telescope operations. Quantum computing accelerates complex simulations, while next-generation telescopes enable deeper cosmic observations. These innovations expand our understanding of the universe, fostering groundbreaking discoveries and shaping the future of astronomical research and exploration.

11.3 The Role of Citizen Science in Astronomy

Citizen science empowers individuals to contribute to astronomical research through data analysis and observations. Platforms enable participants to classify galaxies or detect exoplanets. This collaborative effort bridges professionals and amateurs, fostering groundbreaking discoveries and public engagement. Citizen science expands our understanding of the cosmos while inspiring future generations to pursue STEM fields and astronomical exploration.

Astronomy reveals the universe’s vastness, igniting human curiosity. It bridges science and wonder, inspiring exploration and a deeper understanding of cosmic phenomena and our existence.

12.1 Summary of Key Concepts

Astronomy explores the universe’s structure, studying celestial objects like stars, planets, and galaxies. It blends physics, mathematics, and chemistry to explain phenomena such as the Big Bang, dark matter, and star life cycles. Understanding these concepts reveals the universe’s complexity and humanity’s role within it, inspiring ongoing exploration and discovery.

12.2 The Ever-Evolving Nature of Astronomy

Astronomy is a dynamic field, continually advancing with new discoveries and technologies. Each breakthrough expands our understanding of the cosmos, revealing new mysteries to explore. From ancient observations to modern space missions, astronomy evolves, adapting to emerging tools and theories, ensuring its relevance and fascination for future generations of scientists and enthusiasts alike.

References and Further Reading

Explore academic journals, online archives, and PDF repositories for in-depth astronomy resources. Publications like “Archaeology, Anthropology, and Interstellar Communication” offer unique insights, supporting further study and research.

13.1 Academic Journals and Publications

Academic journals like The Astronomical Journal and The Astrophysical Journal provide peer-reviewed articles on astronomy. Publications such as Archaeology, Anthropology, and Interstellar Communication offer innovative research insights. These resources are essential for in-depth study, supporting scholars and enthusiasts with credible, detailed information on various astronomical topics.

13.2 Online Archives and PDF Repositories

Online archives like arXiv.org and NASA’s Astrophysics Data System (ADS) offer free access to astronomy PDFs. Platforms such as ResearchGate and Academia.edu also host a wealth of downloadable resources. These repositories provide convenient access to research papers, theses, and educational materials, enabling scholars and enthusiasts to explore astronomy topics in depth.

sharp el 2196bl calculator manual

The Sharp EL-2196BL is a professional-grade electronic printing calculator designed for business and office use, offering advanced features like item counting, tax computation, and a fluorescent display.

1.1 Overview of the Sharp EL-2196BL Electronic Printing Calculator

The Sharp EL-2196BL is a professional-grade electronic printing calculator designed for business and office environments. It features a large fluorescent display, a fast 3.7 lines-per-second ribbon printer, and advanced calculation functions. The calculator is built to handle complex tasks, including item counting, cost/sell/margin calculations, and tax computations, making it a reliable tool for precise financial operations. Its durable design ensures long-lasting performance.

1.2 Key Features and Benefits

The Sharp EL-2196BL Electronic Printing Calculator offers a large fluorescent display for easy viewing, a fast 3.7 lines-per-second ribbon printer for efficient output, and a mark-up key for quick cost/sell/margin calculations. It also includes item counting and tax computation functions, ensuring precise financial operations. Designed for durability, it features a heavy-duty construction and user-friendly controls, making it ideal for high-volume use in professional settings. Its advanced features enhance productivity and accuracy, providing reliable performance for daily business tasks.

Operating Controls and Basic Functions

The Sharp EL-2196BL features a user-friendly control panel with clearly labeled keys for easy operation. Basic functions include number entry, arithmetic operations, and special keys like the Paper Feed Key, ensuring efficient and straightforward calculations.

2.1 Understanding the Control Panel Layout

The Sharp EL-2196BL features a well-organized control panel designed for intuitive operation. The layout includes a large fluorescent display for clear visibility, numeric keys, and function keys. Key sections include arithmetic operations, item counting, and special functions like the Paper Feed Key. The logical arrangement of buttons ensures easy access to frequently used features, making calculations efficient and straightforward for users.

2.2 Navigating Basic Calculation Functions

The Sharp EL-2196BL offers seamless basic calculation functions including addition, subtraction, multiplication, and division. The Mark Up key simplifies cost, sell, and margin calculations. Users can efficiently perform arithmetic operations with clear button labels and a responsive keypad. The calculator also features a large fluorescent display for easy viewing of results; These functions are designed to streamline daily tasks and enhance productivity for office and business environments.

Advanced Calculation Functions

The Sharp EL-2196BL features advanced calculation functions such as item counting, cost/sell/margin calculations, and tax computation, designed to simplify complex financial operations and enhance business efficiency.

3.1 Item Counting and Cost/Sell/Margin Calculations

The Sharp EL-2196BL enables efficient item counting and precise calculations for cost, sell, and margin. These functions simplify inventory management and pricing strategies, allowing users to quickly determine profit margins and adjust prices accordingly. The calculator’s advanced algorithms ensure accuracy, making it an essential tool for retail and business environments. With clear results displayed on the fluorescent screen, users can make informed decisions effortlessly.

3.2 Tax Computation and Financial Operations

The Sharp EL-2196BL calculator excels in tax computation and financial operations, ensuring accuracy for business transactions. It supports tax calculations with programmable rates, making it ideal for retail and accounting tasks. The calculator also handles complex financial operations, such as discounts and profit margins, streamlining workflows. Its robust financial functions, combined with reliable performance, make it a versatile tool for managing business finances efficiently.

Maintenance and Replacement Procedures

Regular maintenance ensures optimal performance. Replace ink ribbons and paper rolls as needed. Follow manual guidelines for proper replacement to prevent errors and extend calculator longevity.

4.1 Ink Ribbon Replacement Process

Replacing the ink ribbon is essential for maintaining print quality. Turn off the power before starting. Open the printer compartment, remove the old ribbon, and install the new one. Close the compartment and test the printer to ensure proper function. Always use compatible ribbons to avoid damage and ensure clear printing. Regular replacement prevents faded or blurry output, ensuring accurate and professional results.

4.2 Paper Roll Replacement Instructions

Regular paper roll replacement is crucial for uninterrupted printing. Turn off the calculator and remove the old roll. Take the new roll, align it with the feed mechanism, and gently insert it. Close the compartment and test the printer to ensure proper alignment. If the paper jams, tear it carefully and restart the process. Always use genuine Sharp rolls for optimal performance and reliability.

Clock Section and Time Management

The Sharp EL-2196BL features a built-in clock for accurate time stamping and scheduling. Easily adjust date and time settings to ensure precise calculations and synchronized operations.

5.1 Adjusting Date and Time Settings

To adjust the date and time on the Sharp EL-2196BL, press and hold the designated keys to access the clock settings. Use the numeric keypad to input the correct date and time. Ensure the calculator is in the correct mode (printing or non-printing) before making adjustments. Save your settings to maintain accurate time management for calculations and records. Regularly synchronizing the clock ensures precision in time-stamped operations.

5.2 Synchronizing Time for Accurate Calculations

Synchronizing the time on the Sharp EL-2196BL ensures precise calculations and accurate time-stamped records. Access the clock section via the control panel, then use the designated keys to set the correct date and time. Confirm your settings to update the internal clock. Regular synchronization is crucial for maintaining consistency in financial and operational tasks. This feature guarantees that all calculations and prints reflect the current time accurately.

Troubleshooting Common Issues

Identify and resolve issues like paper feed errors or ribbon problems using the calculator’s error indicators and correction keys. Power cycling often resolves minor malfunctions quickly.

6.1 Resolving Paper Feed Errors

Paper feed issues can disrupt workflow. To fix, turn off the calculator, remove the paper roll, and gently clear any jammed paper from the print mechanism. Ensure the paper is properly aligned and reloaded. If issues persist, check for obstructions or torn paper fragments. Power cycling the calculator can also resolve minor feed problems. Regular maintenance helps prevent such errors and ensures smooth operation. Always refer to the manual for detailed steps.

6.2 Fixing Ribbon Printing Problems

To address ribbon printing issues, first, turn off the calculator and replace the ink ribbon if it’s worn or dried out. Gently remove the old ribbon, ensuring no residue remains. Install a new ribbon, aligning it properly. If faint printing persists, check for debris or misalignment. Lightly cleaning the print head with a soft cloth may resolve the issue. Always consult the manual for detailed ribbon replacement and maintenance instructions. Regular checks prevent such problems.

Accessing the Sharp EL-2196BL Manual

The Sharp EL-2196BL manual can be downloaded as a PDF from Sharp’s official website or trusted sources. Simply visit the support page, select your model, and follow the download instructions to access the guide.

7.1 Downloading the PDF Manual

To download the Sharp EL-2196BL PDF manual, visit Sharp’s official website or trusted sources. Select your calculator model, enter the verification code from the image, and click the download button; Once verified, the manual will be available for download. Save it to your device for easy access to instructions, troubleshooting, and detailed operational guidance.

7.2 Navigating the Online Instruction Guide

The online instruction guide for the Sharp EL-2196BL is user-friendly and easily accessible. Once downloaded or viewed online, users can navigate through sections using bookmarks or hyperlinked contents. The guide includes detailed instructions, diagrams, and troubleshooting tips. Use the search function to quickly find specific topics like “ink ribbon replacement” or “tax calculations.” Zoom in for better readability and utilize the table of contents for seamless navigation.

Additional Resources and Support

For further assistance, contact Sharp support at 1-844-578-1637 or explore online forums and communities. Service manuals and additional guides are also available for download.

8.1 Contact Information for Sharp Service

For assistance with the Sharp EL-2196BL, contact Sharp’s customer service at 1-844-578-1637. This service is available for general inquiries, technical support, and repair requests. Additional contact details and resources can be found on Sharp’s official website or support portal.

8.2 Online Communities and Forums

Active online communities and forums provide a platform for discussing the Sharp EL-2196BL calculator. Users share tips, ask questions, and receive advice from experts and fellow users. These interactive spaces are ideal for troubleshooting, exploring advanced features, and optimizing calculator use. Engaging with these communities can enhance your experience and help resolve issues efficiently.

The Sharp EL-2196BL is a professional-grade calculator offering advanced printing capabilities, financial calculations, and a clear fluorescent display. Regular maintenance and exploring online resources ensure optimal performance.

9.1 Summary of Key Features and Benefits

The Sharp EL-2196BL is a professional-grade electronic printing calculator designed for business and office use. It features a large fluorescent display, fast 3.7 lines-per-second printing, and advanced functions like item counting, cost/sell/margin calculations, and tax computation. The calculator also includes a Mark Up key for quick financial calculations and a reliable paper feed system. Its durable design and user-friendly interface make it ideal for heavy-duty use, while the downloadable manual ensures easy troubleshooting and maintenance. Regular updates and customer support further enhance its functionality and longevity, making it a reliable choice for professional environments.

9.2 Final Tips for Optimal Use

For optimal performance, regularly clean the printer and replace the ink ribbon as needed. Ensure the paper roll is properly aligned to avoid jams. Familiarize yourself with all functions via the manual to maximize efficiency. Store the calculator in a dry, cool place to maintain longevity. Always update settings like date and time for accurate records. By following these tips, you can enjoy reliable and precise calculations for years to come.

References and Further Reading

Refer to the official Sharp website for comprehensive guides, service manuals, and related models. Download the PDF manual for detailed instructions and troubleshooting tips specific to the EL-2196BL.

10.1 Recommended Manuals and Guides

Download the official Sharp EL-2196BL PDF manual for detailed instructions and troubleshooting. Visit the Sharp website for service manuals, user guides, and related resources. Explore online communities and forums for peer support and additional tips. Contact SharpService at 1-844-578-1637 for professional assistance. Refer to the operation manual for advanced features and maintenance procedures, ensuring optimal use of your calculator.

10.2 Related Sharp Calculator Models

Explore other Sharp calculator models like the EL-1901, EL-2607, and EL-3300, which offer similar features such as high-speed printing, tax calculations, and energy efficiency. These models are popular for their durability and advanced functions, making them ideal for business and office environments. Visit Sharp’s official website for more details on these related models and their specifications.

ryuu kusari no ori light novel pdf

Ryuu Kusari no Ori is a captivating light novel series by author Cadet, illustrated by Sime, and published by Ichijinsha. Set in a world where spirits, swords, and magic reign, the story follows Nozomu Bountis, a young man navigating the prestigious Solminati Academy, where ambition and power define the hierarchy. Struggling with his suppressed abilities, Nozomu’s journey intertwines personal growth, romance, and fantasy, offering a compelling blend of drama and adventure.

Background and Overview

Ryuu Kusari no Ori, also known as Ori of the Dragon Chain, is a light novel series written by Cadet and illustrated by Sime. Published by Ichijinsha, it debuted in 2019 and has since gained popularity for its unique blend of fantasy, romance, and school life genres. The story is set in a world where spirits and magical abilities are central to society, with Solminati Academy serving as a hub for ambitious youths. Protagonist Nozomu Bountis struggles with his suppressed abilities, facing ridicule and isolation, until a transformative encounter with an elderly woman sets him on a path of self-discovery and growth. The series explores themes of perseverance, friendship, and overcoming adversity, resonating with readers seeking a heartfelt yet action-packed narrative.

Setting and World-Building

The story unfolds in a fantasy realm where spirits, swords, and magic dominate, with Solminati Academy as a central hub for ambition and growth. The world is richly detailed, blending magical elements with a competitive academic environment, creating a unique backdrop for the protagonist’s journey of self-discovery and transformation.

Solminati Academy

Solminati Academy serves as the central backdrop of the story, a prestigious institution where ambitious youths gather to nurture their talents and pursue their aspirations. This elite school is a hotbed of competition, where students are judged based on their magical and martial prowess. The academy’s rigorous environment pushes its attendees to excel, fostering both camaraderie and rivalry. For Nozomu Bountis, the protagonist, Solminati Academy becomes a crucible of challenges, where his suppressed abilities and personal struggles are constantly tested. The academy’s culture of meritocracy and its intricate social dynamics play a pivotal role in shaping Nozomu’s journey and the story’s progression.

The Role of Spirits, Swords, and Magic

In the world of Ryuu Kusari no Ori, spirits, swords, and magic are integral elements that shape the narrative and its characters. Spirits serve as powerful companions, granting their wielders enhanced abilities and playing a central role in battles. Swords symbolize strength and skill, often serving as extensions of their users’ will. Magic, or “magic techniques,” adds depth to the story, allowing for strategic combat and character development. These elements intertwine to create a rich, immersive world where battles are not just physical but also ideological, reflecting the characters’ inner struggles and growth.

Plot Overview

Ryuu Kusari no Ori follows Nozomu Bountis, a young man who enters Solminati Academy to support his lover’s dreams but struggles with suppressed abilities. After meeting an old woman, Nozomu’s life transforms, leading to a journey of self-discovery and growth. The story explores themes of ambition, friendship, and overcoming adversity, blending drama, swords, and magic in a captivating narrative.

Main Story Arcs

The story of Ryuu Kusari no Ori unfolds through several key arcs, beginning with Nozomu Bountis’ enrollment at Solminati Academy to support his lover’s ambitions. Initially, his suppressed abilities and lack of progress isolate him, leading to mockery and abandonment by peers, including his former lover. A turning point occurs when he meets an elderly woman whose guidance sparks his transformation. The narrative then explores his growth as he uncovers the mysteries of his abilities and the academy’s hidden workings. Later arcs delve into the consequences of his newfound power and the challenges of navigating a world where strength and magic define social hierarchies. Themes of redemption, ambition, and self-discovery are central to the story’s progression, with each arc building upon the last to create a compelling and emotional journey for the protagonist.

Character Development

The protagonist, Nozomu Bountis, undergoes significant growth from a timid, struggling student to a resilient individual determined to reclaim his place at Solminati Academy. His journey begins with self-doubt and isolation, as his suppressed abilities and lack of progress alienate him from peers and even his lover. However, his encounter with an elderly woman ignites a transformation, revealing inner strength and a deeper understanding of his potential. Through trials and relationships with friends and foes, Nozomu learns to confront his insecurities and embrace his true power. His development is marked by emotional depth, highlighting themes of redemption and self-discovery.

Key Characters

Nozomu Bountis, the protagonist, enters Solminati Academy to support his lover’s ambitions but struggles with suppressed abilities. His journey is joined by childhood friends, including a beautiful redhead girlfriend and a rival, who challenge his growth and decisions in a world of swords, magic, and spirits.

Protagonist: Nozomu Bountis

Nozomu Bountis is the relatable protagonist of Ryuu Kusari no Ori, a young man driven by love and ambition. He enrolls in Solminati Academy to support his beloved’s dreams but struggles with suppressed abilities, mocked by peers and eventually abandoned by his lover. His journey begins in despair but takes a dramatic turn when he meets an old woman, sparking a transformation. Nozomu’s story explores themes of perseverance, self-discovery, and the power of unexpected encounters, making him a compelling and empathetic character in this fantasy world filled with swords, magic, and spirits.

Other Major Characters

Besides Nozomu, the story features a cast of dynamic characters who shape his journey. His childhood friends include a stunning redhead girlfriend, whose harsh words cut deep, and a male companion whose loyalty fades as Nozomu struggles. The enigmatic old woman he meets becomes a pivotal figure, guiding his transformation. Other key characters include spirited rivals and wise mentors at Solminati Academy, each contributing to the narrative’s depth. Their interactions explore themes of loyalty, ambition, and jealousy, adding layers to Nozomu’s quest for redemption and growth in this fantastical world of magic and swords.

Themes and Genre

Ryuu Kusari no Ori explores themes of personal growth, ambition, and overcoming adversity in a fantasy world. The genre blends fantasy, romance, and school life with dramatic elements.

Exploration of Themes

The light novel delves into themes of perseverance, self-discovery, and the challenges of a society driven by ability and ambition. Nozomu’s journey highlights the struggle to overcome personal limitations and societal expectations, emphasizing the importance of inner strength and resilience. The story also explores the complexities of relationships, friendship, and love, set against a backdrop of magical and spiritual conflicts. Through Nozomu’s experiences, the novel examines the emotional and psychological growth of a young man navigating a world where power often defines one’s worth, offering a poignant reflection on finding one’s purpose and identity amidst adversity.

Genre Classification

Ryuu Kusari no Ori seamlessly blends elements of fantasy, adventure, and romance, set against the backdrop of a magical academy. The story’s focus on personal growth and magical conflicts places it firmly in the fantasy genre, while its emotional depth and interpersonal relationships add layers of drama and romance. This multifaceted approach makes it appealing to fans of character-driven narratives and epic adventures alike.

Publication Details

Ryuu Kusari no Ori is published by Ichijinsha, with four volumes released as of April 2, 2024, under the Ichijinsha Novels label. Available digitally via Amazon Kindle and Google Play Books.

Light Novel Volumes

Ryuu Kusari no Ori is an ongoing light novel series published by Ichijinsha under their Ichijinsha Novels label. As of April 2, 2024, four volumes have been released, with the fourth installment being the latest. The series, written by Cadet and illustrated by Sime, has gained a dedicated following for its unique blend of fantasy, romance, and school life themes. Digital versions of the light novels are available on platforms like Amazon Kindle and Google Play Books, making it accessible to readers worldwide. Fans anticipate future volumes as the story continues to unfold.

Digital Availability

Ryuu Kusari no Ori is widely available in digital formats, catering to modern readers’ preferences. The light novel series can be purchased and downloaded from platforms like Amazon Kindle and Google Play Books, ensuring accessibility across devices. Digital editions include special bonus content, such as short stories and exclusive illustrations, enhancing the reading experience. Additionally, the series is distributed through popular ebook stores, making it easy for fans worldwide to enjoy the story. The digital versions are released concurrently with the print editions, allowing readers to stay up-to-date with the latest developments in the narrative.

Manga Adaptation

Ryuu Kusari no Ori has been adapted into a manga series, bringing the light novel’s story to life with vibrant visuals and dynamic storytelling. Serialized in Monthly Shonen Magazine, the manga closely follows the original narrative, capturing Nozomu’s struggles and growth at Solminati Academy. The adaptation retains the core themes of ambition, friendship, and magic, while the artwork enhances the emotional depth and action sequences. Fans of the light novel can enjoy the manga’s fresh perspective, and new readers can discover the story through this engaging medium. The manga is ongoing, with digital versions available on popular platforms for easy access.

Reception and Reviews

Ryuu Kusari no Ori has garnered a mixed yet generally positive reception. Fans of fantasy and school life genres praise its unique blend of magic, swords, and character-driven drama. The light novel’s relatable protagonist and emotional depth resonate with readers, particularly in Nozomu’s journey of self-discovery. However, some critics note that the story relies heavily on common tropes and lacks depth in certain arcs. Despite this, the series remains popular for its engaging world-building and romantic subplots. The manga adaptation has also been well-received, with fans appreciating its visual storytelling. Overall, it’s a solid choice for fans of teen drama and fantasy adventures.

Future Prospects

Ryuu Kusari no Ori continues to show promising potential. With the fourth volume set for release on April 2, 2024, fans anticipate deeper character development and plot progression. The manga adaptation’s success has broadened its audience, suggesting strong visual storytelling. Author Cadet’s unique approach to blending fantasy and teen drama offers room for expansion, possibly through spin-offs or new arcs. The series’ active fan base and positive reception indicate a bright future, with potential for further adaptations or exploring uncharted storylines. This series remains a compelling choice for fans of fantasy and school life genres, with much to look forward to in the coming years.

Ryuu Kusari no Ori emerges as a compelling light novel series, blending fantasy, drama, and romance. Its unique world-building, centered around Solminati Academy, captivates readers with its intricate mix of spirits, swords, and magic. The protagonist, Nozomu Bountis, embodies relatable struggles of ambition and growth, making his journey resonate deeply. With ongoing publications and a manga adaptation, the series continues to expand its reach. Fans of fantasy and school life genres will find this series engaging, offering both emotional depth and thrilling plot twists. As it progresses, Ryuu Kusari no Ori promises to deliver even more captivating storylines and character development.

singer featherweight 221 instruction manual

The Singer Featherweight 221, introduced in 1933, is a portable, versatile sewing machine. Its instruction manual is essential for understanding features, setup, and maintenance, ensuring optimal performance and unlocking its full potential. Available in original and reproduction formats, it guides users through threading, troubleshooting, and routine care, making it a vital resource for sewists.

Overview of the Machine and Its Significance

The Singer Featherweight 221 is a iconic, portable sewing machine introduced in 1933 at the Chicago World’s Fair. Known for its lightweight design, durability, and versatility, it quickly became a favorite among home sewists and professionals alike. The machine features a rotary hook system, producing a lockstitch, and includes a reverse feeding mechanism for added functionality. Its compact size and ease of use made it revolutionary for its time, catering to both hobbies and professional projects; The Featherweight’s significance lies in its timeless design and reliability, making it a sought-after collectible and functional tool. The instruction manual plays a crucial role in unlocking its full potential, guiding users through setup, operation, and maintenance. This machine’s enduring popularity underscores its value as a testament to innovative engineering and practicality.

Key Features of the Singer Featherweight 221

The Singer Featherweight 221 is a portable, lightweight machine featuring a rotary hook for lockstitch sewing and a reverse feeding mechanism. It’s known for its durability and versatility, making it ideal for both home and professional sewing projects.

Machine Features and Capabilities

The Singer Featherweight 221 is renowned for its lightweight design and portability, weighing only 11 pounds. It features a rotary hook mechanism, enabling it to create precise lockstitches. The machine supports forward and reverse stitching, enhancing versatility for various sewing tasks. Its compact size and intuitive controls make it ideal for both beginners and experienced sewists. The Featherweight 221 is compatible with a variety of attachments, allowing for tasks like buttonholes, zipper insertion, and decorative stitching. The machine’s durable construction ensures long-lasting performance, making it a reliable choice for sewing enthusiasts. Additionally, its straightforward design simplifies maintenance, with easy access to internal components for cleaning and oiling as outlined in the instruction manual.

Why the Singer Featherweight 221 is Popular Among Sewists

The Singer Featherweight 221 is a beloved choice among sewists due to its lightweight portability, weighing just 11 pounds, making it easy to transport. Its precise straight-stitch capability and smooth operation ensure high-quality results for both everyday and intricate projects. The machine’s durability and timeless design have made it a favorite, with many units from the 1930s and 1940s still in use today. Sewists also appreciate its versatility, as it can handle a wide range of fabrics and tasks with optional attachments. The Featherweight’s nostalgic appeal and ease of maintenance further enhance its popularity. Additionally, the availability of comprehensive instruction manuals and online resources ensures users can troubleshoot and maintain their machines effectively. Its enduring reliability and charm make it a cherished tool for sewists of all skill levels.

Understanding the Singer Featherweight 221 Instruction Manual

The Singer Featherweight 221 instruction manual is a comprehensive guide for users, detailing setup, operation, and maintenance. It ensures seamless navigation of the machine’s features and troubleshooting, making it an indispensable resource for both beginners and experienced sewists.

Importance of the Instruction Manual

The Singer Featherweight 221 instruction manual is crucial for unlocking the machine’s full potential. It provides clear, step-by-step guidance for setup, threading, and operation, ensuring users can sew efficiently. The manual also covers maintenance routines, such as oiling and cleaning, to prolong the machine’s lifespan. Troubleshooting sections help users identify and resolve common issues, reducing downtime. Additionally, it explains how to use various attachments, enabling sewists to explore advanced stitching techniques. Without the manual, users might struggle to understand the machine’s intricacies, leading to improper use or damage. Its detailed instructions empower users to maximize their sewing experience, making it an indispensable resource for both beginners and experienced sewists. Whether restoring a vintage model or operating a newly acquired machine, the manual is essential for optimal performance and satisfaction.

What the Manual Includes

The Singer Featherweight 221 instruction manual is a comprehensive guide designed to help users master their machine. It includes detailed step-by-step instructions for setting up the machine, threading, and basic operation. The manual covers maintenance routines, such as cleaning, oiling, and lubricating parts, to ensure optimal performance. Additionally, it provides troubleshooting tips for common issues, helping users diagnose and resolve problems independently. The manual also explains how to use various attachments and accessories, expanding the machine’s capabilities. Clear illustrations and diagrams are included to guide users through complex procedures. Whether you’re a beginner or an experienced sewist, the manual offers practical advice to enhance your sewing experience. It also includes safety precautions and best practices for handling the machine. This resource is essential for anyone looking to get the most out of their Singer Featherweight 221.

How to Use the Manual Effectively

To maximize the benefits of the Singer Featherweight 221 instruction manual, start by reading it thoroughly. Familiarize yourself with the table of contents to quickly locate specific sections. The manual’s detailed diagrams and illustrations are invaluable for understanding machine parts and complex procedures. Always follow the recommended maintenance schedules to ensure optimal performance. When troubleshooting, refer to the manual’s guidance for clear, step-by-step solutions. Keep the manual in an accessible place and consult it regularly for routine care and repairs. Additionally, consider exploring any supplementary materials or online resources that may enhance your understanding. Before making any adjustments or repairs, consult the manual to avoid potential damage. By following these steps, you can effectively utilize the manual to enhance your sewing experience and maintain your machine’s longevity.

Troubleshooting Common Issues

The Singer Featherweight 221 instruction manual provides detailed guidance for addressing common issues. One frequent problem is thread breakage, often caused by improper tension or incorrect needle size. The manual advises checking the tension discs and ensuring the needle is aligned correctly. Another issue is uneven stitch quality, which can result from a dull needle or misaligned bobbin. Regular cleaning of the bobbin area and oiling of moving parts can prevent such problems. Additionally, the manual offers solutions for noise issues, suggesting lubrication of the oil canister and inspecting for dust buildup. By following the manual’s troubleshooting steps, users can quickly resolve these common challenges and maintain smooth machine operation. Regular maintenance, as outlined, helps prevent many issues before they arise, ensuring the machine’s longevity and performance.

Maintenance and Troubleshooting Tips

Regular cleaning, oiling, and checking tension ensure smooth operation. The manual provides practical advice for troubleshooting common issues and maintaining the Singer Featherweight 221’s performance and longevity.

Regular Maintenance for Optimal Performance

Regular maintenance is crucial for the Singer Featherweight 221 to ensure smooth operation and longevity. The instruction manual emphasizes the importance of cleaning the machine, oiling moving parts, and checking thread tension. Proper lubrication with Singer-approved oils helps prevent friction and wear. Users should also inspect and replace worn or damaged parts, such as needles and bobbin cases, to maintain stitching quality. Additionally, routine cleaning of the bobbin area and feed dogs prevents lint buildup, which can cause mechanical issues. By following the manual’s step-by-step maintenance guidelines, sewists can keep their machine in top condition, ensuring consistent performance and extending its lifespan. Regular care not only preserves the machine but also enhances sewing efficiency and reliability.

Common Issues and Solutions

Common issues with the Singer Featherweight 221 include thread breaking, uneven stitching, and the machine not turning on. These problems often arise from improper threading, tension issues, or lack of maintenance. The instruction manual provides detailed troubleshooting steps, such as checking thread tension, ensuring the needle is properly aligned, and verifying power connections. For thread breaking, users should inspect for lint buildup or damaged needles. Uneven stitches can be resolved by adjusting the tension discs or re-threading the machine. If the machine fails to turn on, ensure the power cord is securely connected and the switch is functioning. Regular cleaning and lubrication, as outlined in the manual, can prevent many of these issues. By following the manual’s guidance, users can quickly identify and resolve common problems, ensuring their machine runs smoothly and efficiently.

south carolina landlord-tenant act pdf

The South Carolina Residential Landlord-Tenant Act, enacted in 1986, provides a comprehensive legal framework governing residential rental agreements, balancing rights and responsibilities for landlords and tenants alike.

1.1 Overview of the Act

The South Carolina Residential Landlord-Tenant Act regulates residential rental agreements, balancing rights and responsibilities for landlords and tenants. Enacted in 1986, it covers key areas like security deposits, evictions, and maintenance, ensuring fairness and clarity in rental relationships under Title 27, Chapter 40 of the South Carolina Code.

1.2 Purpose and Scope

The South Carolina Residential Landlord-Tenant Act aims to establish a balanced legal framework for residential rentals, protecting both landlords and tenants. Its scope applies to all rental agreements for dwelling units in South Carolina, outlining rights, responsibilities, and dispute resolution processes under Title 27, Chapter 40 of the South Carolina Code.

Key Definitions Under the Act

The Act defines key terms such as landlord, tenant, rental agreement, and dwelling unit, providing clarity on roles and responsibilities within residential rental relationships in South Carolina.

2.1 Landlord and Tenant

The South Carolina Residential Landlord-Tenant Act defines a landlord as the owner or agent of a residential property, and a tenant as the renter of the dwelling unit. These definitions establish clear roles and responsibilities for both parties in a rental agreement under the Act, ensuring legal clarity in residential rental relationships statewide.

2.2 Rental Agreement

A rental agreement under the South Carolina Residential Landlord-Tenant Act is a binding contract between a landlord and tenant, outlining terms such as rent, duration, and responsibilities. It can be written or oral, but written agreements are generally more enforceable. The agreement must comply with the Act’s provisions, ensuring both parties’ rights are protected and obligations are clear.

2.3 Dwelling Unit

A dwelling unit under the South Carolina Residential Landlord-Tenant Act refers to a residential property rented for use as a home, including houses, apartments, or rooms. It must meet basic habitability standards and be intended for occupancy as a residence, ensuring tenants have a safe and lawful place to live under the terms of their rental agreement.

Rights and Responsibilities of Landlords

A dwelling unit is a residential property rented for use as a home, such as a house, apartment, or room. It must meet basic habitability standards under the South Carolina Residential Landlord-Tenant Act and be intended for occupancy as a residence, ensuring tenants have a safe and lawful place to live.

3.1 Maintenance and Repairs

Landlords are legally required to maintain the rental property, ensuring it remains habitable and compliant with health and safety codes. This includes repairing structural components, plumbing, and essential systems. Tenants must notify landlords of needed repairs in writing, and landlords must address them promptly to avoid penalties under the South Carolina Residential Landlord-Tenant Act.

3.2 Security Deposits

Under the South Carolina Residential Landlord-Tenant Act, security deposits are capped at one month’s rent and must be used for damages or unpaid rent. Landlords must provide written notice of deductions and return the remaining balance within 30 days after the tenancy ends. Non-compliance can lead to penalties, underscoring the need for adherence to the Act’s provisions.

3.4 Compliance with Building Codes

Landlords are legally required to ensure their rental properties comply with local building codes, focusing on health and safety standards. This includes maintaining structural integrity, electrical systems, and plumbing. Failure to meet these obligations can result in legal consequences, emphasizing the landlord’s responsibility to provide habitable living conditions for tenants as mandated by the Act.

Rights and Responsibilities of Tenants

Tenants are entitled to a habitable living environment and must fulfill obligations such as paying rent, maintaining the property, and adhering to lease terms responsibly.

4.1 Payment of Rent

Tenants are obligated to pay rent as agreed in the lease, typically due at the beginning of each rental period. Rent must be paid in full unless otherwise specified. Late fees may apply if payment is delayed beyond the grace period, as outlined in the rental agreement or state law. Payment methods should be mutually agreed upon, ensuring clarity and documentation to avoid disputes. Rent payments are a fundamental tenant responsibility under the South Carolina Residential Landlord-Tenant Act, essential for maintaining the tenancy and avoiding potential eviction proceedings. Timely payment helps preserve a positive landlord-tenant relationship and ensures compliance with legal obligations.

4.2 Maintenance of the Premises

Tenants are required to maintain the rental property in good condition, keeping it clean and free from damage. They must promptly report any needed repairs to the landlord to prevent further deterioration. Tenants are also responsible for preventing damage from negligence and ensuring compliance with health and safety standards. Failure to fulfill these obligations may result in legal action or eviction proceedings under the South Carolina Residential Landlord-Tenant Act.

4.3 Compliance with Lease Terms

Tenants are legally obligated to comply with all terms outlined in their lease agreement under the South Carolina Residential Landlord-Tenant Act. This includes adhering to rules regarding property use, occupancy limits, and prohibited activities. Failure to comply may result in legal action, including eviction, as landlords can enforce lease terms through court proceedings if necessary.

Security Deposits

The South Carolina Residential Landlord-Tenant Act regulates security deposits, limiting their use to cover damages or unpaid rent. Landlords must return deposits within 30 days after tenancy ends, with deductions properly documented.

5.1 Limits on Security Deposits

The South Carolina Residential Landlord-Tenant Act limits security deposits to one month’s rent for leases exceeding one year. For shorter terms, no specific cap is imposed, but deposits must be refundable. Landlords cannot charge non-refundable deposits, and any deductions must align with the act’s guidelines, ensuring transparency and fairness in handling security deposits.

5.2 Return of Security Deposits

Landlords must return security deposits within 30 days after the tenancy ends. Deductions must be itemized and justified, such as for damages or unpaid rent. If a tenant disputes deductions, they can challenge the charges, potentially leading to court proceedings if unresolved. The act ensures timely refunds and accountability for both parties involved in the process.

5.3 Deductions from Security Deposits

Deductions from security deposits must be itemized and justified, such as for property damage or unpaid rent. Tenants can dispute deductions, and landlords must provide written explanations. The act ensures transparency and accountability, balancing landlord rights to recover losses with tenant protections against unfair withholdings, fostering a fair resolution process for both parties involved.

Eviction Process

The South Carolina Residential Landlord-Tenant Act outlines legal steps for eviction, including proper notices and court procedures, ensuring a structured process for resolving tenancy disputes fairly and lawfully.

6.1 Grounds for Eviction

Under the South Carolina Residential Landlord-Tenant Act, eviction can occur for non-payment of rent, violation of lease terms, or illegal activities on the premises. Landlords must follow legal procedures, providing appropriate notices and seeking court approval. Proper documentation and compliance with the Act are essential to ensure evictions are lawful and justified.

6.2 Notice Requirements

The South Carolina Residential Landlord-Tenant Act requires landlords to provide tenants with specific notices before taking legal action. For non-payment of rent, a 5-day notice to vacate is mandatory. For lease violations, landlords must issue a 14-day notice to cure the breach. Proper notice delivery ensures compliance with state law and protects both parties’ rights.

6.3 Judicial Process

The judicial process for evictions in South Carolina involves filing a summons and complaint with the court. The tenant must be served notice, and if they fail to respond within 10 days, a default judgment may be entered. Mediation may be pursued, and a hearing is scheduled to determine the merits of the case. The court ultimately decides whether an eviction order will be granted.

Lease Agreements

A lease agreement outlines the terms and conditions of the rental relationship, including rent, duration, and responsibilities. It must comply with the SCRLTA and be in writing for enforceability.

7.1 Types of Leases

The SCRLTA recognizes various lease types, including fixed-term leases, month-to-month agreements, and tenancy at will. Fixed-term leases specify a duration, while month-to-month leases renew automatically. Tenancy at will continues until terminated by either party. All leases must be in writing to be enforceable under the Act.

7.2 Required Contents of a Lease

A valid lease under the SCRLTA must include the names and addresses of both landlord and tenant, a description of the rented property, rent amount, payment terms, and security deposit details. It must also outline the rights and responsibilities of both parties, as well as any rules or restrictions applicable to the premises.

7.3 Prohibited Clauses

The SCRLTA prohibits lease clauses that attempt to waive a landlord’s legal obligations, such as maintenance or security deposit responsibilities. Clauses restricting a tenant’s right to pursue legal remedies or those requiring tenants to pay for landlord negligence are also prohibited, ensuring a fair and balanced rental agreement that protects both parties’ interests.

Rent and Fees

The SCRLTA regulates rent and associated fees, ensuring transparency and fairness. It outlines permissible charges, rent increase procedures, and late payment penalties, protecting both landlords and tenants.

8.1 Rent Increases

The South Carolina Residential Landlord-Tenant Act requires landlords to provide tenants with written notice of rent increases, typically 30 days before the lease renewal. This ensures transparency and protects tenants from sudden, excessive increases, balancing the landlord’s right to adjust rent with tenant stability and fairness under the law.

8.2 Late Fees

The South Carolina Residential Landlord-Tenant Act allows landlords to charge late fees for overdue rent, provided they are reasonable and specified in the lease agreement. If not outlined in the lease, landlords may still impose a late fee, but it must comply with state law to avoid being deemed unfair or excessive.

8.3 Other Charges

The Act permits landlords to charge tenants for specific additional costs, such as utility bills, trash collection, or parking fees, provided these charges are clearly outlined in the lease agreement. However, landlords must ensure such fees are reasonable and directly related to the tenant’s use of the property to comply with state regulations.

Landlord-Tenant Disputes

The South Carolina Residential Landlord-Tenant Act provides mechanisms for resolving disputes, including mediation, arbitration, and court proceedings, ensuring both parties can address issues efficiently under state law guidelines.

9.1 Mediation and Arbitration

Mediation and arbitration are encouraged under the South Carolina Residential Landlord-Tenant Act to resolve disputes without litigation. Mediation involves a neutral third party facilitating negotiations, while arbitration allows for a binding decision by an arbitrator. These methods promote efficient conflict resolution, maintaining the landlord-tenant relationship and reducing court burdens, aligning with the Act’s goals.

9.2 Court Proceedings

Court proceedings under the South Carolina Residential Landlord-Tenant Act provide a legal framework for resolving disputes, including eviction processes and damage claims. Landlords must follow specific procedures, such as serving proper notices and filing complaints. Tenants have the right to contest actions in court, presenting evidence to protect their interests. Courts may grant judgments for possession or monetary awards, ensuring fairness and compliance with the law.

9.3 Remedies for Breach

Remedies for breach under the Act include legal actions for damages, eviction, or injunctive relief. Landlords may seek eviction or monetary damages for lease violations, while tenants can withhold rent or sue for repairs if landlords fail to maintain habitable conditions. Both parties may pursue legal remedies to enforce compliance with the rental agreement terms.

Exemptions from the Act

The Act does not apply to certain types of tenancies, such as short-term rentals, room rentals in owner-occupied homes, or specific housing arrangements like public housing or hotels.

10.1 Types of Tenancies Exempt

The Act excludes certain tenancies from its provisions, including short-term rentals, room rentals in owner-occupied homes, and specific types of housing like public housing or hotels. These exemptions ensure the Act primarily governs traditional landlord-tenant relationships while allowing flexibility for unique or temporary arrangements.

10.2 Limitations on Exemptions

While certain tenancies are exempt, the Act imposes limitations to prevent misuse. For instance, exemptions for owner-occupied homes may not apply if the property is primarily used for commercial rental purposes. These restrictions ensure exemptions are not exploited, maintaining the Act’s intent to protect both parties in typical rental arrangements.

Recent Amendments and Updates

The South Carolina Residential Landlord-Tenant Act has undergone recent amendments, notably in 2023, addressing security deposit limits, eviction processes, and lease term requirements to enhance clarity and balance for both parties.

11.1 Legislative Changes

Recent legislative updates to the South Carolina Residential Landlord-Tenant Act include amendments in 2023 and 2024. These changes address security deposit limits, eviction procedures, and lease term requirements. The updates aim to enhance protections for tenants while clarifying obligations for landlords, promoting a balanced rental housing market and ensuring compliance with modern housing standards.

11.2 Impact on Landlords and Tenants

The legislative updates impose stricter rent increase limits and security deposit return timelines, benefiting tenants. Landlords face clearer maintenance obligations and eviction process guidelines. These changes aim to protect tenants’ rights while ensuring landlords’ interests are balanced, fostering a fair and transparent rental housing market in South Carolina.

Importance of Compliance

Compliance with the Act is crucial to avoid legal penalties, financial losses, and strained tenant-landlord relationships. Adhering to regulations ensures fairness and protects both parties’ rights effectively.

12.1 Consequences of Non-Compliance

Non-compliance with the South Carolina Residential Landlord-Tenant Act can result in legal penalties, financial losses, and reputational damage. Landlords may face lawsuits, court-ordered damages, and eviction process violations. Tenants may also be impacted if landlords fail to meet their obligations, leading to unsafe living conditions and potential legal disputes. Compliance ensures a fair and lawful rental relationship.

12.2 Best Practices for Landlords and Tenants

Best practices under the South Carolina Residential Landlord-Tenant Act include clear communication, proper documentation, and mutual respect. Landlords should maintain properties, return security deposits timely, and avoid prohibited lease clauses. Tenants should pay rent on time, maintain the unit, and comply with lease terms. These practices foster positive relationships and ensure legal compliance.

minolta x 370 manual

Overview of the Minolta X-370

The Minolta X-370 is a 35mm SLR film camera with aperture-priority auto-exposure and manual modes. Known for its user-friendly design and quartz-controlled shutter‚ it offers ease of use and advanced features‚ making it a popular choice among photographers and collectors.

1.1 Key Features of the Minolta X-370

The Minolta X-370 features aperture-priority auto-exposure and manual mode‚ offering precise control over photography. It includes a quartz-controlled shutter‚ ensuring accurate speeds‚ and compatibility with Minolta SR-mount lenses. Additional features include a built-in flash sync at 1/60 sec‚ remote control capability‚ and compatibility with accessories like motor drives and wireless controllers‚ making it a versatile and durable choice for photographers.

1.2 Historical Context and Popularity

Released in the late 1980s‚ the Minolta X-370 became popular for its advanced yet user-friendly design‚ appealing to both amateur and professional photographers. Its robust construction and compatibility with a wide range of accessories contributed to its enduring popularity. Today‚ it remains sought after by collectors and enthusiasts‚ celebrating its legacy as a significant piece of photographic history.

Available Manuals for the Minolta X-370

The Minolta X-370 has various manuals available‚ including owner’s‚ instruction‚ and service manuals‚ all accessible as free PDF downloads from official sources and photography repositories.

2.1 Types of Manuals (Owner’s Manual‚ Instruction Manual‚ Service Manual)

The Minolta X-370 offers three key manuals: the Owner’s Manual‚ detailing basic operations and features; the Instruction Manual‚ providing in-depth usage guidance; and the Service Manual‚ catering to technical repairs and maintenance with diagrams and repair procedures. These resources ensure comprehensive understanding and upkeep of the camera.

2.2 Where to Download the Manuals (Free PDF Resources)

Minolta X-370 manuals are available as free PDF downloads from various online sources. Websites like ManualsLib‚ Butkus Camera Manuals‚ and MediaCollege provide access to the Owner’s Manual‚ Instruction Manual‚ and Service Manual. These platforms offer easy navigation and direct links for downloading‚ ensuring users can quickly obtain the necessary guides for their camera maintenance and operation needs.

Main Functions and Modes of the Minolta X-370

The Minolta X-370 features aperture-priority auto-exposure and manual modes‚ with quartz-controlled shutter speeds and a built-in light meter for precise exposures. Its intuitive design combines ease of use with advanced functionality.

3.1 Aperture-Priority Auto-Exposure Mode

The Minolta X-370’s aperture-priority mode allows users to set the lens aperture‚ with the camera automatically adjusting the shutter speed for optimal exposure. This mode is ideal for controlling depth of field while ensuring proper exposure. The camera’s microcomputer calculates the correct shutter speed based on the selected aperture‚ making it a versatile option for photographers who want creative control without manual calculations. This feature enhances flexibility and precision in various lighting conditions.

3.2 Manual Mode and Custom Settings

The Minolta X-370 offers a manual mode for full control over exposure settings‚ allowing photographers to adjust both aperture and shutter speed independently. Custom settings include manual ISO selection (12-3200)‚ exposure compensation‚ and flash sync speed. These features provide flexibility for experienced users‚ enabling precise control over lighting and composition. The camera’s quartz-controlled shutter ensures accurate speeds‚ making manual mode reliable for creative photography.

Compatible Accessories and Lenses

The Minolta X-370 is compatible with a wide range of lenses and accessories‚ including Motor Drive 1‚ Auto Winder G‚ and Wireless Controller IR-1‚ enhancing its versatility.

4.1 List of Compatible Lenses

The Minolta X-370 supports various SR-mount lenses‚ including wide-angle‚ telephoto‚ and zoom options. Compatible lenses include the MC/MD series‚ such as the 50mm f/1.7‚ 28mm f/2.8‚ and 70-200mm zoom‚ offering versatility for different photography needs. These lenses ensure high optical quality and compatibility with the X-370’s advanced features‚ making them ideal for both casual and professional use.

4.2 Additional Accessories (Motor Drive‚ Auto Winder‚ Flash Units)

The Minolta X-370 can be enhanced with accessories like the Motor Drive MD-1 for faster shooting and the Auto Winder G for automatic film winding. Flash units‚ such as the Minolta X-series Auto Electroflash‚ simplify flash photography with features like TTL metering and synchronization at 1/60 sec. These accessories expand the camera’s functionality‚ catering to professional and advanced photographers seeking enhanced performance and convenience.

Troubleshooting and Common Issues

The Minolta X-370 may experience issues like shutter curtain damage or battery corrosion. Regular maintenance and proper handling can prevent these problems‚ ensuring optimal performance.

5.1 Common Problems and Solutions

Common issues with the Minolta X-370 include shutter curtain tears‚ battery corrosion‚ and faulty light meters. Solutions involve professional repair for curtains‚ cleaning corrosion with a cotton swab‚ and recalibrating or replacing the light meter. Regular maintenance‚ such as cleaning and proper storage‚ can prevent these issues‚ ensuring the camera’s longevity and reliable performance over time.

5.2 Maintenance and Repair Tips

Regular maintenance for the Minolta X-370 includes cleaning the battery compartment and checking the shutter curtains for tears. Use a soft brush to remove dust and ensure proper function. For repairs‚ handle components with anti-static precautions and refer to the service manual for detailed guidance. Proper storage and periodic inspections can extend the camera’s lifespan. Always use original accessories and follow the manual’s recommendations for optimal performance.

Service and Repair Information

The Minolta X-370 service manual provides detailed instructions for repairs‚ maintenance‚ and parts replacement. It emphasizes handling static-sensitive components with care and using proper tools for troubleshooting and fixes.

6.1 Detailed Service Manual Highlights

The Minolta X-370 service manual is a comprehensive 110-page guide covering repairs‚ maintenance‚ and parts replacement. It includes detailed troubleshooting steps‚ circuit diagrams‚ and repair procedures for common issues. The manual emphasizes handling static-sensitive components carefully and using proper tools to avoid damage. It also provides safety precautions and step-by-step instructions for disassembling and reassembling the camera‚ ensuring precise and effective servicing.

6.2 DIY Repair Guidelines

DIY repairs for the Minolta X-370 require caution and attention to detail. Start by grounding yourself to prevent static damage. Use specialized tools for disassembly‚ focusing on delicate components like the flexible circuit board. Follow the service manual’s step-by-step instructions for replacing parts such as the shutter or light seals. Patience and precision are key to ensuring the camera functions properly after repairs. Always refer to the manual for specific guidance.

User Guide and Operating Instructions

The Minolta X-370 user guide provides step-by-step instructions for setup‚ basic operations‚ and advanced techniques. It helps photographers master the camera’s features and capabilities effectively.

7.1 Step-by-Step Camera Setup

The Minolta X-370 setup begins with installing the batteries‚ followed by attaching the lens and loading the film. Set the ISO using the dial‚ then adjust basic settings like aperture and shutter speed. These steps ensure proper functionality and prepare the camera for use‚ providing a smooth start for photographers. Always check the viewfinder and ensure all components are securely in place.

7.2 Advanced Features and Techniques

The Minolta X-370 supports advanced techniques like multiple exposures and self-timer use. Utilize the aperture-priority mode for creative control over depth of field. Experiment with flash photography by syncing with Minolta’s Auto Electroflash units. For precise focus‚ use the camera’s quartz-controlled shutter and manual overrides. These features enhance versatility‚ allowing photographers to explore artistic expressions and technical precision with ease.

Legacy and Collectibility of the Minolta X-370

The Minolta X-370 is a timeless favorite among collectors‚ prized for its user-friendly design‚ advanced features‚ and historical significance in photography‚ making it a sought-after asset.

8.1 Why the X-370 is Sought After by Collectors

The Minolta X-370 is sought after by collectors for its blend of advanced features‚ user-friendly design‚ and historical significance. Its aperture-priority auto-exposure and manual mode offer flexibility‚ appealing to both enthusiasts and professionals. The camera’s solid build and classic aesthetic provide nostalgic value‚ while its role in photography’s evolution adds to its collectibility. Compatibility with various accessories and a supportive community further enhance its desirability.

8.2 Historical Significance in Photography

The Minolta X-370 holds a notable place in photography history as a bridge between manual and automatic systems. Released in the late 1970s‚ it introduced innovative features like aperture-priority auto-exposure and quartz-controlled shutter timing‚ making advanced photography more accessible. Its design influenced later camera models‚ and its popularity among professionals and enthusiasts solidified its legacy as a pivotal tool in the evolution of SLR photography.

Downloading the Manual

The Minolta X-370 manual is available as a free PDF download‚ including Service‚ Instruction‚ and Owner’s manuals‚ from websites like MediaCollege and ManualsLib in English.

9.1 Direct Links to PDF Downloads

9.2 Tips for Navigating the Manual

Use the table of contents to quickly locate specific sections. Search for key features like aperture-priority mode or flash settings. Refer to diagrams for visual guidance. Pay attention to symbols and terminology explanations. Use the scroll bar to navigate page by page. Ensure Adobe Acrobat is updated for smooth viewing. Take notes on important settings for easy reference. This approach ensures efficient use of the manual.

mitsubishi lancer owners manual

The Mitsubishi Lancer owner’s manual is a comprehensive guide essential for understanding your vehicle’s features, maintenance, and troubleshooting. It covers models from 2011 to 2017, ensuring optimal performance and care.

Importance of the Owner’s Manual

The Mitsubishi Lancer owner’s manual is crucial for understanding proper vehicle operation, maintenance, and troubleshooting. It provides detailed instructions for optimizing performance, safety, and efficiency. Whether you’re a new or experienced owner, the manual ensures you’re well-informed about your car’s features, DIY repairs, and essential care routines. Referencing it regularly helps maintain your Lancer in peak condition and prevents potential issues.

Overview of the Mitsubishi Lancer Models

The Mitsubishi Lancer is available in various models, including the Lancer X, Lancer EX, and the high-performance Evolution series. These models offer diverse features such as advanced infotainment systems, fuel-efficient engines, and sport-tuned suspensions. The Lancer X and EX cater to everyday driving, while the Evolution models are designed for enthusiasts seeking enhanced power and handling. Each model provides a unique driving experience tailored to different preferences and needs.

Key Features and Controls Explained

The Mitsubishi Lancer features an instrument panel with a gauge cluster, infotainment system, and navigation controls. These components provide essential information and entertainment options for a seamless driving experience.

Instrument Panel and Dashboard Overview

The Mitsubishi Lancer’s instrument panel and dashboard are designed for driver convenience, featuring a speedometer, odometer, and warning lights. The dashboard houses controls for climate, audio, and navigation systems, ensuring easy access. The manual provides detailed guidance on understanding and utilizing these features for optimal vehicle operation and customization. Refer to the manual for troubleshooting common dashboard warnings and maintaining your Lancer’s performance.

Operating the Infotainment and Navigation Systems

The Mitsubishi Lancer’s infotainment system features a touchscreen interface, voice commands, and Bluetooth connectivity for seamless smartphone integration. The navigation system provides turn-by-turn directions and real-time traffic updates. The manual explains how to customize settings, pair devices, and troubleshoot common issues. It also covers accessing maps, adjusting audio settings, and using optional features like satellite radio for an enhanced driving experience.

Maintenance and Care Guidelines

Regular maintenance ensures optimal performance and longevity of your Mitsubishi Lancer. Follow the schedule for oil changes, tire rotations, and inspections to keep your vehicle in top condition.

Regular Maintenance Schedule

Adhering to the Mitsubishi Lancer’s maintenance schedule ensures reliability and performance. Oil changes are recommended every 5,000 to 7,500 miles, while tire rotations should occur every 15,000 miles. Brake pads and fluids should be inspected annually or as specified. Following the schedule helps prevent wear and tear, ensuring your vehicle runs smoothly for years. Refer to your manual for detailed intervals and procedures.

  • Oil changes: Every 5,000–7,500 miles
  • Tire rotations: Every 15,000 miles
  • Brake inspections: Annually or as needed

DIY Maintenance Tips

Performing routine DIY maintenance can enhance your Mitsubishi Lancer’s longevity. Check oil levels regularly and top up as needed. Replace the air filter every 15,000 miles to improve fuel efficiency. Inspect tire pressure monthly and maintain the recommended levels. Clean the battery terminals to prevent corrosion. These simple tasks can save money and ensure optimal performance. Always refer to your owner’s manual for specific guidelines and recommendations.

  • Check oil levels and top up as needed
  • Replace air filter every 15,000 miles
  • Inspect tire pressure monthly
  • Clean battery terminals

Troubleshooting Common Issues

The Mitsubishi Lancer owner’s manual provides guidance for identifying and resolving common issues. Address warning lights, unusual noises, or performance problems promptly to ensure reliability and safety.

  • Check warning lights and refer to the manual for interpretations.
  • Inspect for unusual noises or vibrations during operation.
  • Monitor fluid levels and address leaks immediately.

Identifying and Resolving Warning Lights

The Mitsubishi Lancer owner’s manual provides a detailed guide to understanding dashboard warning lights. Each light signifies specific issues, such as engine, oil, or brake problems. Refer to the manual for interpretations and follow troubleshooting steps to resolve issues promptly. Addressing warning lights early ensures vehicle reliability and safety, preventing minor problems from escalating into major repairs. Regular checks and maintenance can help avoid common warning light triggers.

Common Problems and Solutions

Common issues with the Mitsubishi Lancer include oil leaks, transmission problems, and clutch system malfunctions. Regular inspections and timely repairs can address oil leaks. Transmission issues often require professional attention. Clutch problems in older models may need replacement. Consulting the manual and following Mitsubishi’s maintenance schedule can help prevent these issues. Addressing problems early ensures optimal performance and extends the vehicle’s lifespan, minimizing costly repairs. Always refer to the manual for specific guidance on troubleshooting and solutions.

Mitsubishi Lancer Evolution Series

The Mitsubishi Lancer Evolution series offers high-performance versions of the Lancer, featuring advanced turbocharged engines and all-wheel drive. These models are renowned for their rally heritage and exceptional handling, making them a favorite among enthusiasts seeking power and precision in a compact package.

Special Features of the Evolution Models

The Mitsubishi Lancer Evolution models boast enhanced performance features, including a turbocharged engine, all-wheel-drive system, and sport-tuned suspension. These models are designed for superior handling and acceleration, with aerodynamic styling and advanced technology. The Evolution series also includes exclusive interior upgrades and rally-inspired design elements, making it a standout choice for driving enthusiasts seeking a blend of power and precision.

Performance Tuning and Modifications

Performance tuning for the Mitsubishi Lancer Evolution involves engine upgrades, ECU tuning, and turbocharger enhancements to boost power and torque. Modifications like lightweight components, sport exhaust systems, and suspension upgrades improve handling and agility. These tweaks allow owners to customize their vehicle for enhanced speed and responsiveness, making it a popular choice among enthusiasts seeking high-performance driving experiences while maintaining reliability and control.

Parts and Accessories

The Mitsubishi Lancer owner’s manual provides detailed information on genuine parts and accessories, ensuring compatibility and performance. Explore catalogs for model-specific components and upgrades to enhance your vehicle’s functionality and style.

Recommended Parts and Suppliers

For genuine Mitsubishi Lancer parts, refer to official suppliers like MMC Manuals or CarManualsOnline.info. These sources provide authentic components for models like Lancer X, Evolution, and Sportback; Ensure compatibility by verifying part numbers and model years. Genuine parts guarantee optimal performance and durability, while trusted suppliers offer reliable warranties and customer support. Always prioritize certified accessories to maintain your vehicle’s quality and safety standards. This ensures long-term reliability and satisfaction.

Upgrading and Customizing Your Lancer

Upgrading your Mitsubishi Lancer can enhance performance and style. Consider installing aftermarket parts like sport exhaust systems or alloy wheels for a personalized look. Performance tuning, such as engine modifications or suspension upgrades, can improve handling and power. Ensure all upgrades are compatible with your model, such as the Lancer Evolution or Sportback. Refer to official Mitsubishi manuals or trusted suppliers for guidance on safe and effective customization to maintain your vehicle’s reliability and warranty. Always consult professionals for complex modifications to ensure optimal results.

Community and Forum Resources

Active forums and online communities provide valuable resources for Mitsubishi Lancer owners. Share tips, troubleshoot issues, and connect with experienced owners globally for enhanced car care and modifications.

Online Communities for Lancer Owners

Online communities like forums and social media groups are invaluable for Mitsubishi Lancer owners. These platforms offer a space to share experiences, ask questions, and access resources. Members often discuss maintenance tips, troubleshooting, and modifications. Many communities provide free downloads of manuals and guides. Joining these groups can enhance your ownership experience by connecting you with knowledgeable enthusiasts and experts.

Forum Discussions and Tips

Forum discussions offer valuable insights and tips from experienced Mitsubishi Lancer owners. These communities share real-world advice on maintenance, repairs, and upgrades. Topics range from DIY repairs to performance tuning, providing practical solutions and expert opinions. Engaging with these forums fosters a sense of camaraderie and helps owners optimize their vehicle’s performance and longevity. Active participation can lead to discovering hidden features and resolving common issues efficiently.

Digital Access to the Owner’s Manual

Access the Mitsubishi Lancer owner’s manual in PDF format for models from 2011 to 2017. Download directly through the Mitsubishi portal for convenient digital access.

Downloading the Manual in PDF Format

Downloading the Mitsubishi Lancer owner’s manual in PDF format is straightforward. Visit the Mitsubishi portal or trusted sites like CarManualsOnline.info. Choose your model year, from 2011 to 2017, and download the manual for free. This digital version allows easy access and printing, ensuring you always have essential information at hand for maintenance, troubleshooting, and understanding your vehicle’s features.

Accessing the Manual Through the Mitsubishi Portal

To access the Mitsubishi Lancer owner’s manual through the Mitsubishi portal, visit their official website and log into your account. Navigate to the “Owners Portal” section, where you can search for your specific model year. The manual is available in digital format, allowing you to view, download, or print it conveniently. This ensures you have instant access to essential information, keeping your Lancer well-maintained and performing optimally.

The Mitsubishi Lancer owner’s manual is a vital resource for optimizing performance, maintenance, and troubleshooting. It provides detailed guidance to ensure your Lancer runs smoothly and efficiently.

Final Tips for Optimizing Your Lancer’s Performance

Regularly servicing your Mitsubishi Lancer ensures peak performance. Check oil levels, tire pressure, and brakes. Refer to the manual for maintenance schedules and troubleshooting. Adhere to recommended parts and DIY tips for optimal efficiency. Customize with approved accessories to enhance functionality and aesthetics without compromising safety. Stay updated with Mitsubishi support for the best driving experience.

Staying Connected with Mitsubishi Support

Stay connected with Mitsubishi support for a seamless ownership experience. Access the Mitsubishi portal for digital manuals, troubleshooting guides, and service updates. Join online communities and forums to share tips and learn from fellow Lancer owners. Regularly visit Mitsubishi’s official website for the latest updates, ensuring your vehicle remains in optimal condition. Mitsubishi’s dedicated support team is always available to assist with inquiries, enhancing your driving experience.

yamaha ef2000is generator manual

Welcome to the Yamaha EF2000iS Generator Manual, your essential guide for safe and effective operation. This manual covers everything from initial setup to maintenance and troubleshooting.

1.1 Overview of the Yamaha EF2000iS Generator

The Yamaha EF2000iS is a portable inverter generator designed for reliable power delivery. It combines advanced inverter technology with a compact, lightweight design, making it ideal for camping, outdoor events, and emergency power needs. Known for its quiet operation and fuel efficiency, this generator is a versatile solution for powering sensitive electronics and small appliances.

1.2 Importance of the Manual for Users

The Yamaha EF2000iS manual is crucial for users to ensure safe, efficient, and proper operation. It provides detailed instructions for setup, maintenance, and troubleshooting, helping users avoid potential hazards and extend the generator’s lifespan. By following the manual, users can optimize performance, comply with safety standards, and resolve issues effectively, making it an indispensable resource for owners.

Key Features of the Yamaha EF2000iS Generator

The Yamaha EF2000iS boasts advanced inverter technology, a portable and lightweight design, and quiet operation, making it ideal for camping, RVs, and home backup power needs.

2.1 Inverter Technology and Its Benefits

The Yamaha EF2000iS features advanced inverter technology, ensuring clean and stable power output. This technology minimizes harmonic distortion, making it safe for sensitive electronics like laptops and smartphones. The inverter system also enables efficient energy production, reducing noise levels and overall weight, making it ideal for camping and outdoor activities.

2.2 Portable Design and Weight

The Yamaha EF2000iS boasts a compact and lightweight design, weighing just 44.1 pounds. Its ergonomic handle and small footprint make it easy to transport, perfect for camping, RV trips, or job sites. The portable design ensures versatility, allowing users to take reliable power wherever they go without sacrificing performance or convenience.

2.3 Quiet Operation and Noise Reduction

The Yamaha EF2000iS features advanced noise-reduction technology, operating at a low 51.5 dBA at 25% load. Its inverter system minimizes electrical interference and noise. The generator includes a sound-dampening muffler and insulated engine design, ensuring quiet performance. This makes it ideal for camping, residential areas, or outdoor events where noise needs to be kept to a minimum.

Safety Guidelines and Precautions

Always follow safety guidelines to ensure safe operation. Stop the engine before maintenance and ensure proper ventilation to avoid carbon monoxide risks. Adhere to manual instructions.

3.1 General Safety Tips for Generator Operation

Read the manual thoroughly and follow all safety guidelines. Always stop the engine before performing maintenance; Ensure proper ventilation to avoid carbon monoxide risks. Never overload circuits or operate in flammable environments. Regularly inspect for damage and wear. Use grounding wires and keep the area clear of debris. Follow noise and emission regulations.

3.2 Pre-Operation Checks and Safety Gear

Before starting the Yamaha EF2000iS, ensure the oil level is correct, and check the spark plug and air filter. Verify fuel quality and proper connection of all components. Always wear protective gloves and eyewear. Ensure the generator is on a level, stable surface and all switches are in the off position. Review the manual for specific pre-operation steps.

Routine Maintenance and Care

Regular maintenance ensures optimal performance and longevity. Schedule oil changes, inspect spark plugs, and clean or replace air filters as recommended in the manual.

4.1 Oil Change and Filter Replacement

Regular oil changes and filter replacements are crucial for maintaining the Yamaha EF2000iS generator. Change the oil after the first month and every 50 hours thereafter. Use the recommended oil type specified in the manual. Drain the old oil carefully, replace the filter with a genuine Yamaha part, and dispose of used materials safely. Always consult the manual for detailed instructions and specifications.

4.2 Spark Plug Inspection and Replacement

Inspect the spark plug every 100 hours of operation. Remove the plug using a spark plug socket and check for wear or fouling. Replace it with a genuine Yamaha spark plug to ensure proper engine performance. Always allow the engine to cool before starting work and refer to the manual for torque specifications and detailed replacement steps.

4.3 Air Filter Cleaning and Maintenance

Regularly inspect and clean the air filter every 50 hours of operation. Use compressed air to remove dirt and debris. If damaged, replace the filter with a genuine Yamaha part. Proper maintenance ensures optimal engine performance and prevents overheating. Always refer to the manual for detailed cleaning instructions and recommended replacement intervals to keep your generator running efficiently and reliably.

Storage and Transportation Tips

Store your Yamaha EF2000iS in a dry, cool place, protected from sunlight. Ensure good ventilation and avoid moisture exposure. For transportation, secure the generator tightly and use a cover to shield from dust and damage.

5.1 Proper Storage Conditions

Store your Yamaha EF2000iS in a dry, cool place away from direct sunlight. Ensure good ventilation to prevent moisture buildup. For extended storage, drain the fuel tank or add a fuel stabilizer. Avoid exposure to extreme temperatures and humidity to preserve performance and longevity. Proper storage ensures reliability and extends the generator’s lifespan.

5.2 Safe Transportation Practices

Secure your Yamaha EF2000iS during transport to prevent damage. Place it upright in a vehicle, avoiding tilting. Use the built-in handles to lift carefully. Protect from rain and moisture. Ensure the fuel cap is tightly closed. Always follow local transport regulations for generators; Proper handling ensures safety and maintains performance and longevity.

Troubleshooting Common Issues

Identify symptoms, check fuel levels, and ensure proper oil and spark plug conditions. Refer to the manual for diagnostic steps and solutions to restore optimal performance.

6.1 Diagnosing and Resolving Low Power Output

Low power output can result from issues like insufficient fuel, faulty spark plugs, or clogged air filters. Check fuel levels, clean or replace air filters, and inspect spark plugs. Ensure the generator is not overloaded and verify proper oil levels. Consult the manual for detailed diagnostic steps and solutions to restore full performance safely and efficiently.

6.2 Addressing Overheating Problems

Overheating issues can arise due to blocked air vents, low oil levels, or excessive workload. Ensure proper ventilation, check oil levels, and reduce the load if necessary. Clean or replace clogged air filters and inspect the cooling system for blockages. Always allow the generator to cool down before restarting. Refer to the manual for specific cooling system maintenance guidelines.

Yamaha EF2000iS Parts Diagram and Replacement

This section provides a detailed parts diagram to help identify components. It outlines replacement procedures, ensuring proper maintenance and repair of your Yamaha EF2000iS generator.

7.1 Understanding the Parts Diagram

The parts diagram in the Yamaha EF2000iS manual provides a visual breakdown of the generator’s components. It labels key parts, such as the engine, inverter, and control panel, with reference numbers. This tool helps users identify components for maintenance or replacement. While the diagram is useful for locating parts, it should not be used for assembly; refer to the service manual for detailed instructions.

7.2 Replacing Worn or Damaged Parts

Replacing worn or damaged parts ensures optimal performance and safety. Always refer to the parts diagram for correct identification. Use genuine Yamaha parts to guarantee compatibility and reliability. Before starting, turn off the generator and let it cool. Consult the service manual for detailed instructions. Properly dispose of old parts to maintain environmental standards.

Yamaha EF2000iS vs. Other Models (e.g., EF2000iSC)

Compare the Yamaha EF2000iS with similar models like the EF2000iSC. Understand key differences in features, design, and performance to make informed decisions for your power needs.

8.1 Key Differences Between Models

The Yamaha EF2000iS and EF2000iSC differ in features like remote start capability, fuel tank size, and weight; The EF2000iSC often includes a larger fuel tank for extended runtime, while the EF2000iS focuses on portability. Both models share the same inverter technology for clean power but cater to different user preferences and needs, making them suitable for varying applications and environments.

8.2 Choosing the Right Model for Your Needs

When selecting between Yamaha generator models, assess your power needs, portability requirements, and runtime expectations. If portability is a priority, the EF2000iS is ideal due to its lightweight design. For extended runtime, the EF2000iSC with a larger fuel tank may be more suitable. Consider additional features like remote start for convenience and ensure the model aligns with your specific application and environment.

Frequently Asked Questions (FAQs)

This section addresses common inquiries about the Yamaha EF2000iS, covering operation, maintenance, and troubleshooting to ensure optimal performance and user satisfaction.

9.1 Can I Use the Yamaha EF2000iS for Sensitive Electronics?

Yes, the Yamaha EF2000iS is suitable for sensitive electronics due to its inverter technology, which produces clean, stable power with a pure sine wave output. This makes it ideal for devices like laptops, smartphones, and medical equipment. Always ensure the generator is properly grounded and use the correct cables to avoid damage to your devices.

9.2 How Long Can I Run the Generator Continuously?

The Yamaha EF2000iS can run continuously for up to 10.5 hours at a 25% load. However, runtime varies depending on the load and fuel quality. Avoid running it at full load for extended periods to prevent engine strain. Regular maintenance, like oil changes, ensures optimal performance and extends its operational life. Always follow the manual’s guidelines for continuous use.

The Yamaha EF2000iS manual provides a comprehensive guide for optimal performance. Follow its instructions for safe, efficient operation and long-term reliability of your generator.

10.1 Summary of the Yamaha EF2000iS Manual

The Yamaha EF2000iS manual is a comprehensive guide covering operation, maintenance, and troubleshooting. It ensures safe and efficient use of the generator, detailing key features like inverter technology and quiet operation. The manual also provides routine maintenance steps, such as oil changes and spark plug inspections, to prolong the generator’s lifespan. By following the guidelines, users can maximize performance and reliability for years of dependable power generation.

10.2 Best Practices for Long-Term Usage

For long-term usage, regularly change the oil and clean or replace the air filter to maintain performance. Inspect and replace spark plugs as needed to ensure efficient engine operation. Store the generator in a dry, cool place to prevent damage. Always follow safety guidelines and refer to the manual for specific care recommendations to extend the generator’s lifespan.

wlky tv guide

WLKY TV Guide Overview

The WLKY TV Guide provides a comprehensive overview of programming, including news, sports, and entertainment shows, with detailed schedules and accessibility features for seamless viewing experiences.

Daily and Weekly Schedules

WLKY TV Guide offers detailed daily and weekly schedules, ensuring viewers never miss their favorite shows. From early morning news segments like WLKY News at 5:00 a.m. and WLKY News at 6:00 a.m. to late-night programming such as CBS Overnight News, the guide provides a clear breakdown of air times. Entertainment and sports programs are also highlighted, allowing users to plan their viewing experience effortlessly. The schedule is updated regularly to reflect any changes, ensuring accuracy and reliability for viewers.

News, Sports, and Entertainment Programming

WLKY TV Guide features an extensive lineup of news, sports, and entertainment programs. Viewers can enjoy local news broadcasts like WLKY News at 5:00 a.m. and WLKY News at 6:00 a.m., along with national updates from CBS Overnight News. Sports enthusiasts can catch live games and highlights, while entertainment fans will find popular shows and movies. The guide also includes specials and reruns, ensuring diverse content for all audiences. This variety makes WLKY a go-to source for both local and national programming.

Channel Information

WLKY broadcasts on channel 32, offering clear reception and a wide range of programming. Its frequency ensures strong signal coverage for over-the-air viewers in the Louisville area.

WLKY Frequency and Reception Details

WLKY broadcasts on channel 32, ensuring strong signal coverage for over-the-air viewers in the Louisville area. The station recently changed frequencies to improve reception quality and expand its reach. Viewers are advised to rescan their TVs to maintain uninterrupted service. This adjustment supports better signal strength and clarity, especially in rural areas. The frequency change occurred at 9 a.m. on the specified date, affecting all over-the-air viewers. For optimal reception, viewers may need to adjust their antennas or use digital tuners.

Online Viewing Options

WLKY offers convenient online viewing options, allowing users to stream live TV and catch up on missed episodes. The station’s official website and mobile app provide access to a wide range of programming, including local news, sports, and entertainment shows. Viewers can also use platforms like CBS All Access for on-demand content. These digital platforms ensure that audiences can stay connected to their favorite shows anytime, anywhere, with a stable internet connection. This service is free for over-the-air viewers with a valid login.

Special Features

WLKY TV Guide offers enhanced accessibility options, including closed captions and audio descriptions, ensuring inclusive viewing experiences for all audiences with interactive features to personalize schedules.

Accessibility Options

WLKY TV Guide prioritizes accessibility, offering closed captions for hearing-impaired viewers and audio descriptions for visually impaired audiences. The guide also features customizable font sizes and screen reader compatibility, ensuring equal access to news, sports, and entertainment programming for all users.

Interactive TV Guide Features

The WLKY TV Guide offers interactive features such as customizable viewing schedules, show reminders, and search functionality by time or channel. Users can filter programming by category, such as news, sports, or entertainment, and easily access detailed episode descriptions. This makes it easier for viewers to plan their watching experience and stay updated on their favorite shows. The guide also allows users to create personalized watchlists, enhancing the overall viewing experience.

Availability and Platforms

WLKY TV Guide is accessible via over-the-air, cable, satellite, and streaming platforms, ensuring wide availability and flexibility for viewers to watch their favorite shows seamlessly.

Over-the-Air, Cable, and Satellite Options

WLKY is available through various platforms, including over-the-air broadcasts for free, cable services like Spectrum, and satellite providers such as DirecTV. These options ensure wide accessibility for viewers to enjoy WLKY’s programming, including local news, sports, and entertainment shows. Over-the-air reception requires a digital antenna, while cable and satellite subscriptions offer additional features like DVR and HD quality, making it easy for audiences to stay connected to their favorite content seamlessly.

Streaming and Digital Platforms

WLKY offers streaming options through platforms like CBS All Access, allowing viewers to watch live TV and on-demand content. The WLKY mobile app provides real-time updates, breaking news alerts, and an interactive TV guide. Additionally, services like Hulu and YouTube TV include WLKY in their channel lineups, ensuring accessibility for cord-cutters. These digital platforms enable viewers to stay informed and entertained anytime, anywhere, with a seamless viewing experience tailored to modern preferences and technologies.

Viewer Benefits

WLKY TV Guide helps viewers stay informed with local news, plan their viewing experience, and access a wide range of entertainment and sports programming effortlessly.

Stay Informed with Local News

WLKY TV Guide ensures viewers stay updated on local news with detailed schedules for WLKY News broadcasts, including morning, evening, and breaking news segments. Users can easily find replays of missed episodes and special reports, keeping them informed about Louisville’s latest events, weather updates, and community stories. This feature is essential for those who rely on local news to stay connected to their area.

Plan Your Viewing Experience

The WLKY TV Guide allows viewers to plan their viewing experience with ease. Users can search by time or channel, ensuring they never miss their favorite shows. Detailed schedules are available for today, tomorrow, and beyond, making it simple to track local news, sports, and entertainment. The guide also features options to filter by category, such as news or sports, and provides information on replays and special reports, helping viewers customize their TV time effectively.

Frequency Changes

WLKY TV Guide updates viewers on frequency adjustments, ensuring seamless access to channels. Changes are implemented to accommodate new wireless services and improve broadcast efficiency nationwide.

Upcoming Adjustments

WLKY will implement frequency changes to comply with federal regulations, ensuring better wireless service availability. Viewers are advised to rescan their TVs after the adjustment to maintain access to channels. The change, set for 9 a.m. on a specified Friday, aims to optimize broadcast efficiency and accommodate new high-speed wireless services. Over-the-air viewers may need to re-tune their devices to continue receiving WLKY’s programming without interruptions. Stay updated for precise timing and instructions to ensure uninterrupted access to your favorite shows and news.

Impact on Viewers

WLKY’s frequency change may require viewers to rescan their TVs to maintain access. Over-the-air viewers will need to re-tune devices, while cable and satellite users remain unaffected. This adjustment ensures compliance with federal regulations and enhances broadcast efficiency. Viewers are advised to stay informed about the exact timing and rescan instructions to avoid service interruptions. The change supports improved wireless services but requires a one-time adjustment for continued access to WLKY’s programming and local content.

How to Access the Guide

Access the WLKY TV Guide through their official website or mobile app. View schedules online via platforms like TVsch.com, search by time or channel, and plan your viewing experience.

Website and Mobile App

Access the WLKY TV Guide through their official website or mobile app. Both platforms provide detailed schedules, allowing users to browse by time or channel. The app offers personalized features like setting reminders and filtering content based on preferences.

Stay updated with real-time programming changes and exclusive content. The website and app are user-friendly, ensuring a seamless experience for planning your viewing schedule and staying informed about local news and entertainment.

TV Menu Navigation

WLKY TV Guide offers an intuitive TV menu for easy navigation. Viewers can browse schedules by time, channel, or genre. The menu includes features like program descriptions and reminders.

Users can customize their experience by setting favorite channels and receiving alerts for upcoming shows. The guide ensures quick access to local news, sports, and entertainment, making it simple to plan viewing preferences seamlessly.

WLKY TV Guide as a Valuable Resource

WLKY TV Guide is an essential tool for viewers, offering comprehensive schedules, accessibility features, and detailed programming information, ensuring a seamless and informed viewing experience for all.

WLKY TV Guide serves as an indispensable tool for viewers, providing detailed schedules, accessibility options, and interactive features. It ensures users stay informed about local news, sports, and entertainment programming while offering a user-friendly platform to plan their viewing experience. With comprehensive coverage of daily and weekly schedules, the guide empowers viewers to maximize their TV time efficiently. Its availability across multiple platforms further enhances its convenience, making it a trusted resource for staying connected to favorite shows and local updates.

dailies total 1 multifocal fitting guide

The Dailies Total 1 Multifocal Fitting Guide provides a structured approach to ensure optimal lens performance for presbyopia correction. Designed for predictable vision, it offers a seamless experience.

Overview of Dailies Total 1 Multifocal Contact Lenses

Dailies Total 1 Multifocal lenses are designed for presbyopia correction, offering seamless near, intermediate, and far vision. Featuring Alcon’s unique Water Gradient Technology, these lenses ensure exceptional comfort and moisture retention. The PRECISION PROFILE design provides predictable optical performance, while the smooth progression of power minimizes visual disturbances. As the first water gradient multifocal lenses, they combine innovative material science with advanced optics, making them a premier choice for patients seeking both clarity and comfort in daily disposable contact lenses.

Importance of Proper Fitting for Multifocal Lenses

Proper fitting of multifocal lenses is crucial for optimal visual performance and patient satisfaction. Accurate lens selection ensures clear vision at all distances, minimizing eye strain and adaptation issues. A well-executed fitting process enhances comfort, reduces discomfort, and maximizes lens wearability. With Dailies Total 1 Multifocal, adhering to the fitting guide ensures a high success rate, addressing individual prescriptions and lifestyle needs effectively. Correct fitting also prevents complications, making it essential for both new and experienced wearers to achieve the best possible outcomes with multifocal contact lenses.

Understanding Presbyopia and Multifocal Lenses

Presbyopia is a natural aging process affecting near vision, typically starting around age 40. Multifocal lenses are designed to correct this by providing multiple focal points in one lens.

What is Presbyopia?

Presbyopia is a natural age-related condition affecting the eye’s ability to focus on near objects. It typically begins around age 40, as the lens loses flexibility, making tasks like reading difficult. This condition is part of the aging process and affects nearly 2 billion people worldwide. It occurs when the eye’s lens becomes less elastic, reducing its ability to accommodate or change shape to focus on close objects, leading to blurred near vision.

How Multifocal Lenses Address Presbyopia

Multifocal lenses, like Dailies Total 1 Multifocal, address presbyopia by providing multiple powers within a single lens. They seamlessly integrate near, intermediate, and distance vision, eliminating the need for multiple corrective devices. The unique design ensures a smooth progression of power, allowing the eye to focus effortlessly at all distances. This innovation enhances comfort and convenience, offering a natural visual experience tailored to the wearer’s lifestyle and daily activities.

Key Features of Dailies Total 1 Multifocal Lenses

Dailies Total 1 Multifocal lenses feature PRECISION PROFILE lens design, water gradient technology, and smooth progression of power for seamless near, intermediate, and distance vision.

PRECISION PROFILE Lens Design

The PRECISION PROFILE lens design in Dailies Total 1 Multifocal lenses ensures predictable and seamless vision across all distances. This advanced optical technology minimizes adaptation issues, providing sharp focus for near, intermediate, and far vision. The design optimizes the transition between different powers, reducing visual disturbances. It is tailored to address the specific needs of presbyopia, offering a natural visual experience. This feature is a key reason behind the high fit success rate and patient satisfaction reported with these lenses.

Water Gradient Technology

Water Gradient Technology in Dailies Total 1 Multifocal lenses creates a lens with a high water content on the surface and lower in the core. This design enhances comfort, reducing dryness and irritation. The technology promotes a smooth transition of moisture across the lens, ensuring long-lasting wearer comfort. It also supports optimal oxygen flow, contributing to healthy ocular surface. This feature makes the lenses feel natural, minimizing discomfort even during extended wear. Patients report high satisfaction with the lens’s comfort due to this innovative technology.

Smooth Progression of Power

The Smooth Progression of Power in Dailies Total 1 Multifocal lenses ensures a seamless visual experience across different distances. This design gradually transitions power across the lens, allowing for sharp near, intermediate, and far vision. It minimizes visual disturbances, providing a natural viewing experience. The smooth progression enhances depth perception and reduces eye strain, making it ideal for presbyopia correction. This feature is crucial for maintaining clear vision during activities that require constant focus shifts, such as reading or driving. Patients appreciate the effortless adaptation to varying visual demands.

The Fitting Guide for Dailies Total 1 Multifocal

The guide offers a streamlined, two-step fitting process for optimal results. It ensures accurate lens power and ADD selection, tailored to individual patient needs for clear vision.

Initial Lens Power Selection

Initial lens power selection begins with the patient’s vertex-corrected spherical equivalent distance prescription. Add 0.25D to each eye for near vision optimization. This ensures proper balance between near, intermediate, and far vision. The fitting guide recommends starting with the calculated power and adjusting based on patient feedback during the trial. Accurate selection is crucial for seamless visual experience, minimizing the need for follow-up adjustments. Proper power selection enhances comfort and functionality, meeting the diverse needs of presbyopic patients effectively.

ADD Selection and Fitting Process

The ADD (Near Addition) selection begins with determining the lowest acceptable ADD for both eyes, typically starting at +1.00D and increasing in 0.25D increments. The fitting process involves assessing near vision clarity while maintaining distance vision. Patients are asked to perform tasks like reading to evaluate comfort and sharpness. The guide recommends gradual adjustments to ensure binocular balance and optimal visual performance. Proper ADD selection ensures seamless switching between near, intermediate, and far vision, enhancing overall patient satisfaction and lens functionality.

Clinical Results and Success Rates

Clinical studies show a 96% fit success rate with Dailies Total 1 Multifocal, demonstrating high patient satisfaction and effective presbyopia correction compared to other multifocal lenses.

Fit Success Rate and Patient Satisfaction

Dailies Total 1 Multifocal lenses achieve a 96% fit success rate, reflecting their adaptability and comfort. Patients report high satisfaction, citing seamless vision and minimal adaptation time. The lens design ensures predictable performance, addressing both near and far vision needs effectively. Satisfaction scores highlight comfort and optical clarity, making these lenses a preferred choice for presbyopia correction. Their unique Water Gradient Technology enhances wearability, contributing to overall patient contentment and successful fitting outcomes.

Comparison with Other Multifocal Lenses

Dailies Total 1 Multifocal stands out with its unique Water Gradient Technology, offering superior comfort and hydration. Compared to other lenses, it provides a smoother progression of power, reducing visual disturbances. The 96% fit success rate surpasses many competitors, and its predictable optical performance ensures consistent vision. Patients often prefer its seamless adaptation over other multifocal options, making it a top choice for presbyopia correction with minimal compromise on comfort or clarity.

Patient Adaptation and Care

Proper adaptation and care ensure optimal performance of Dailies Total 1 Multifocal lenses. Patients should follow care instructions, use UV-protective eyewear, and maintain lens hygiene for comfort and clarity.

Tips for Patients Wearing Multifocal Lenses

Patients wearing Dailies Total 1 Multifocal lenses should prioritize proper care and hygiene. Always handle lenses with clean hands, avoid sleeping in them, and use recommended cleaning solutions. Gradually adapt to the lenses, starting with one eye to ensure comfort. Use UV-protective eyewear outdoors to enhance lens performance. Regular follow-ups with an eye care professional are essential to monitor fit and address any concerns. Proper adaptation ensures seamless vision and long-term comfort for presbyopia correction.

Care and Maintenance of Dailies Total 1 Multifocal

Proper care ensures the longevity and comfort of Dailies Total 1 Multifocal lenses. As daily disposables, they require no cleaning or storage, simplifying maintenance. Always handle lenses with clean, dry hands to prevent contamination. Avoid exposing lenses to water or saliva, as this can compromise hygiene. Replace lenses daily as prescribed to maintain optical clarity and comfort. Store unused lenses in their original packaging to protect them from dust and debris. Regularly scheduled eye exams are crucial for monitoring lens performance and eye health.

Troubleshooting Common Fitting Challenges

Addressing fitting issues with Dailies Total 1 Multifocal involves resolving vision problems and power adjustments. Proper techniques ensure optimal comfort and clarity for patients.

Addressing Vision Issues

Vision issues with Dailies Total 1 Multifocal often stem from improper power selection or ADD. Adjustments may involve refining the lens power or reevaluating the fitting guide. Ensuring the correct fit minimizes blur or discomfort, enhancing near and far vision seamlessly. Regular follow-ups are crucial to address any emerging concerns, optimizing patient satisfaction and visual acuity.

Adjusting Lens Power and ADD

Adjusting lens power and ADD in Dailies Total 1 Multifocal involves a precise approach. Start with the vertex-corrected prescription, then incrementally modify the power in 0.25D steps. For ADD, begin with the lowest acceptable value and increase as needed. Ensure both eyes are evaluated to maintain balance. Regular monitoring and patient feedback are key to achieving optimal vision and comfort. This method ensures a tailored fit, addressing individual visual needs effectively.

Lifestyle Considerations for Multifocal Lens Wearers

Lifestyle factors significantly influence the performance of Dailies Total 1 Multifocal lenses. Daily activities, environmental conditions, and personal habits can affect comfort and vision clarity, ensuring optimal wear.

Impact of Lifestyle on Lens Performance

Lifestyle factors such as environmental conditions, daily activities, and personal habits can influence the performance of Dailies Total 1 Multifocal lenses. Exposure to UV light, humidity levels, and the presence of dust or allergens may affect comfort and clarity. Additionally, prolonged screen time or reading can impact visual adaptation. Ensuring proper UV protection and maintaining consistent moisture levels are crucial for optimal lens performance. Patients should be advised to adapt their lens care routine based on their lifestyle to maximize comfort and vision quality throughout the day.

UV Protection and Eyewear Recommendations

UV protection is essential for eye health, especially for multifocal lens wearers. Prolonged UV exposure can increase the risk of eye conditions like cataracts and macular degeneration. Patients should be advised to wear UV-absorbing eyewear, such as sunglasses with UV 400 protection, when outdoors. Additionally, combining Dailies Total 1 Multifocal lenses with UV-protective eyewear enhances overall eye protection. Regular use of UV-blocking eyewear can also improve visual comfort and reduce glare, ensuring optimal lens performance in various lighting conditions.